Life has been oh so good to us lately. Seton’s personality has decided to emerge, and I am happy to announce she is a crawler and a puller-upper. I am unhappy to announce she is a morning person and a pea-hater. But such is life.
We have also been playing a lot of peek-a-boo…
which I tend to enjoy more than her.
I’ve also jumped on the #whole30 bandwagon. I feel like I’ve just been hanging off the back of the bandwagon by the tips of my fingers while my body flails in the air and slaps on the ground day after day, but that’s neither here nor there.
I guess it’s not that bad.
But I am going on no support in this household. Davey said he would do Whole30 if it meant eating a whole pizza in under 30 minutes. So, yeah.
BUT!
He has envied my meals and now requests that I make them for TWO! Small victory for me.
I have learned a few things since cutting out all dairy, grains, legumes, yummy food…
–I used to eat a LOT of sugar. I thought I was a healthy eater, but having to really spend time THINKING and DISCERNING about what I am eating, I realize I used to eat a lot of breads and sweets.
–The first few days of whole30, I would day dream about food. Maybe I used to do this anyway, and I just recognize it more now? Unsure. But I had visions of pretzels, bagels, and my favorite snack: dry cheerios with chocolate chips.
–Cooking healthy isn’t hard. Baking a sweet potato, frying an egg, cutting up an avocado is all very easy. It’s the planning part that’s tough, but it’s time I learn how to plan out my meals anyway. Without planning, I end up eating whatever is in sight as soon as I walk in the door from work which leads me to unhealthy choices.
–Cooking healthy does require a lot of trips to the grocery store, the loathe of my life. And I loathe the grocery store even more now that I can’t eat 99.99999999% of the food in it.
which leads me to…
–As a country, we eat a lot of chemicals. We eat a lot of things that are put in our food just to make it last longer on the shelf or taste more palatable to us WHEN IT ALREADY TASTES GOOD ANYWAY! You’ll see what I mean if you look at the label of everything you put in your cart the next time you’re shopping. Just check out how many foods have ingredients you can’t pronounce.
Ah, so many reflections on food.
Here are the stats so far:
Whole30 day: 14
Times I’ve cried because I felt sorry for myself: 1
Times I dreamed I was eating a bagel: 2
Times I have given into cravings: 0!
Anyone else doing whole30? Comment or email me your thoughts!
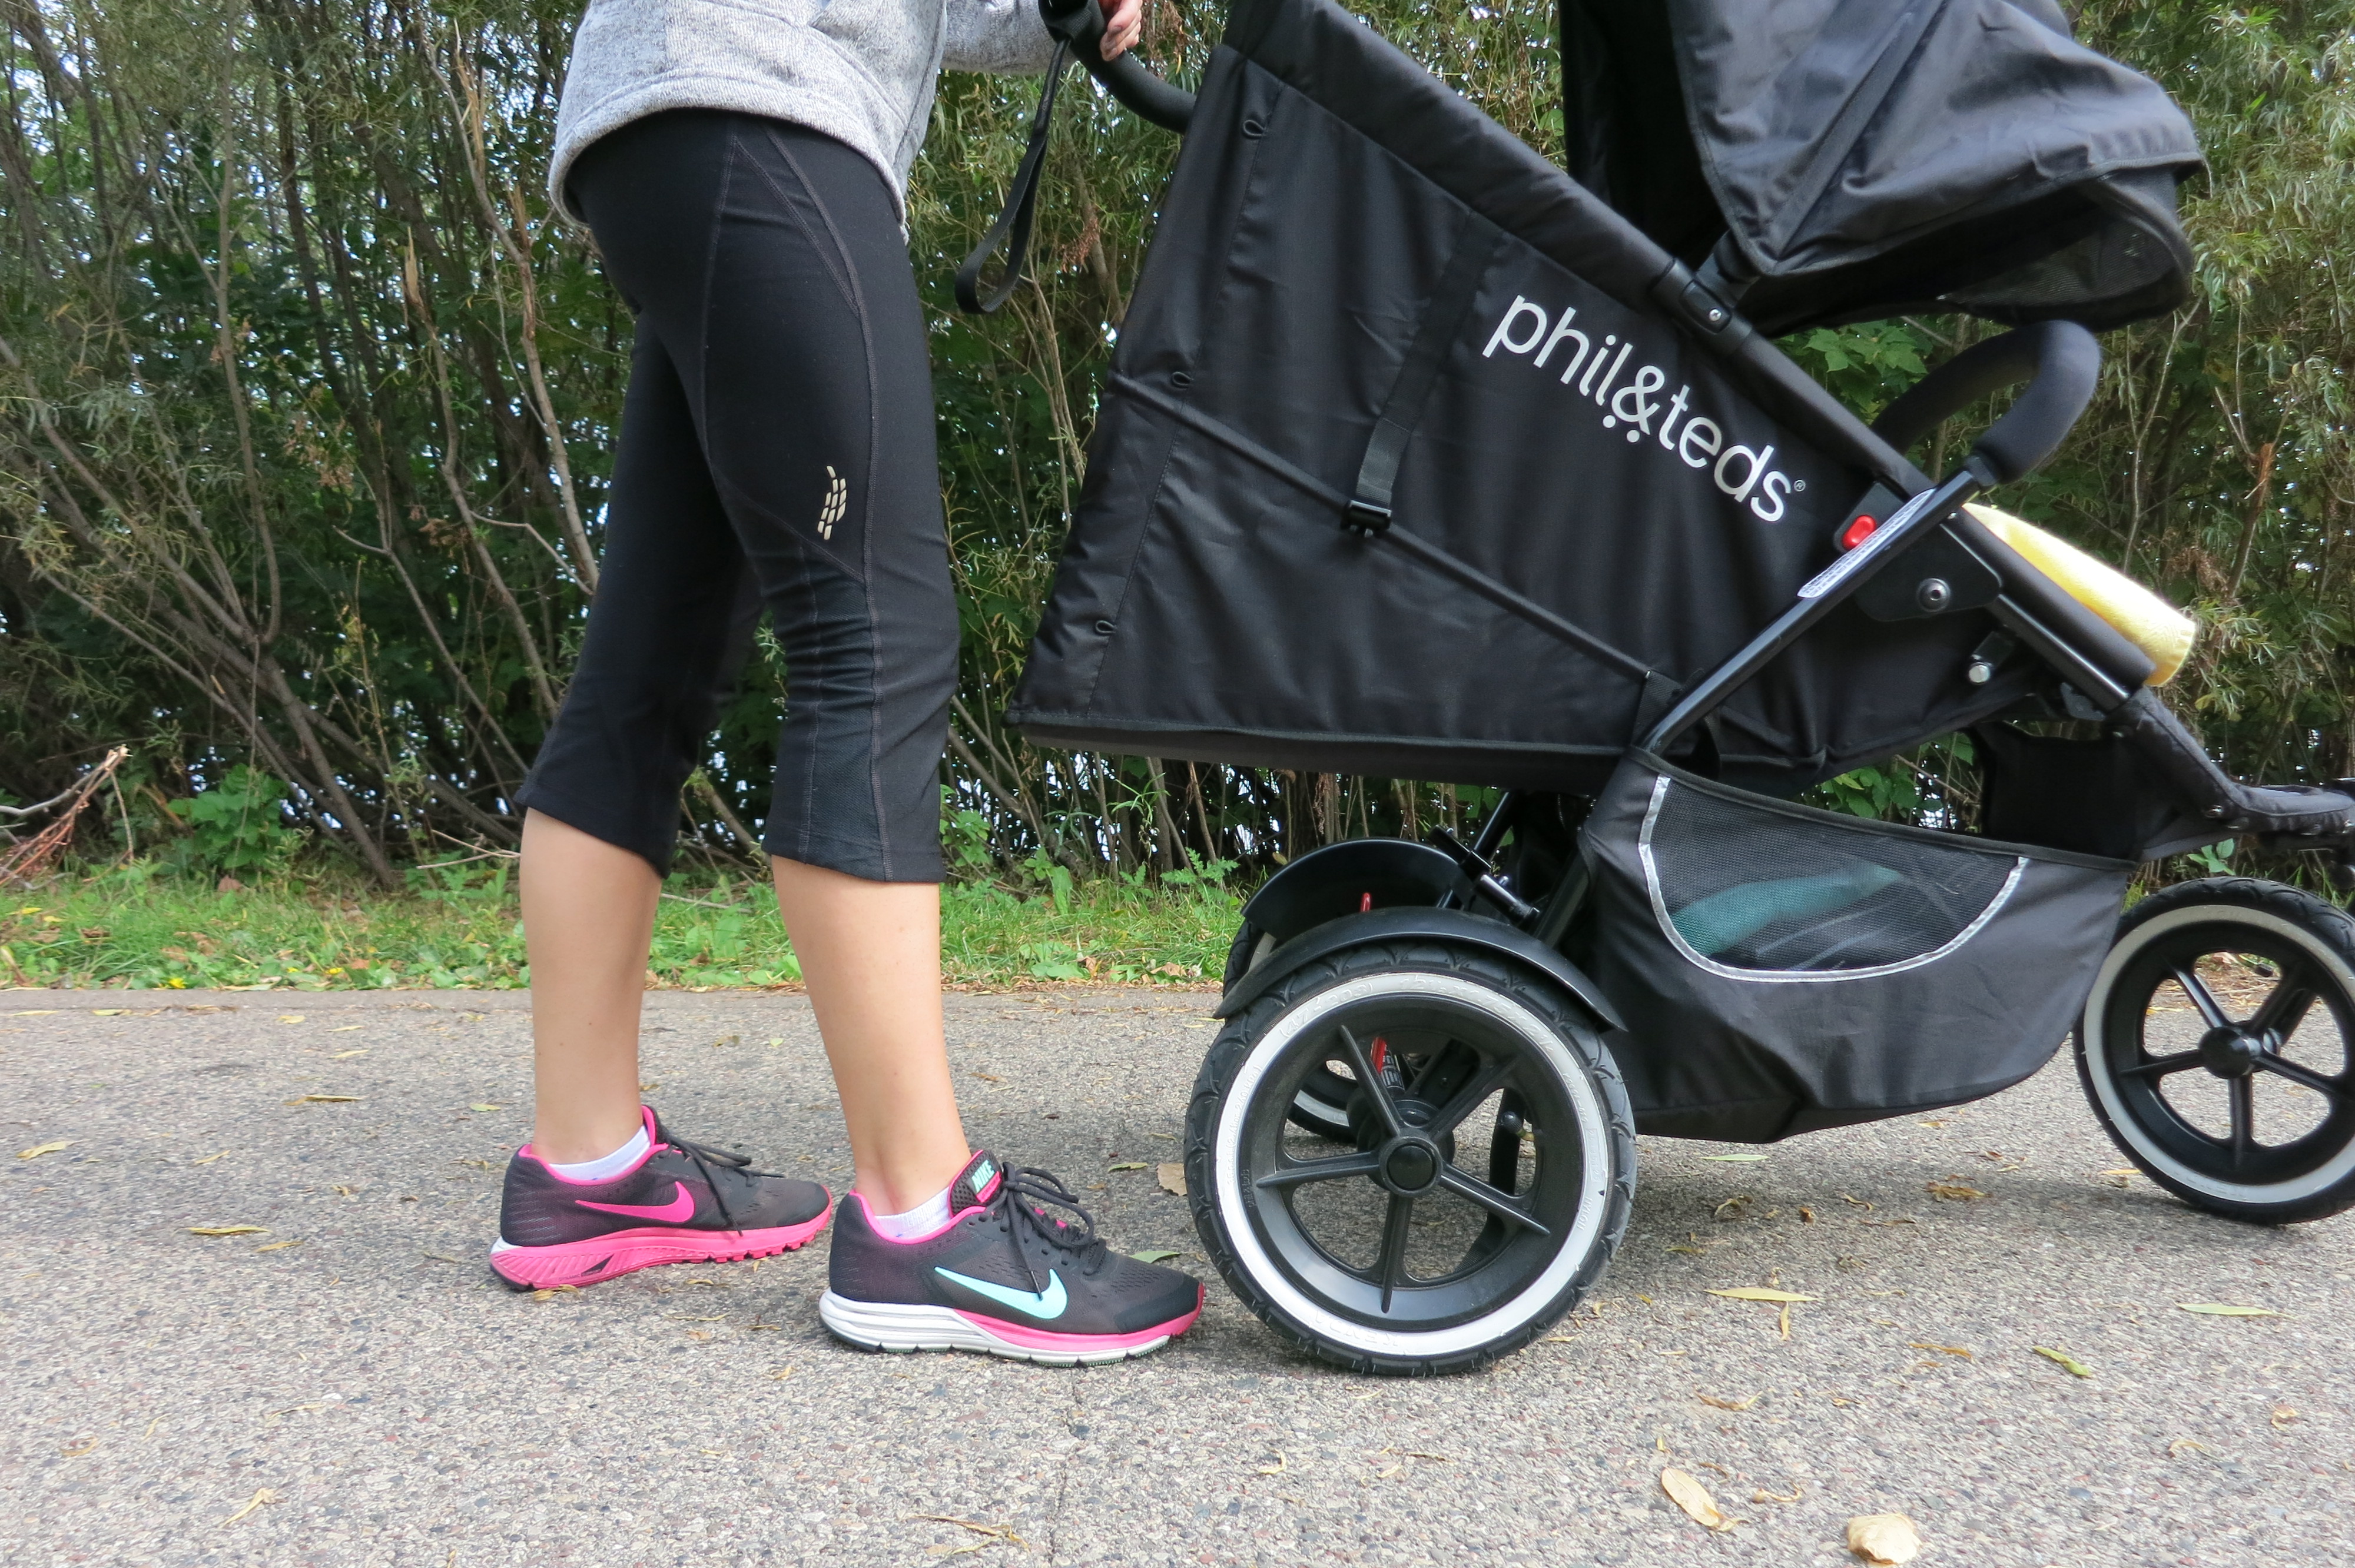
Postpartum has been a long road. And not the kind of “oh, what a journey…” road. The first days after Seton’s birth I didn’t so much want to roll over in bed. I was definitely not dreaming of tying up my shoelaces and going for a run. But eventually, albeit after many weeks, I found myself promising the exercise gods that I would never complain about working out again as I watched Netflix count down to the next episode of my TV marathon in utter disbelief that my current state of life existed on a couch. Being restricted from doing something just makes you want to do it, right? I longed for the feeling of my tennis shoes hitting pavement, my heart beating through my chest, and my frequent breath mixing with the fall air.
We may be anxious to return to running after pregnancy, but it’s important to make our comebacks gradual. Lots of changes just happened to our bodies and, as mothers, we now need our bodies to take care of our babies. Being injured isn’t an option.
To prepare for running, I encourage you to strengthen your abdominals and pelvic floor muscles through the abdominal progression and pelvic floor exercise progression I recommend. Having strong abdominals for running can reduce the risk of injury to our backs, hips, knees, ankles, and even should girdles and necks! The abdominals will work to stabilize our backs and pelvis to allow the limbs to generate movement for each step.
I also encourage you to strengthen your gluteals. You should do this the same way I recommended doing it throughout your pregnancy: by performing Hip Abduction with Lateral Rotation (“The Clamshell”). You can read through the steps in my post Top 3 Exercises Every Pregnant Woman Should Do.
When you feel as though your abdominals and pelvic floor muscles are strong enough that you can keep them contracted throughout the course of the day (even when going up/down stairs or getting up for the floor while holding your baby), you are likely ready to begin a running progression. Make sure your doctor has cleared you to exercise!
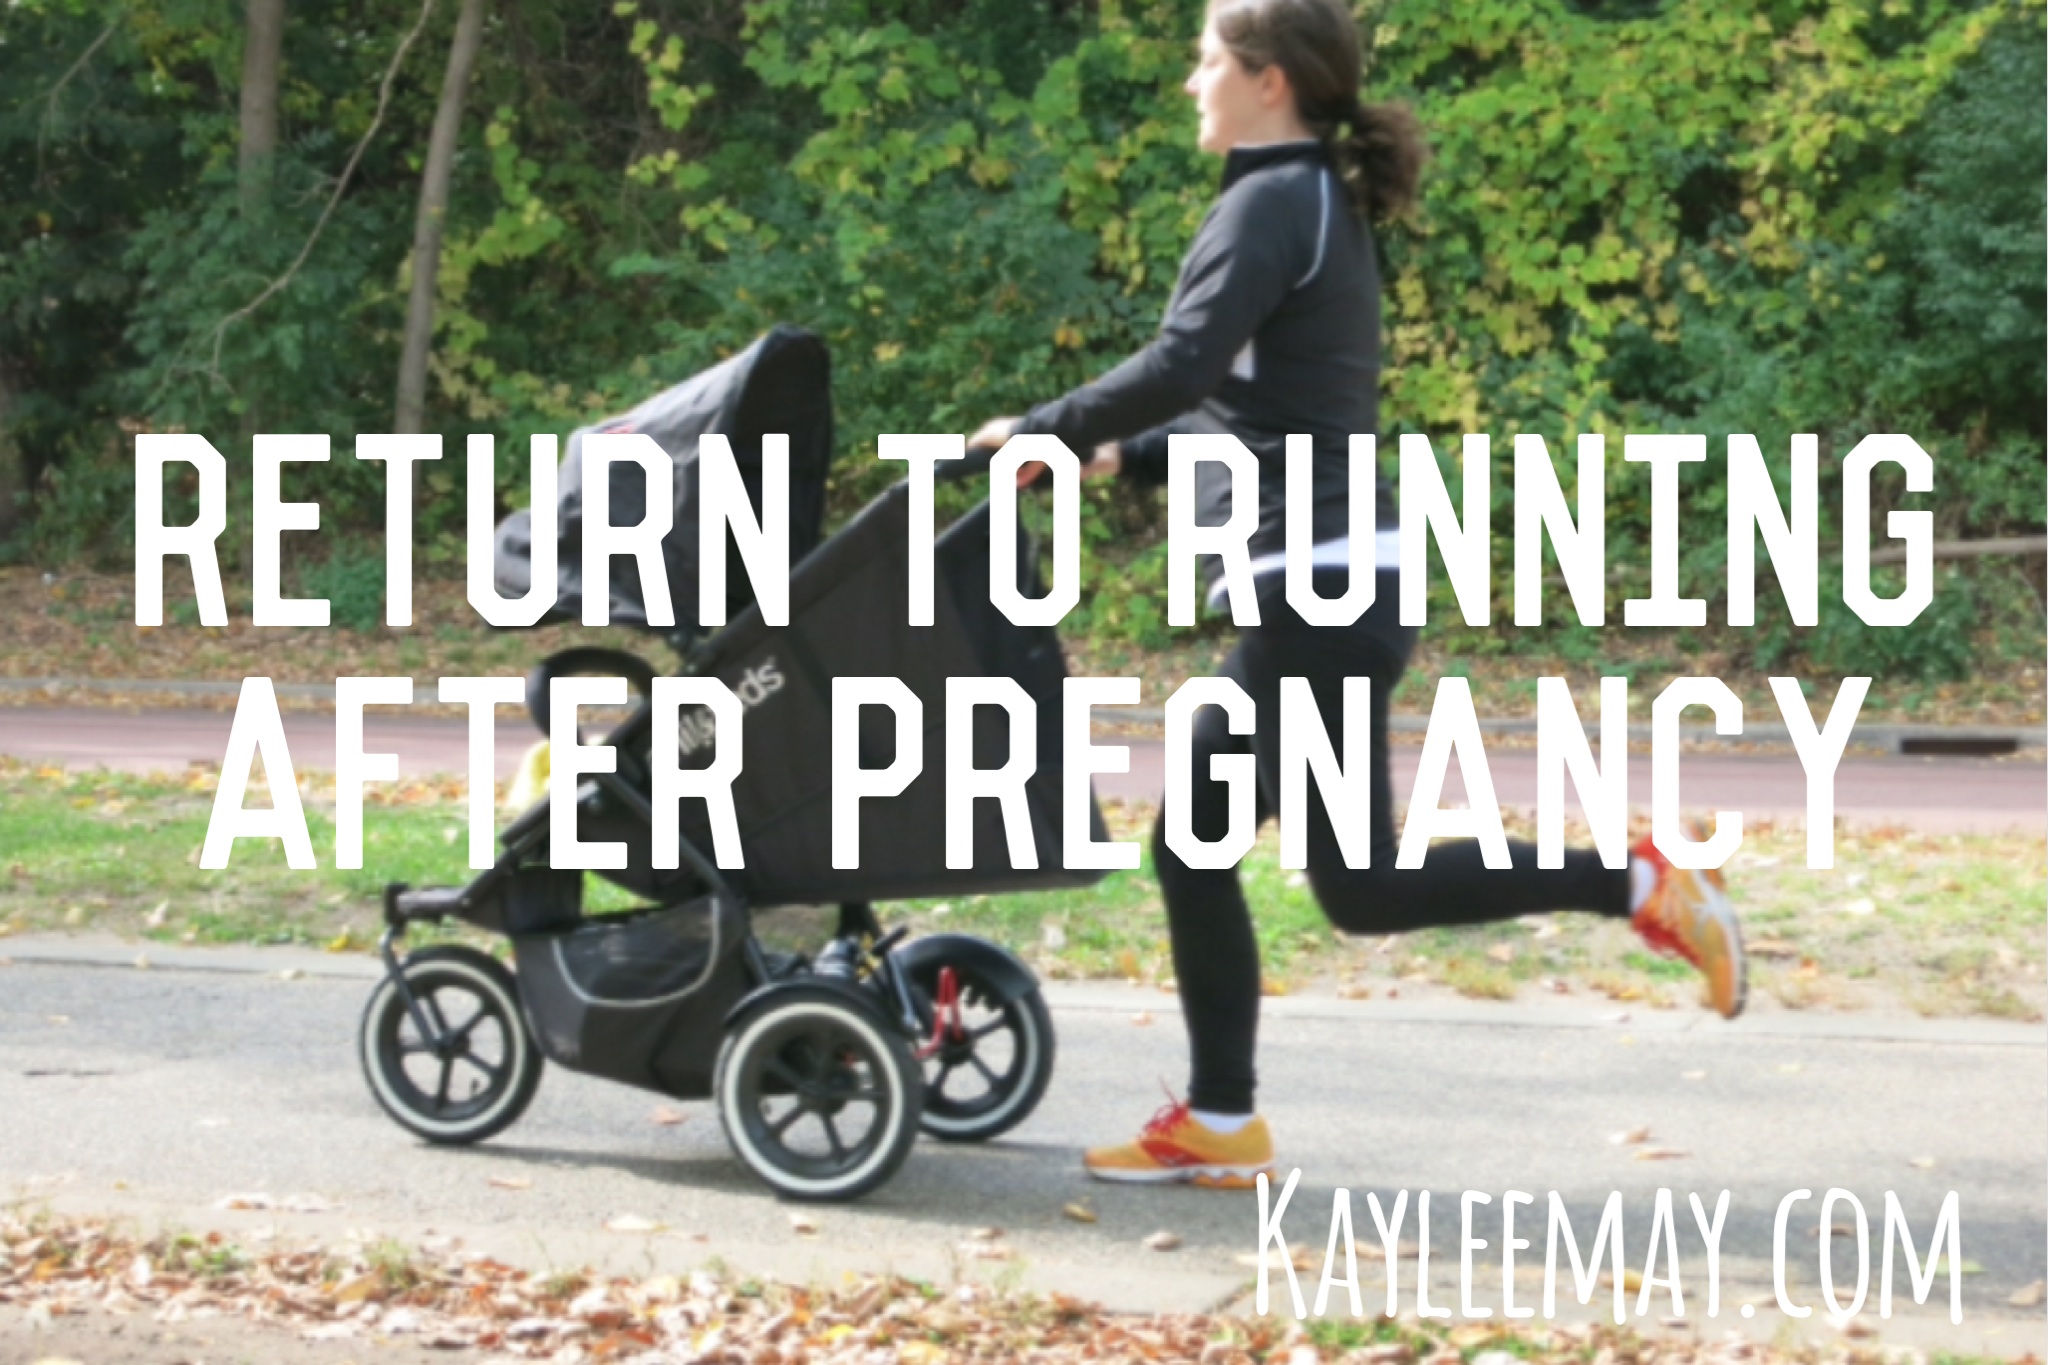
To begin, start with running and walking at one minute intervals, aka run a minute, walk a minute. Prior to pregnancy, I told my patients to do this for 30-minutes. But, now that I am experiencing the joys of postpartum first-hand, I recommend doing this for as long as you can up to 30-minutes. I started my progression (ahem, last night) and barely made it to 18 minutes. I walked that last 12 minutes telling myself, “whatever, I’m strong…I pushed a human out of my body!” as I somehow heard my heart beating the way you do after an insane workout.
Since you are only running one minute at a time, use the minute to focus on running with good form. After pregnancy, our bodies will forget we have abdominals and gluteals, so we will be relying on muscles like the tensor fascia lata (TFL, which is the muscle that controls the infamous IT band) that can lead to injury. Focus on contracting your abdominals. Review my post Improve Your Running Stride Part II: The Gluteals which will help you use your gluteals to improve your stride.
Once you hit this walk/run cycle for 30 minutes, start aiming for running 2-minutes, then walking 1-minute up to 30-minutes.
Add a minute to your running spurts when you feel ready (should be every three to five runs), and so on.
Keep in mind:
Do not push yourself too quickly. Your muscles need time to catch up to what you are asking your body to do.
Do not set time goals until you are confident you can run with good form.
If you’re having unusual aches, pains, or … ahem, dare I say leaking, talk to your physical therapist.
And, lastly, you may want to wear two bras. 🙂
This was my reaction to finally getting the green light from my doctor to exercise:
Hopefully you enjoy you first run back as much as I did.
***The content of www.kayleemay.com is for informational purposes only. The information presented is not to be taken as professional medical advice, diagnosis, or treatment. If you are having pain, or seeking medical advice, talk to your health care provider. Do not delay in seeking treatment because of information you have read on www.kayleemay.com. Taking recommendations presented on www.kayleemay.com is solely at your own risk***
*These exercises are based off the Sahrmann Low Abdominal Progression.*
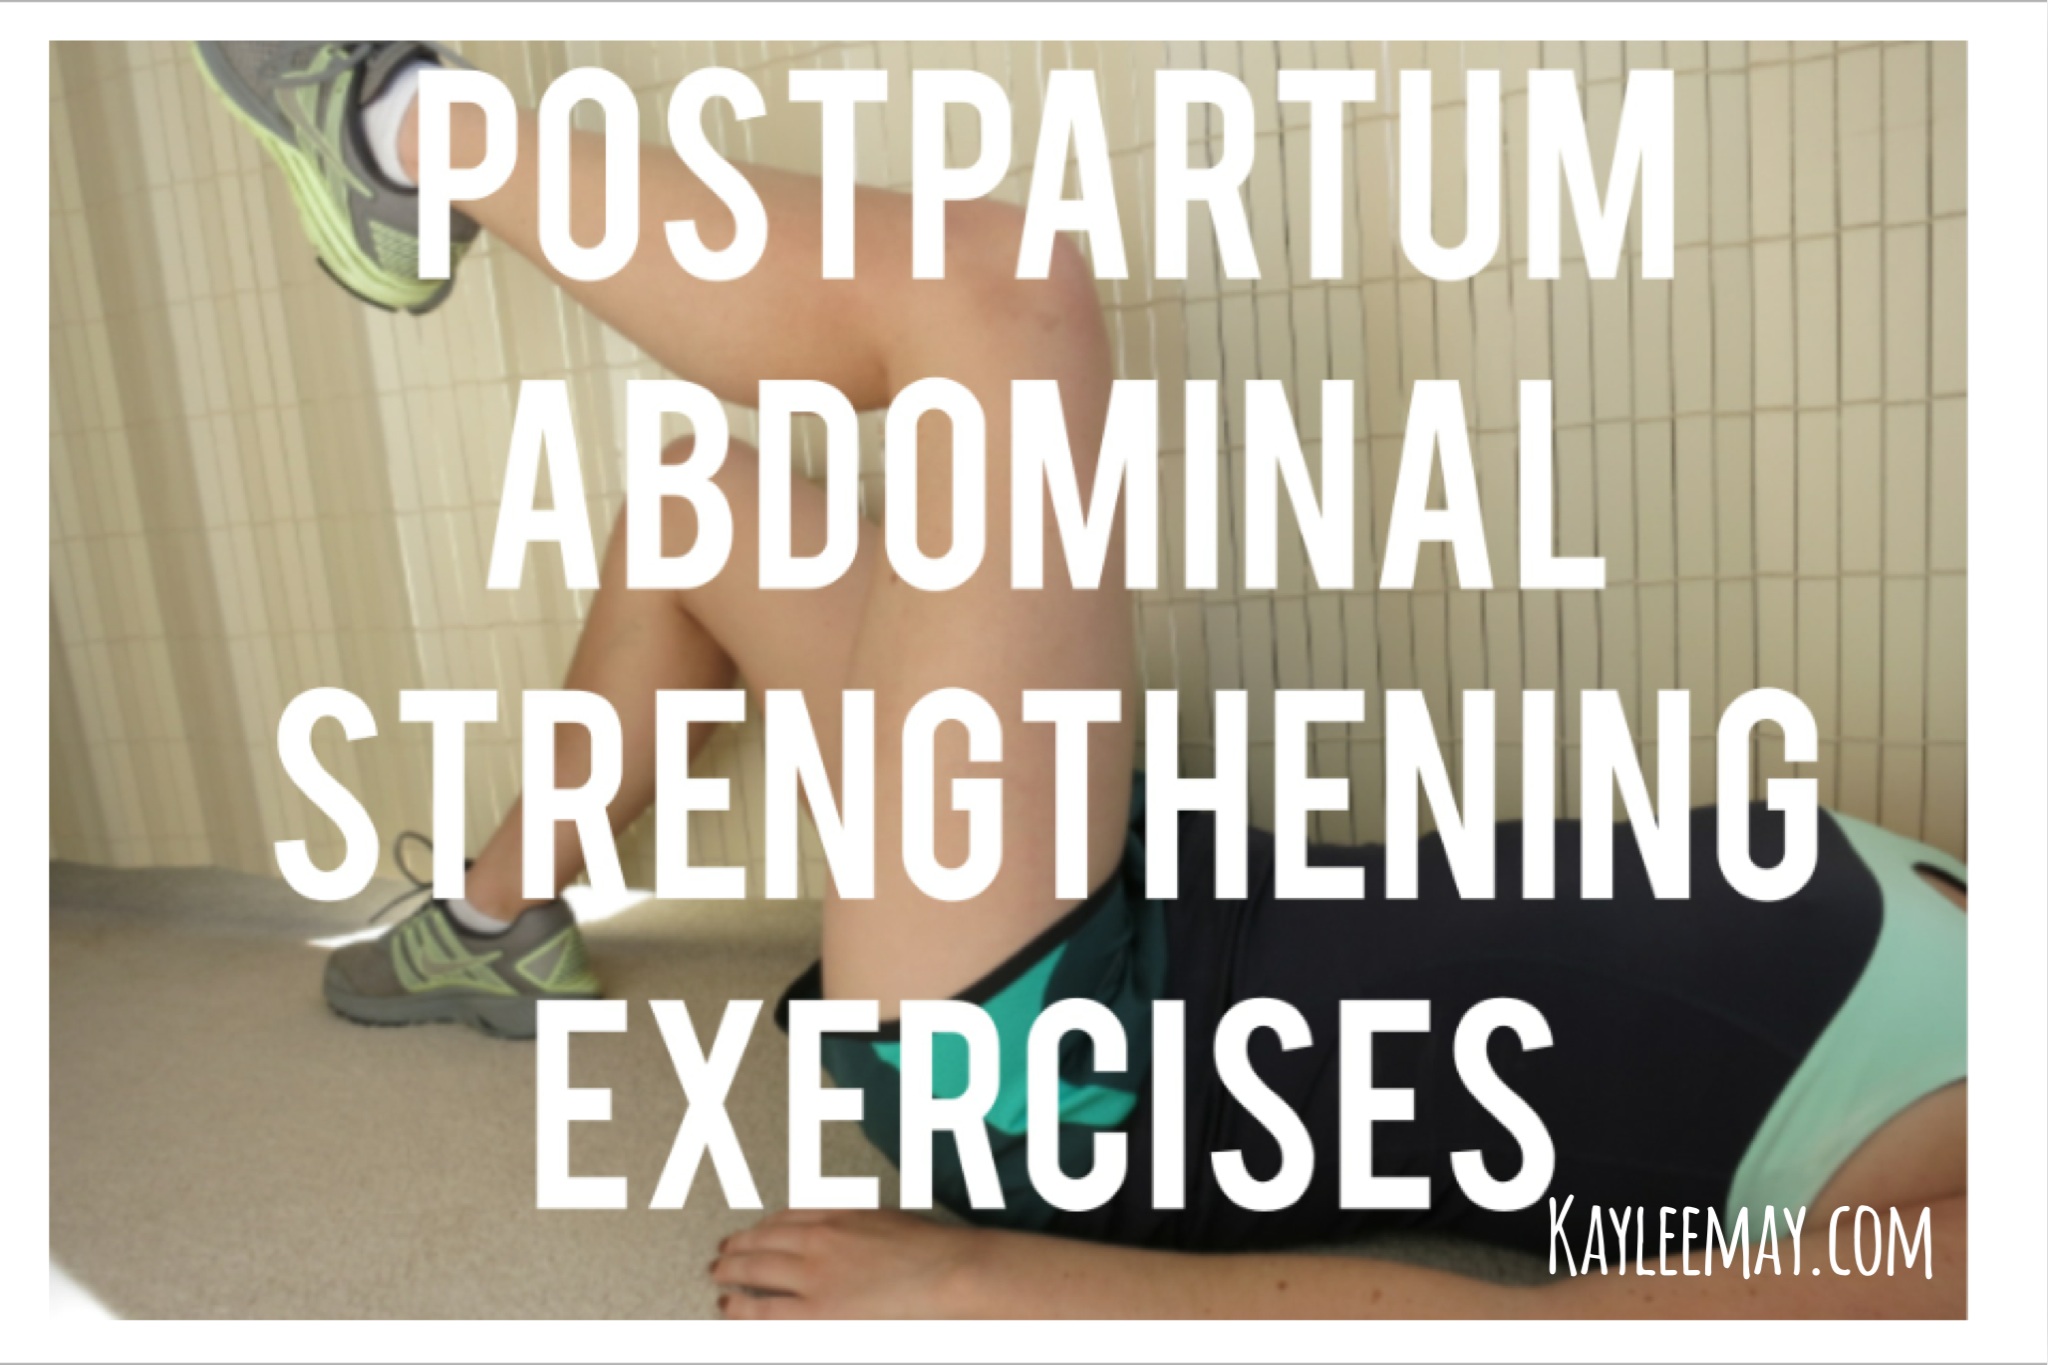
I swore to myself I wouldn’t get that certain post pregnancy “pooch” that stays with me the rest of my life…we all know what I am talking about. Yeah, good for Kate Middleton for going out in public right after giving birth with a pregnancy pooch, but let’s be honest… that kind of thing sticks around a whole lifetime for us normal folk. I thought I would share my postpartum abdominal strengthening program for those in the same position as me.
This post will look very familiar to those of you who read my series on tips for runners. Postpartum abdominal strengthening is very similar to how I recommend my runners strengthen their abdominals with a few key differences.
One difference is that it is important to take it slow and remember that your abs have been stretched to their limits over the course of 9 months. The initial goal of postpartum abdominal exercises is to first be able to contract the muscles. The subsequent goal is to strengthen the abdominals to support your low back, pelvis, and hips. After all, you will be carrying extra weight around (aka the babe and that extremely heavy carseat…grr), and you need your abdominal brace to support your back and hips! Many of my patients’ musculoskeletal problems can be traced back to poor movement patterns due to weak abdominals that they never strengthened after being pregnant. The final goal, for vanity’s sake, is to reduce the chance of the friendly pooch being with us the rest of our life.
One other difference of postpartum abdominal strengthening is that it is necessary to contract your pelvic floor muscles (you’ve heard of Kegels) when you contract your abs. I tell this to my runners as well, but it is especially important after giving birth.
Lastly, and most importantly, ask your doctor and physical therapist before initiating any abdominal strengthening postpartum. It didn’t take me long after giving birth to realize we all have different birth stories (it seemed like everyone else got an epidural because they worked #lies #imnotbitter #yesiam), therefore different rates and amounts of healing required. This goes for any type of birth– Cesarean, water, natural, epidural, in a rain forest like that crazy lady on Youtube (don’t Google it, I warned you)…anything! Your doctor will likely want you to wait a certain amount of time before initiating exercise.
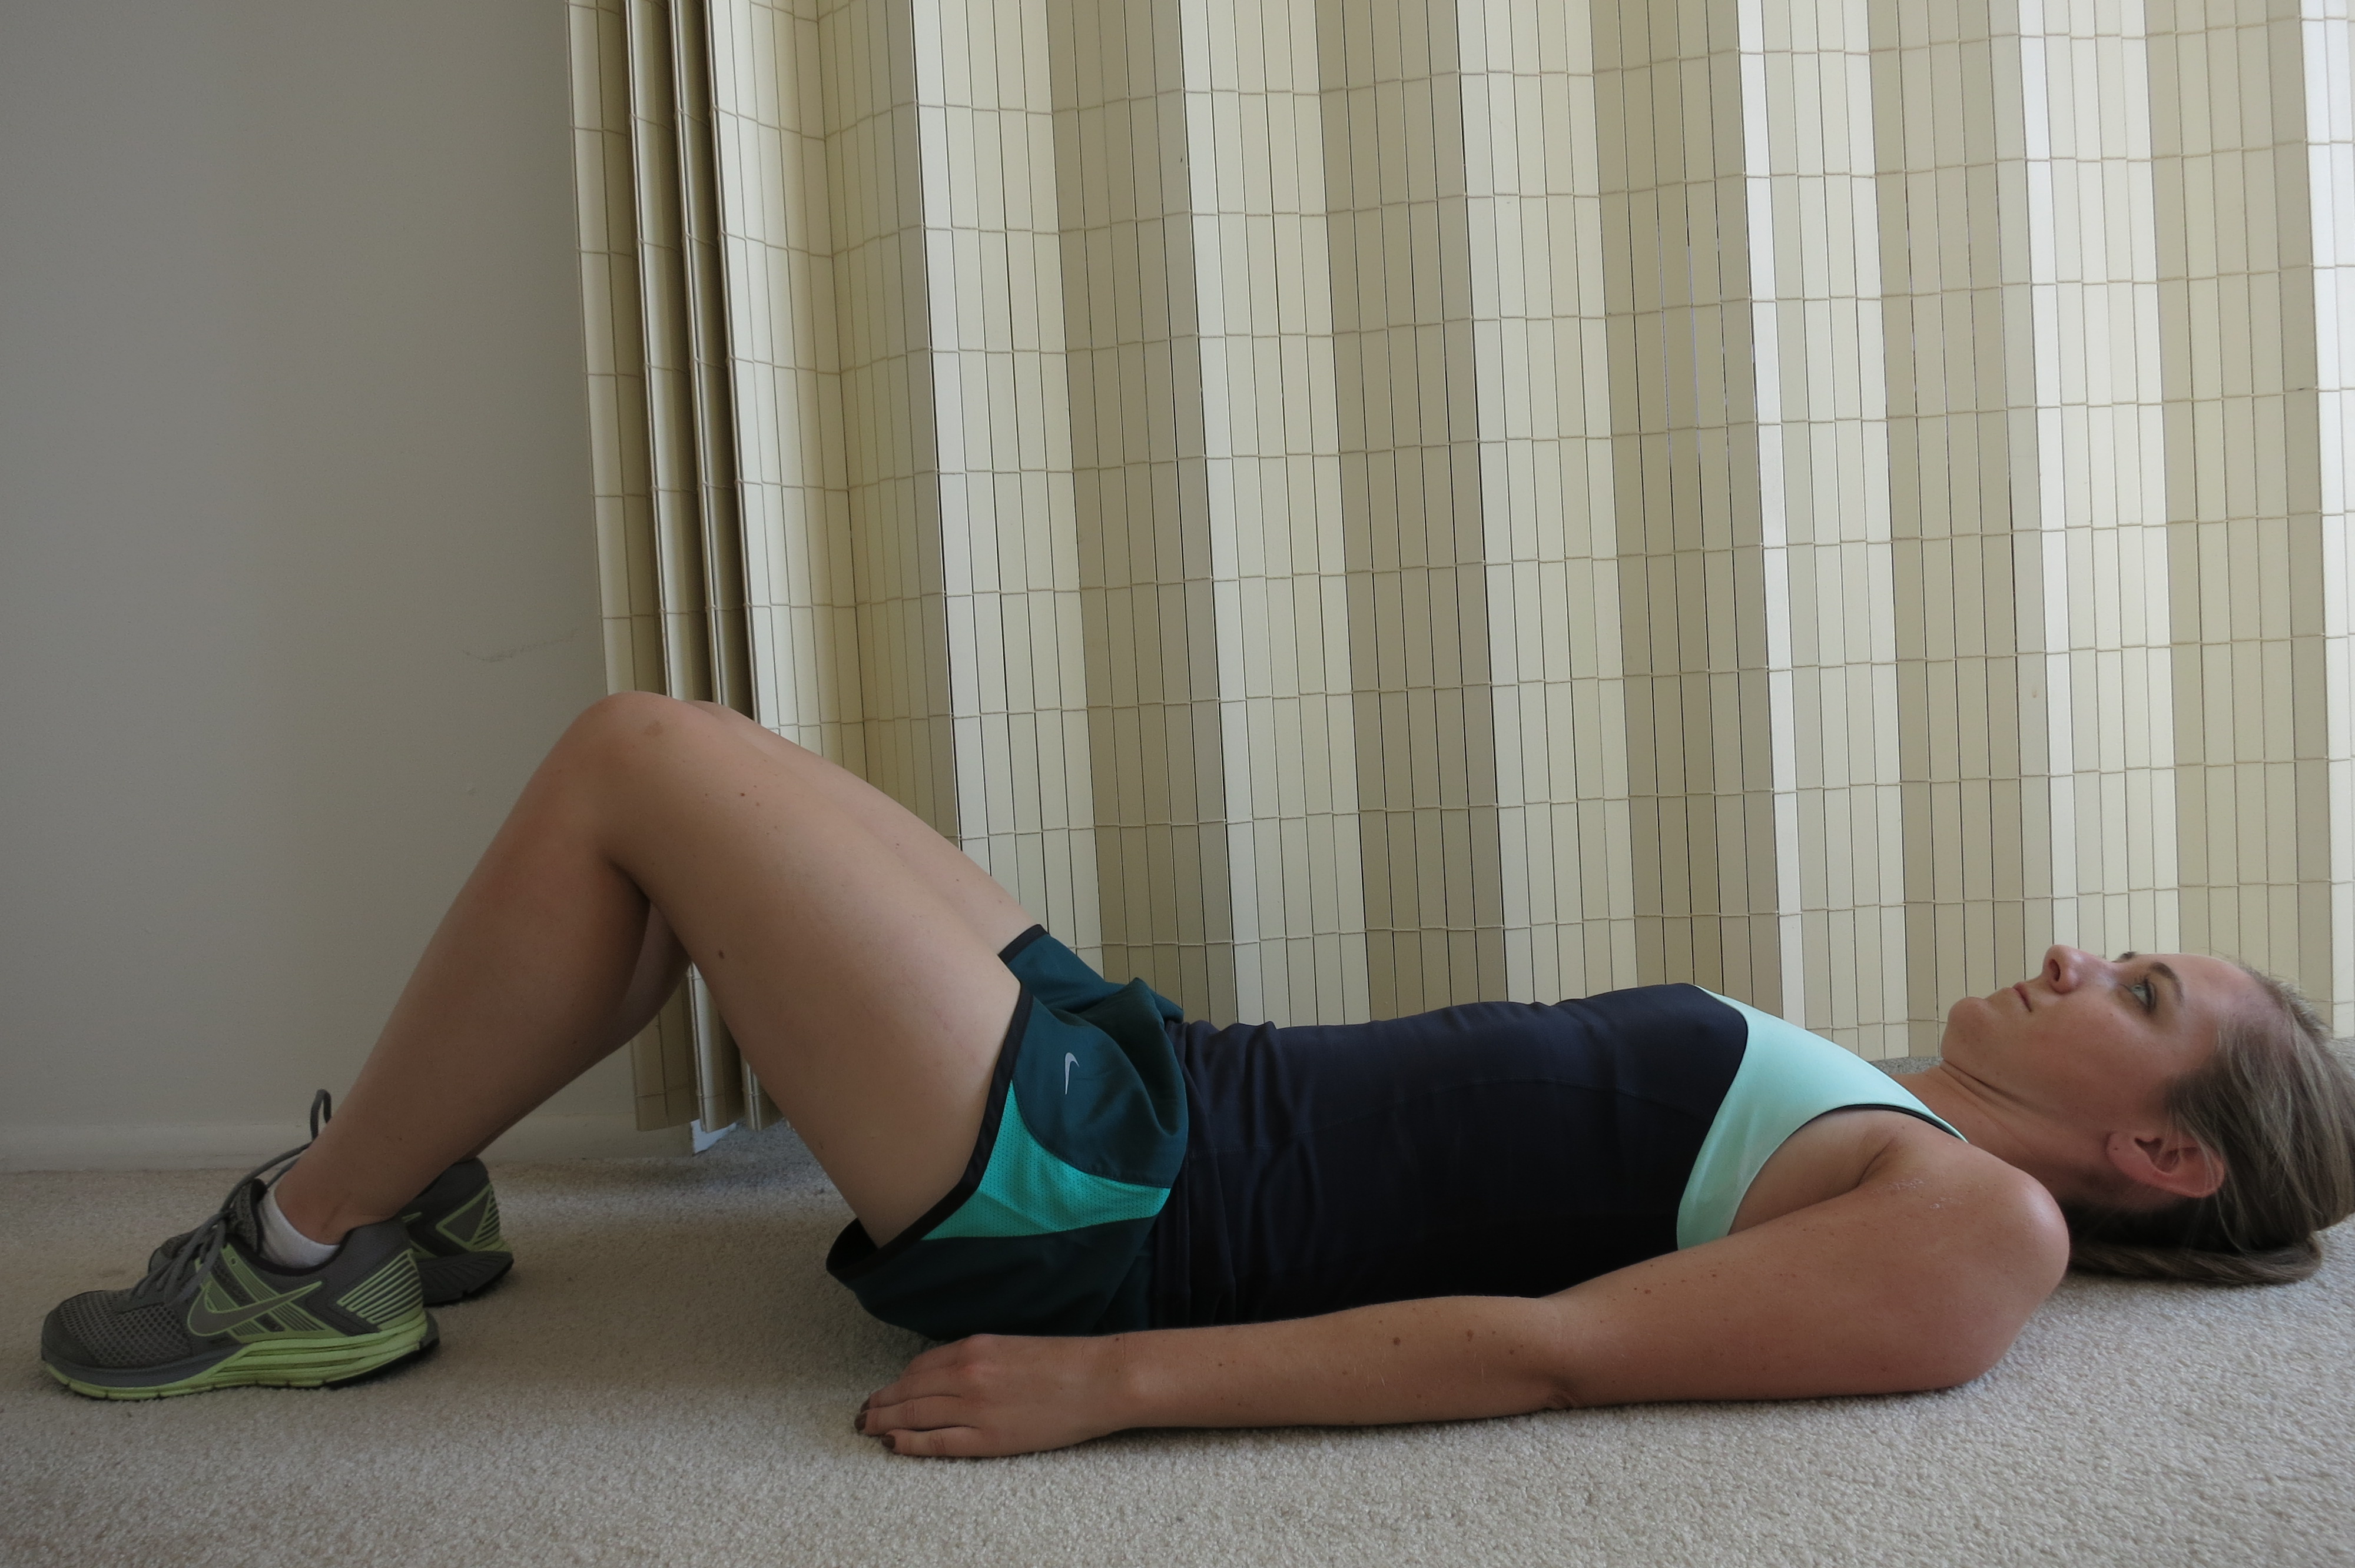
The postpartum abdominal strengthening progression takes you through five abdominal exercises, each progressively more difficult. You will notice that the low back does not move at any point in the exercises. Rather, the abs work to stabilize as the limb movement becomes progressively more challenging. To work through the exercises, you must first successfully perform up to 20 repetitions correctly before progressing to the next exercise. Therefore, you may be on one level for up to 2 weeks before you feel you are ready for the next. If you can not perform an exercise without compensations (arching it away from the floor, pushing into the floor, or allowing your abdominal muscles to “pooch” up toward the ceiling), you must go back down to the previous level.
Level 1
Level I Abdominal Strengthening
Step 1: Lay on back with knees bent and feet flat on floor.
Step 2: Contract abdominals buy pulling navel toward your spine as you exhale. Contract pelvic floor muscles (the muscles you use to stop the flow of urine).
Step 3: Hold 5-10 seconds.
Step 4: Repeat 10-20 times.
Watch out! Do not push your back into the floor or arch it away from the floor. Your stomach should be sinking DOWN, not pushing UP toward the ceiling.
Perform exercise daily until you feel you are able to do 20 repetitions correctly.
Level 2
Level 2 Abdominal Strengthening
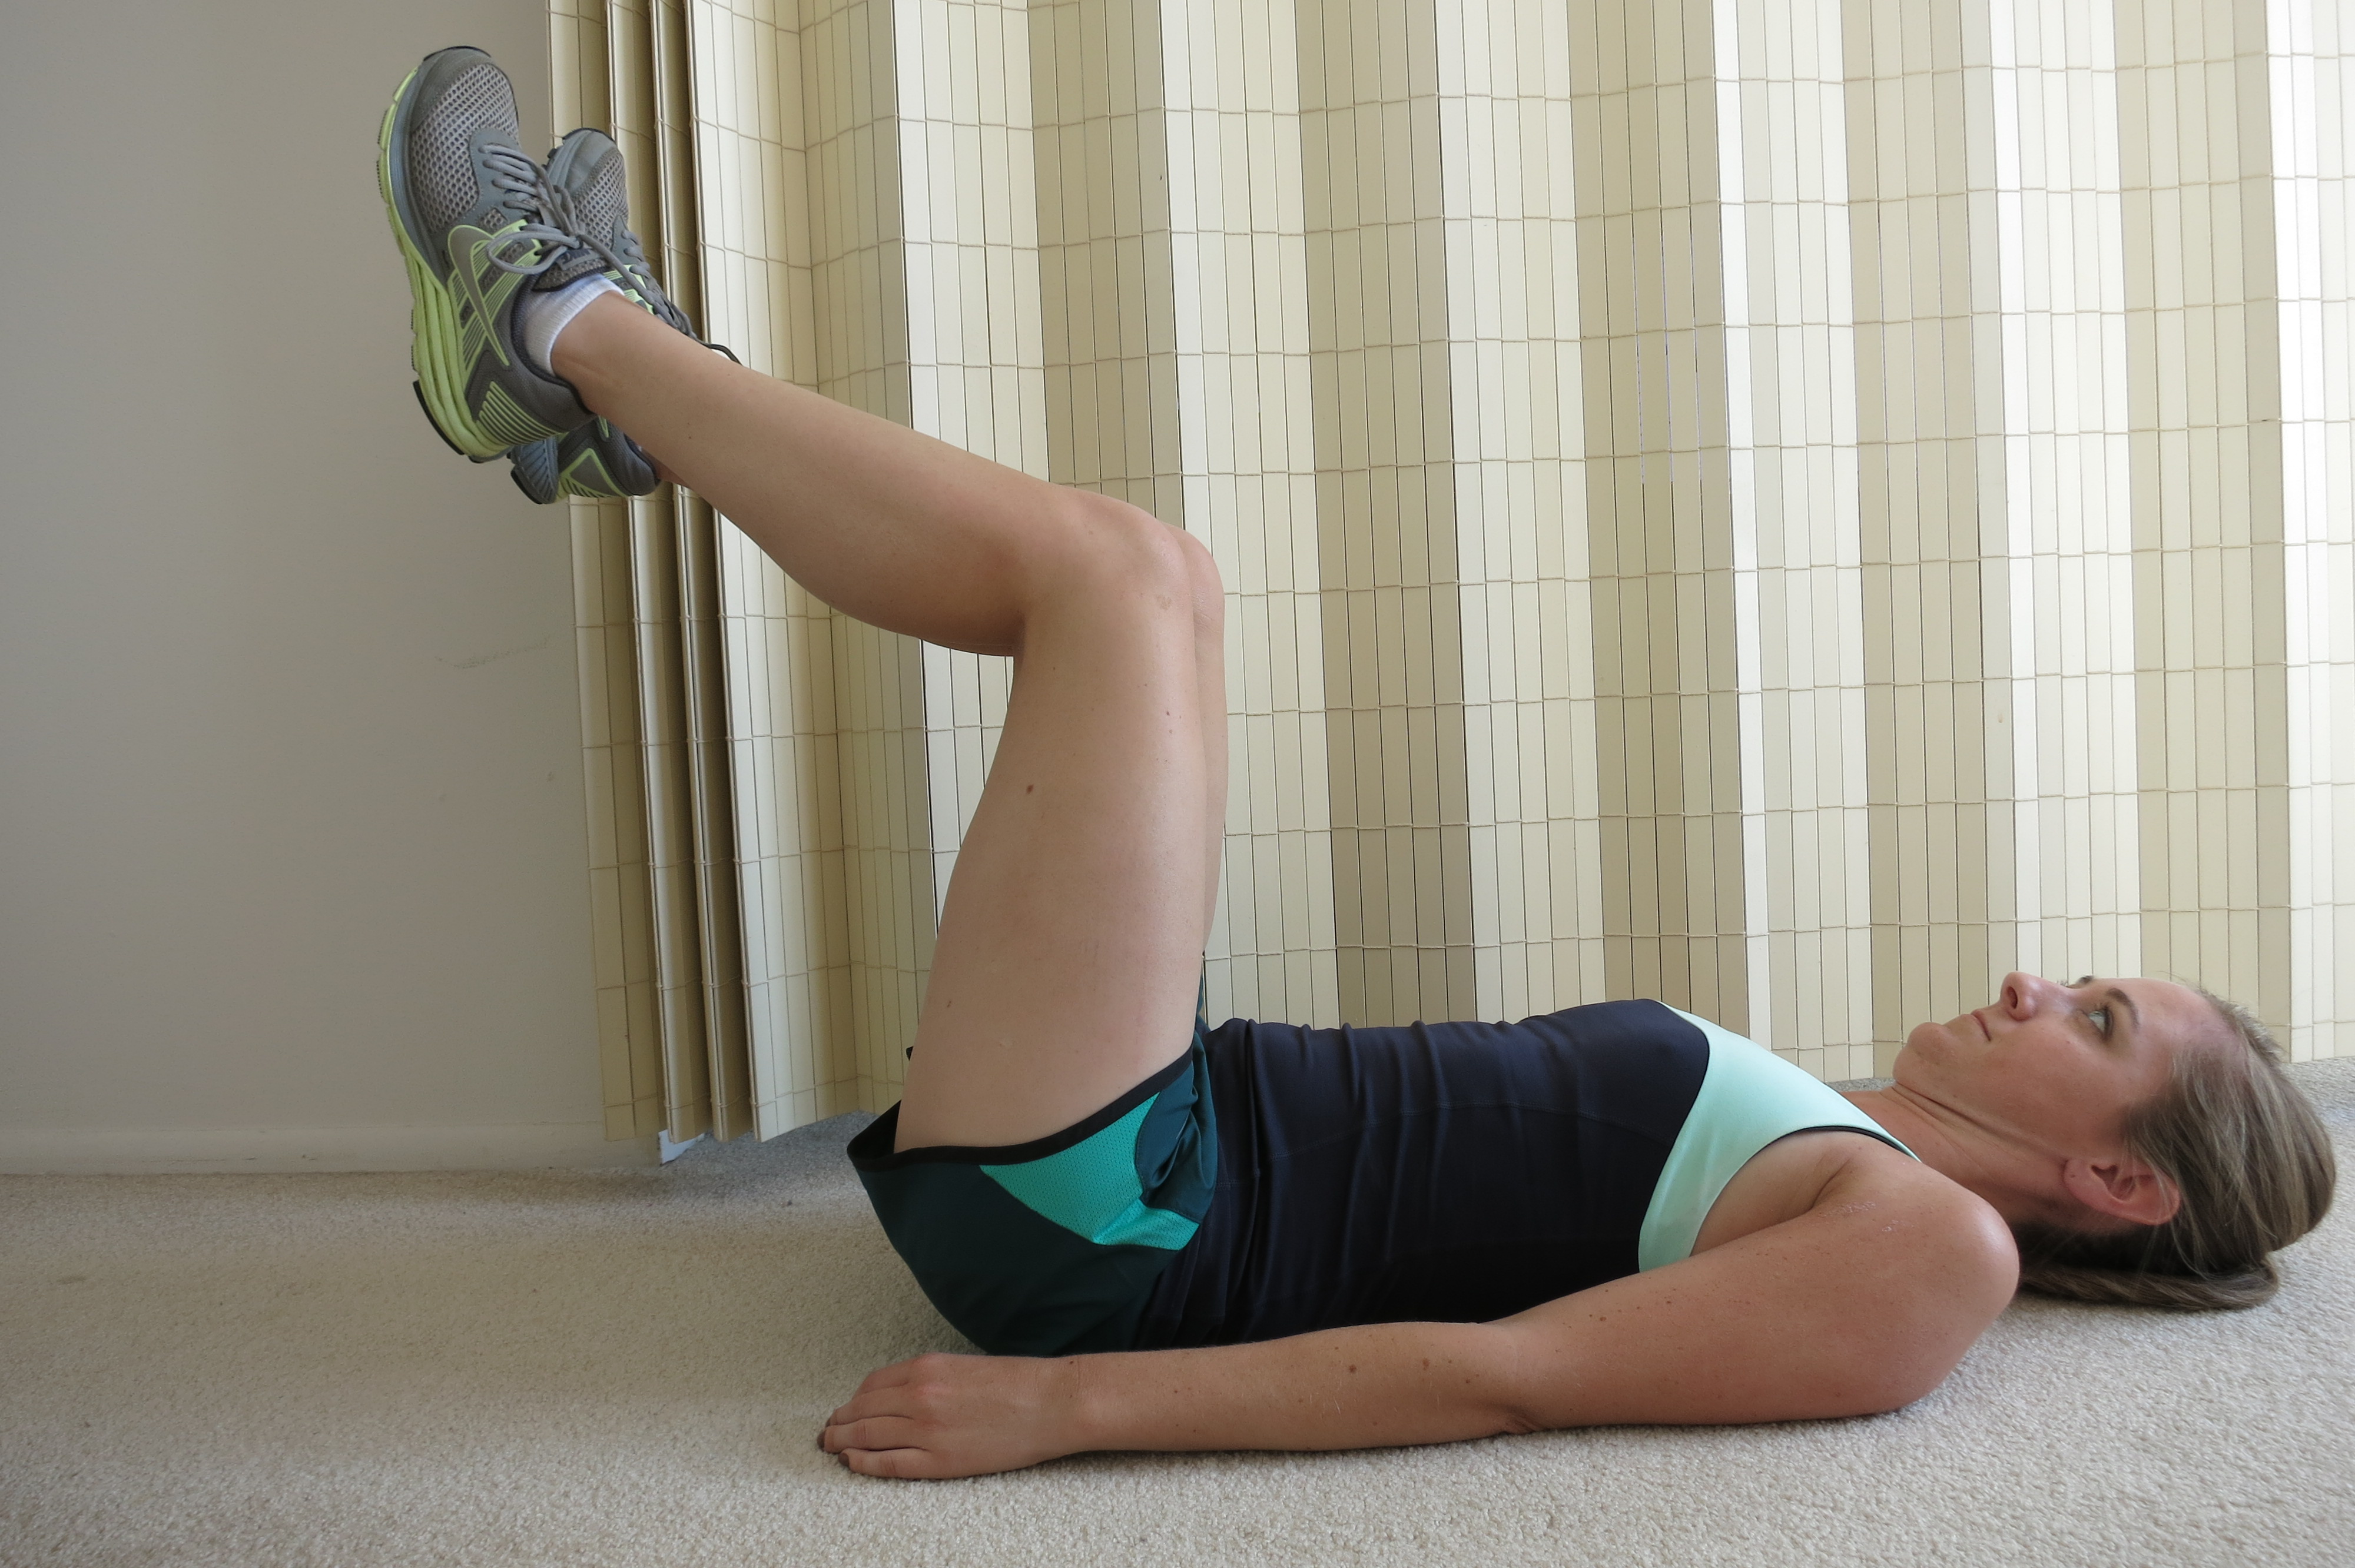
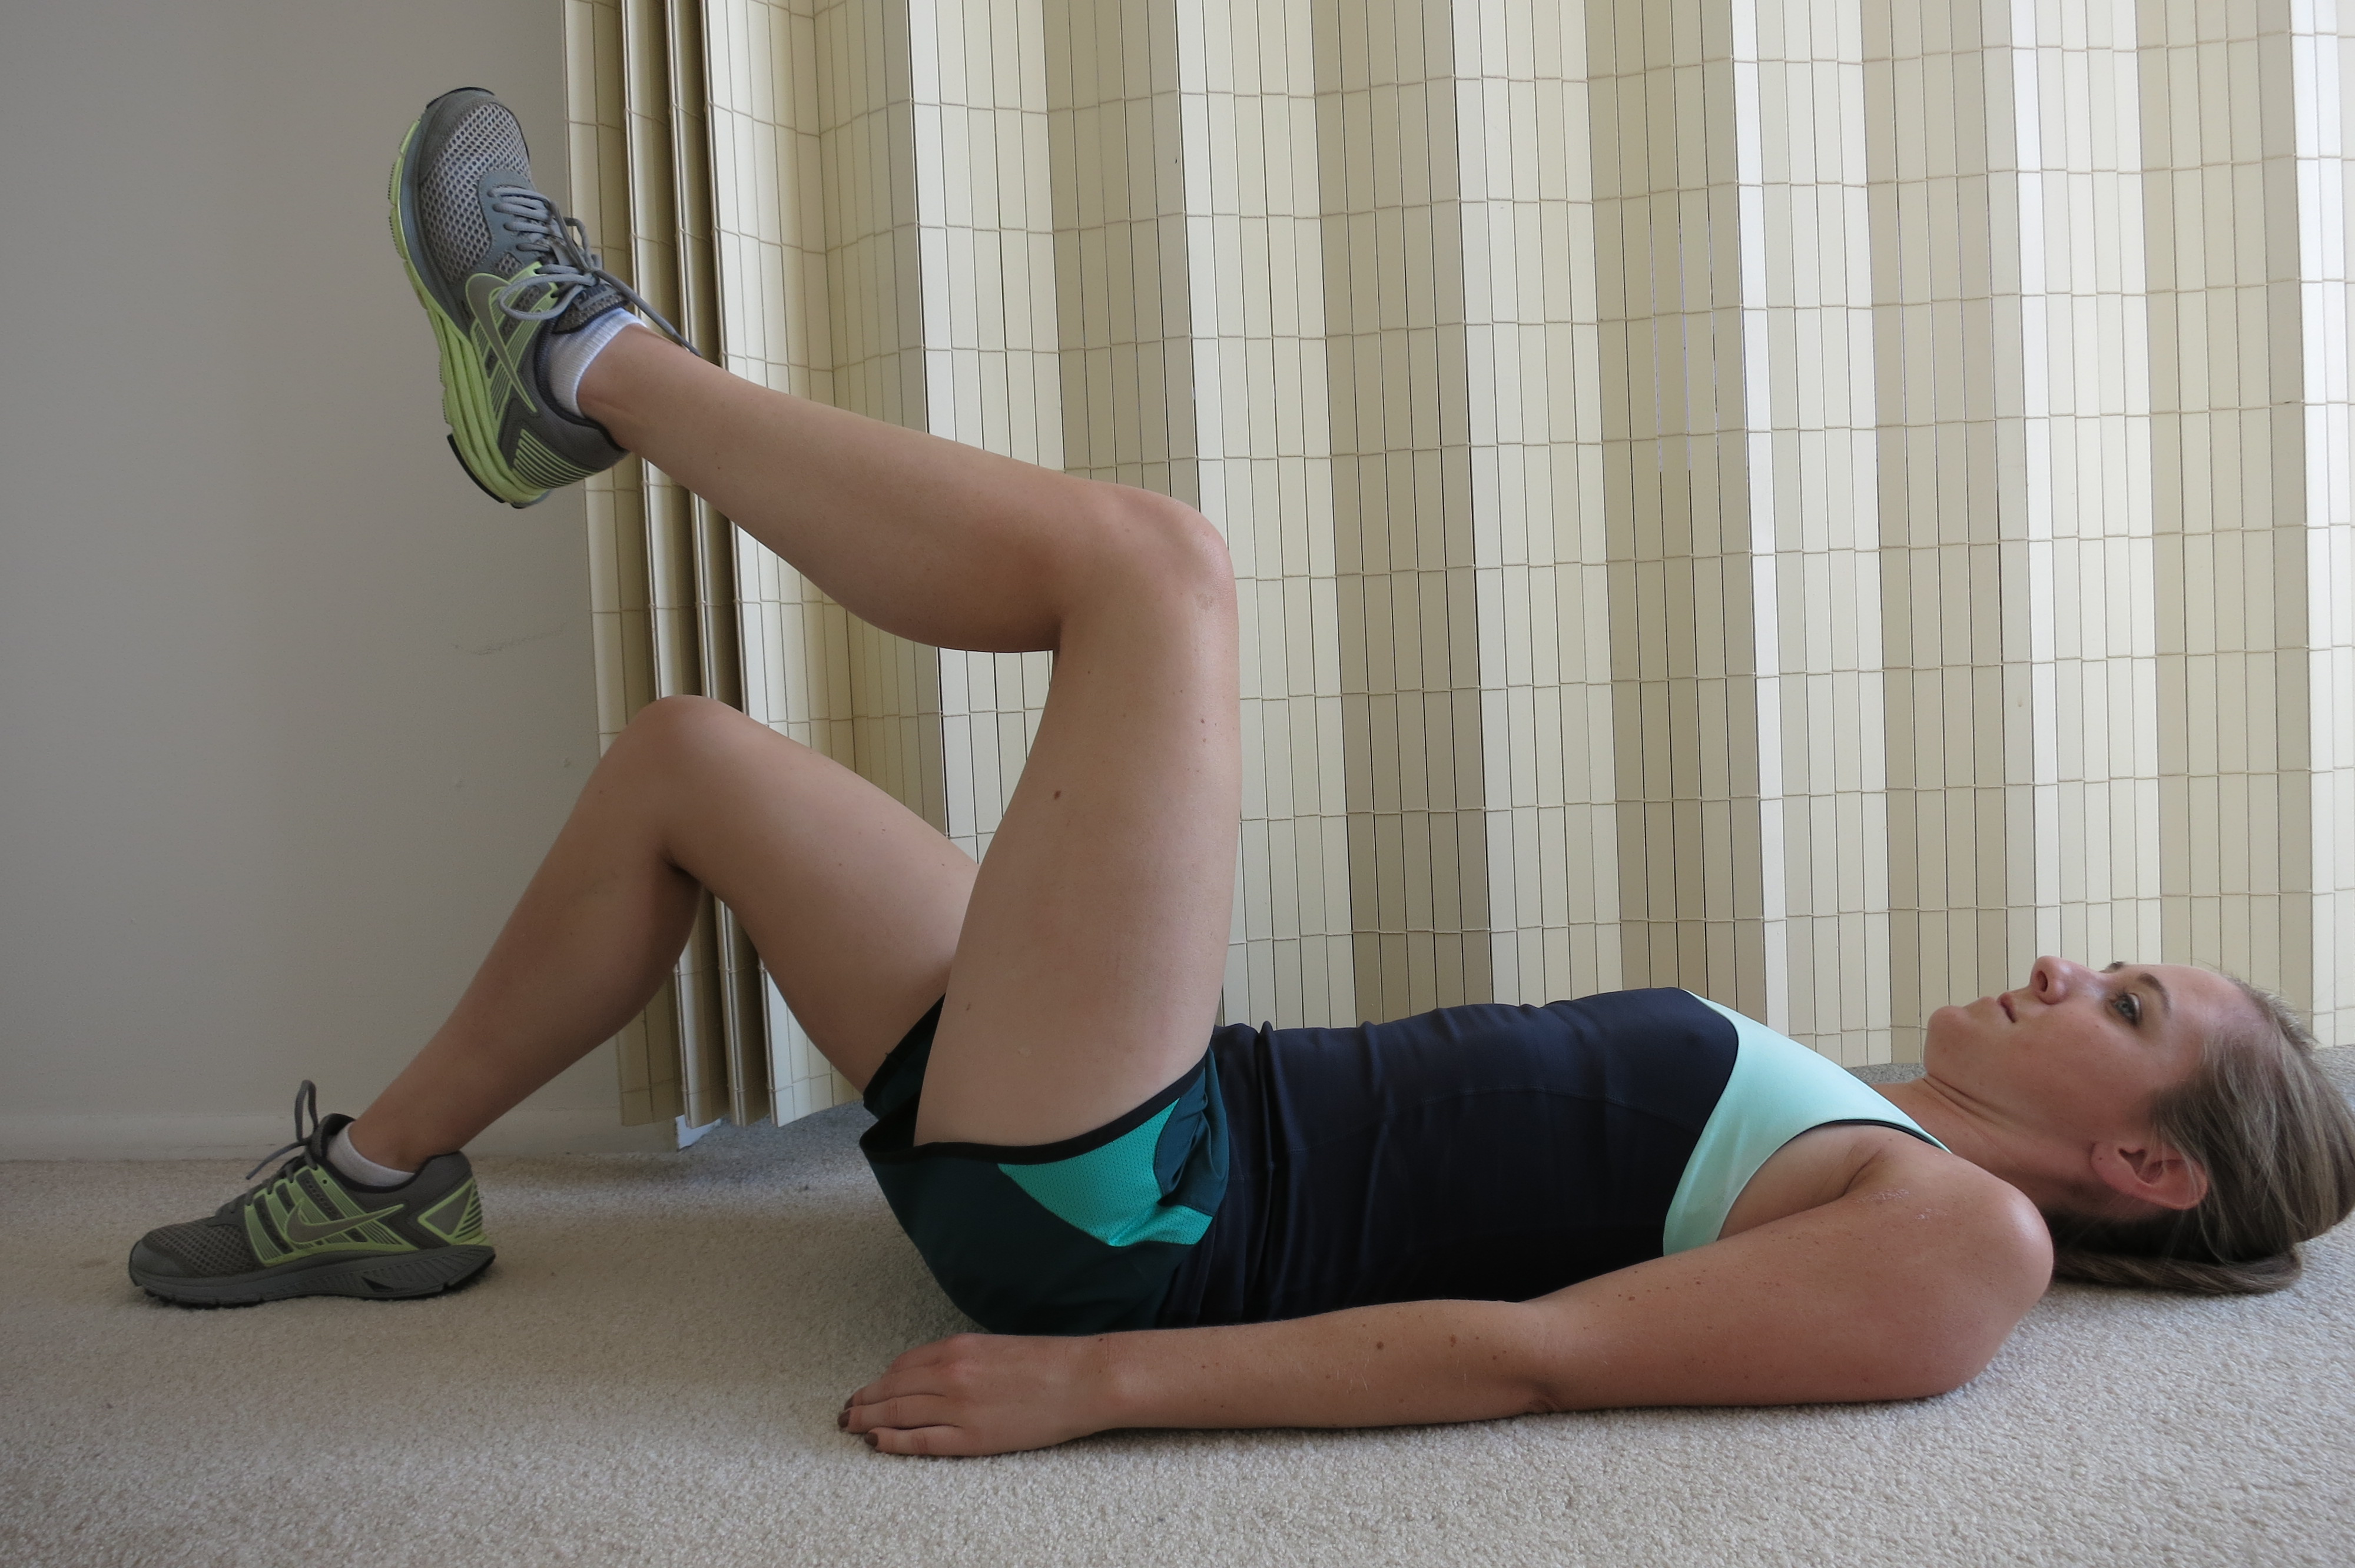
Step 1: Perform abdominal and pelvic floor contraction as in Level 1.
Step 2: Raise one leg so hip is bent 90 degrees while maintaining abdominal contraction.
Step 3: Place leg back to starting position as in Step 1.
Step 4: Raise contralateral leg so hip is bent 90 degrees while maintaining abdominal contraction.
Step 5: Place leg back to starting position as in Step 1.
Step 6: Repeat 10-20 times.
Watch out! Do not push your back into the floor or arch it away from the floor. Your stomach should be sinking DOWN, not pushing UP toward the ceiling.
Perform exercise daily until you feel you are able to do 20 repetitions correctly.
Level 3
Level 3 Abdominal Strengthening
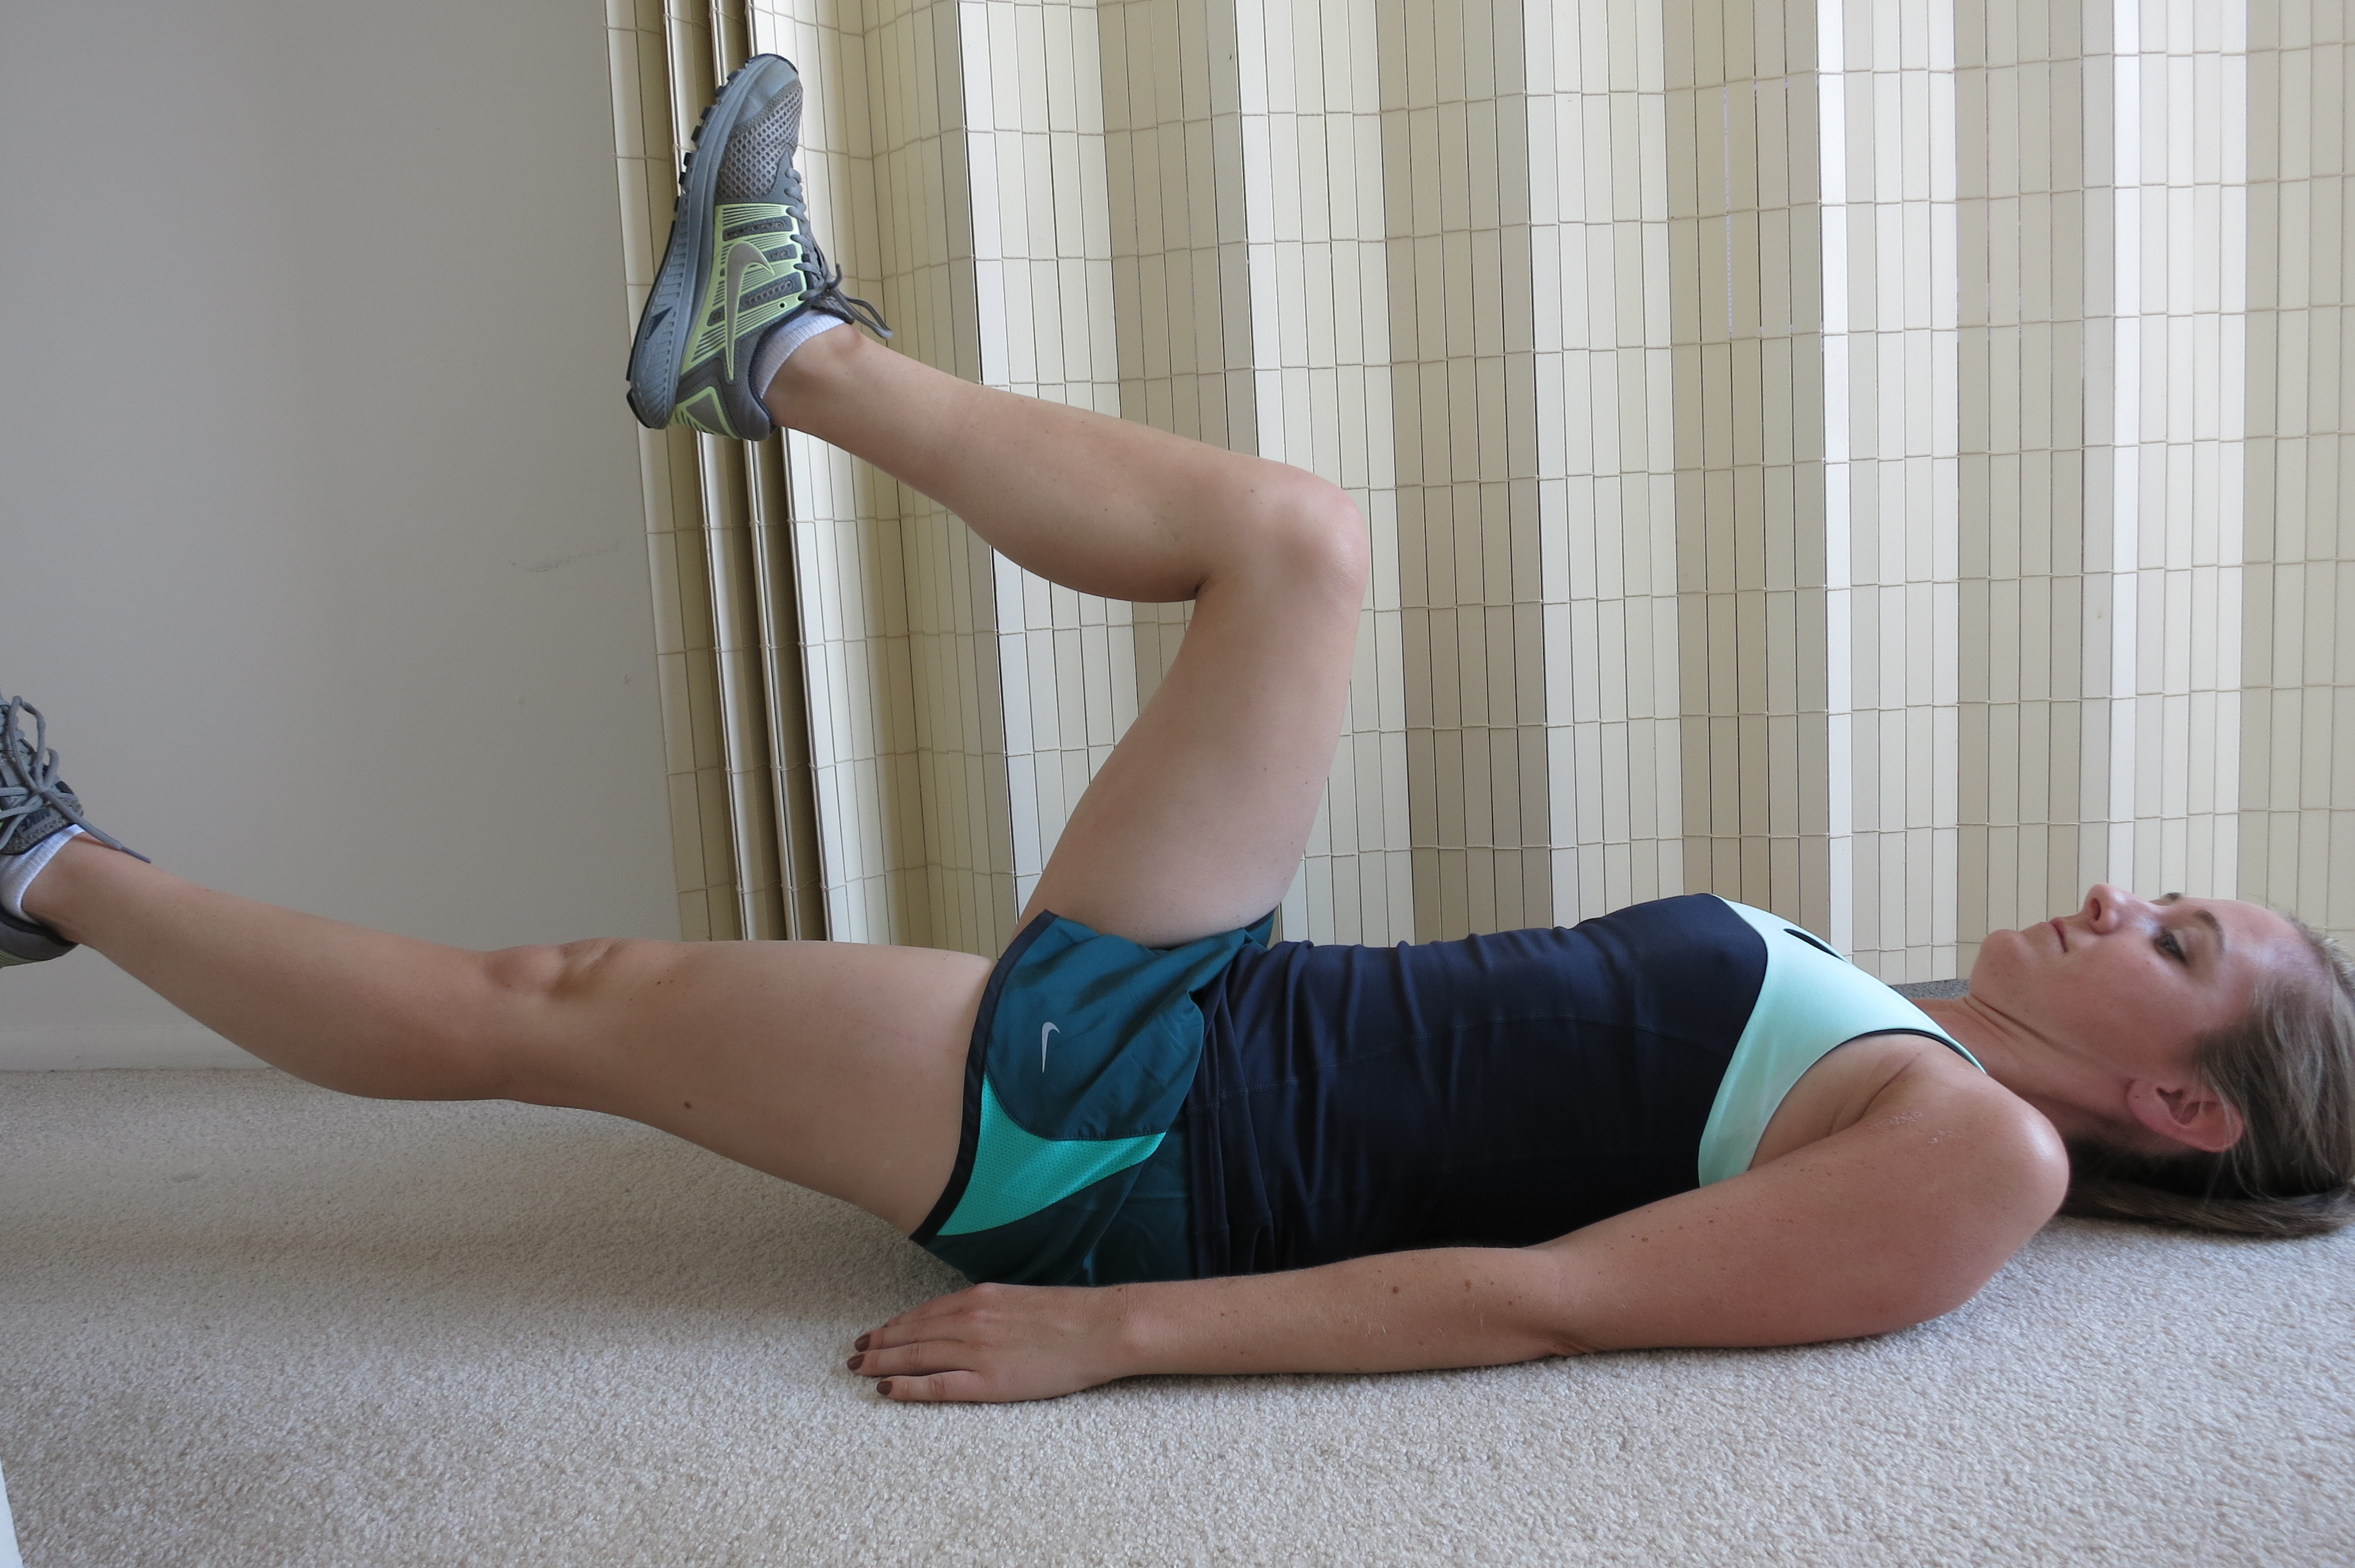
Step 1: Perform abdominal and pelvic floor contraction as in Level 1.
Step 2: Raise one leg so hip is bent 90 degrees while maintaining an abdominal contraction.
Step 3: Maintain position of Step 2 and raise opposite leg so hip is bent 90 degrees.
Step 4: Place one foot back to starting position (keep those abs contracted!)
Step 5: Place the other foot back to the starting position (keep those abs contracted!)
Step 6: Repeat 10-20 times.
Watch out! Do not push your back into the floor or arch it away from the floor. Your stomach should be sinking DOWN, not pushing UP toward the ceiling.
Perform exercise daily until you feel you are able to do 20 repetitions correctly.
Level 4
Level 4 Abdominal Strengthening
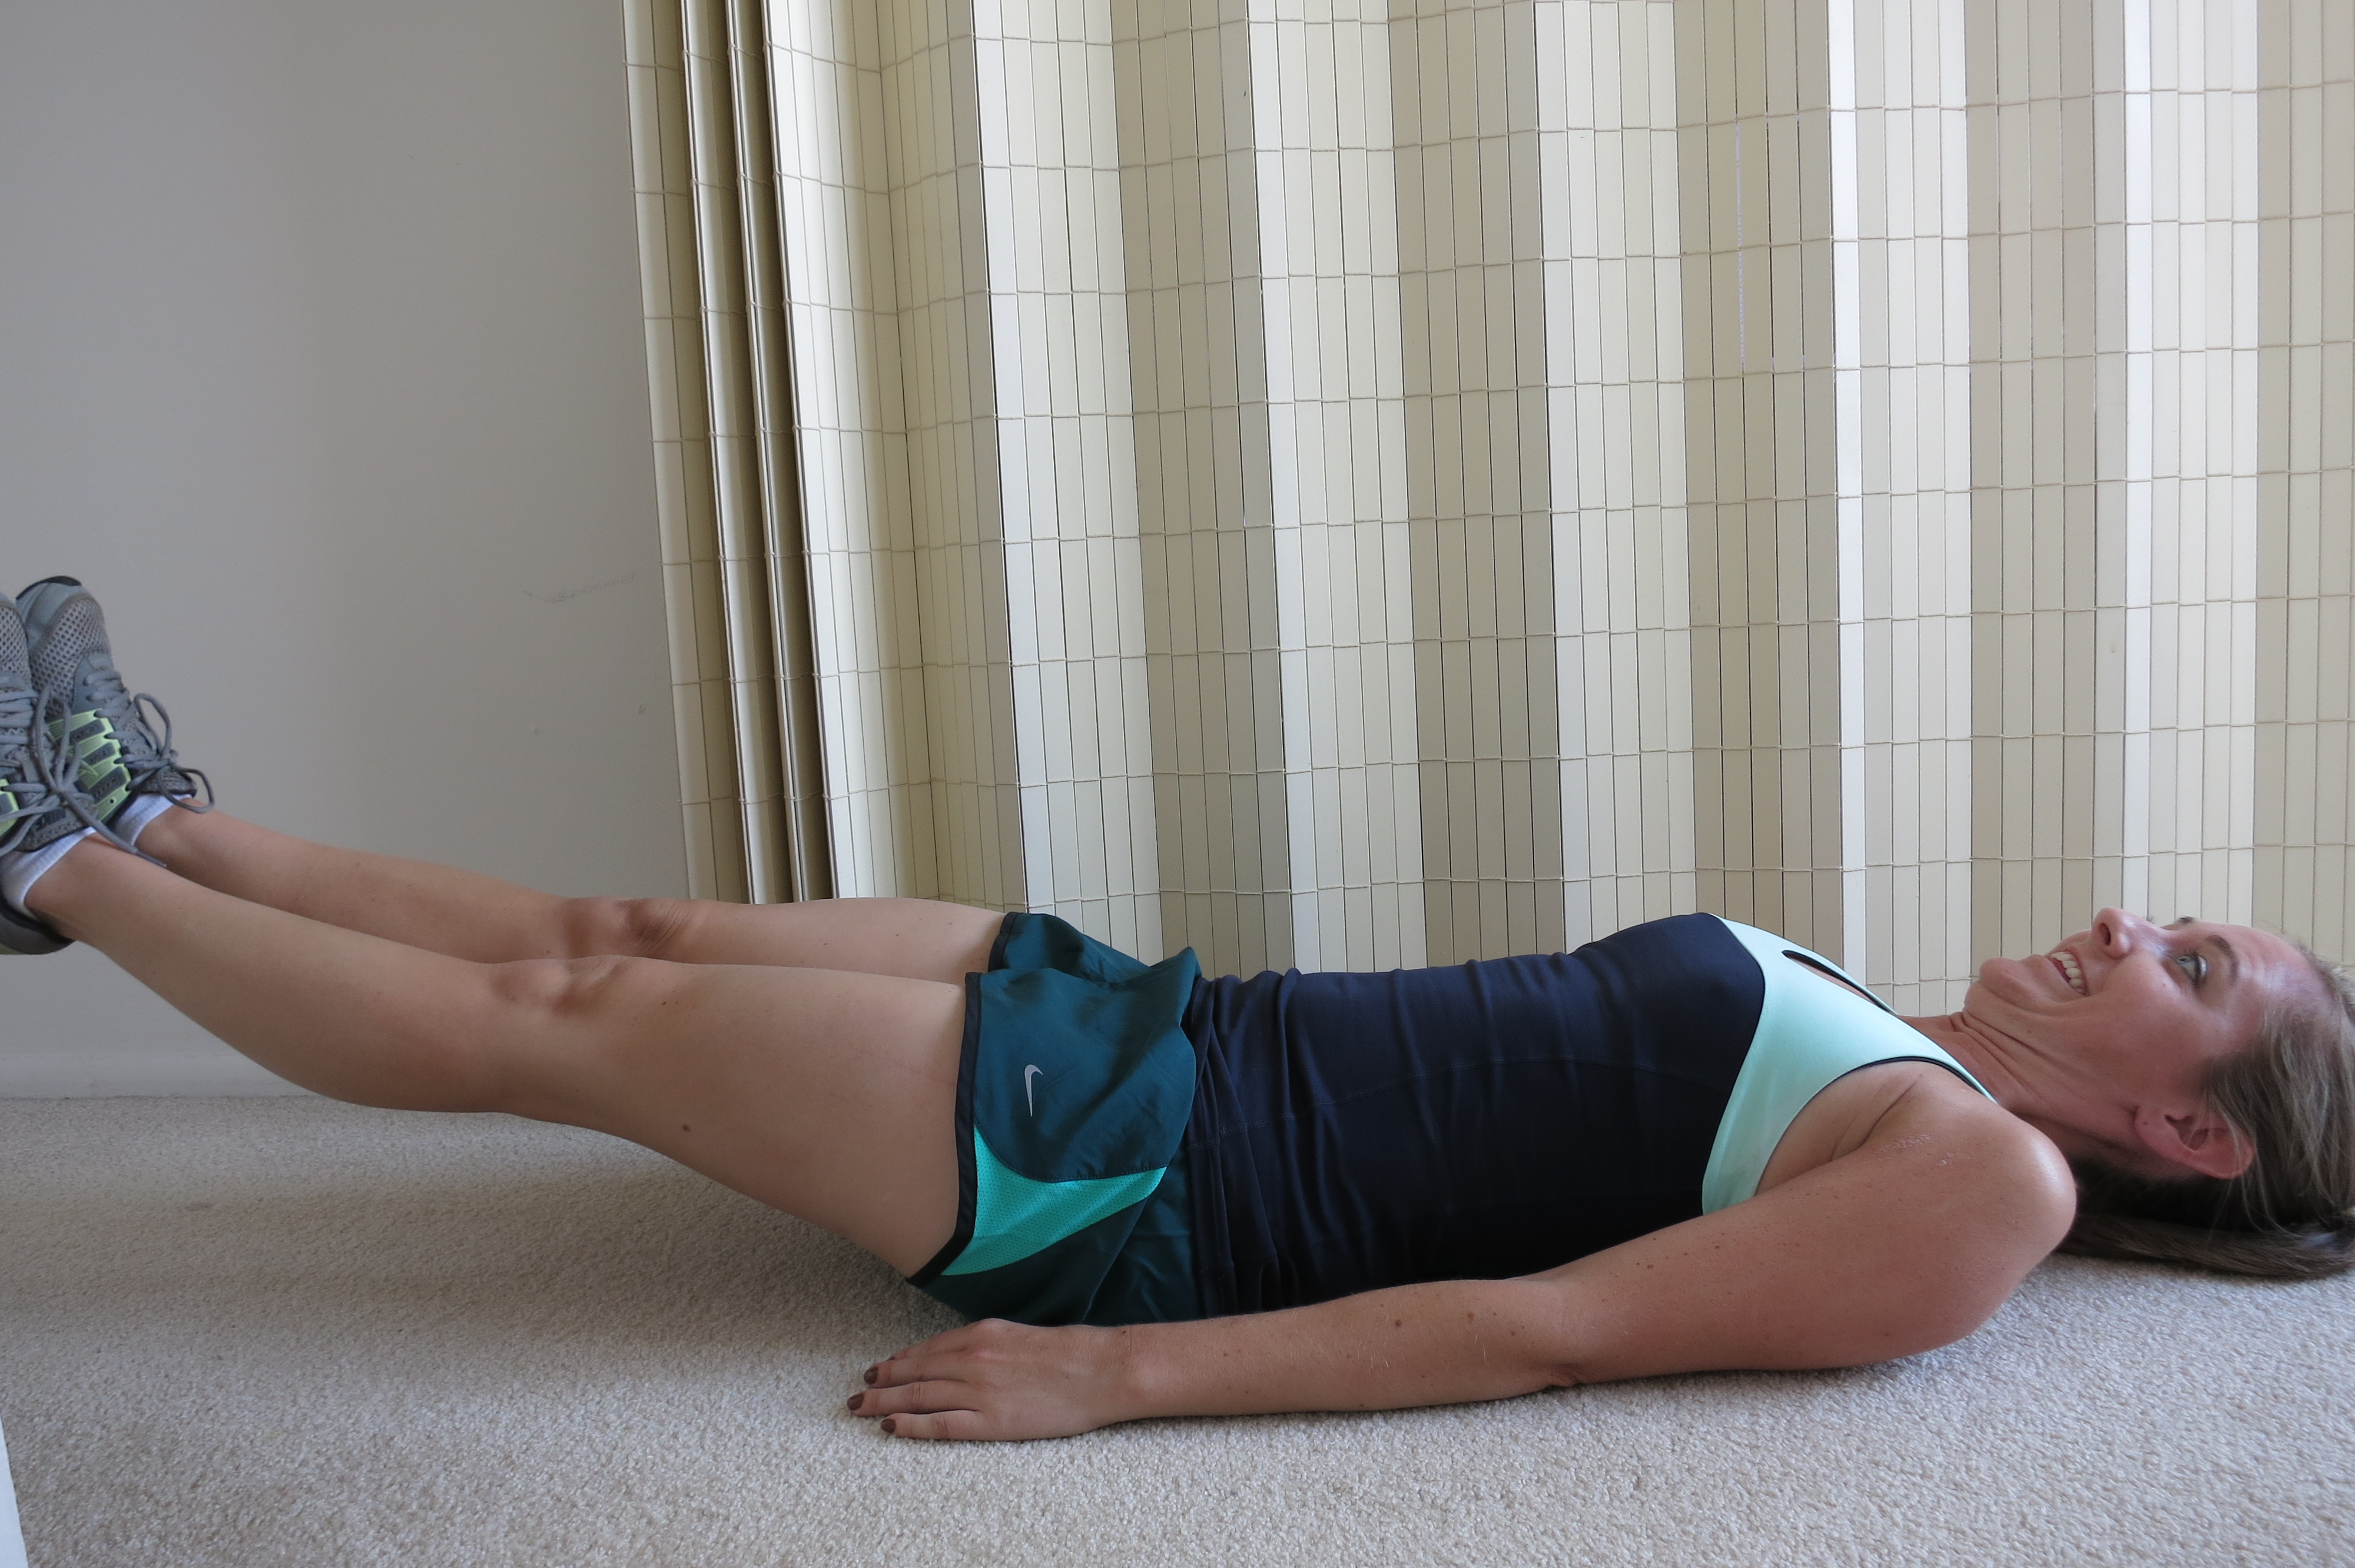
Step 1: Perform abdominal and pelvic floor contraction as in Level 1.
Step 2: Raise one leg so hip is bent 90 degrees.
Step 3: Raise opposite leg so hip is bent 90 degrees.
Step 4: Straighten out one leg, keeping heel close to the floor.
Step 5: Bring leg back to position in Step 3 (bent 90 degrees).
Step 6: Straighten opposite leg, keeping heel close to the floor.
Step 7: Bring leg back to position in Step 3 (bent 90 degrees).
Step 8: Continue alternating extending each leg (as if running!) while keeping abdominals contracted for 10 -20 repetitions.
Watch out! Do not push your back into the floor or arch it away from the floor. Your stomach should be sinking DOWN, not pushing UP toward the ceiling. If you cannot straighten your leg without moving your back, try sliding your heel on the floor. Progress to being able to straighten your leg with your heel just above the floor.
Perform exercise daily until you feel you are able to do 20 repetitions correctly.
Level 5
Level 5 Abdominal Strengthening
Step 1: Perform abdominal contraction as in Level 1.
Step 2: Lift one leg so hip is bent 90 degrees.
Step 3: Lift other leg so hip is bent 90 degrees.
Step 4: While maintaining your abdominal contraction, straighten BOTH legs so heels are just above floor.
Step 5: Bring both legs back up to being bent 90 degrees.
Step 6: Repeat straightening both legs at the same time for 10-20 repetitions.
Watch out! Do not push your back into the floor or arch it away from the floor. Your stomach should be sinking DOWN, not pushing UP toward the ceiling. If you cannot straighten your leg without moving your back, try sliding your heel on the floor. Progress to being able to straighten your leg with your heel just above the floor.
Perform exercise daily.
You also want to integrate the program into your daily life. Be sure to contract your abs when walking, getting up from a chair, carrying your baby (and that carseat…grrr), etc.
For humor, here is what family gatherings look like when you are related to a physical therapist and someone asks how to strengthen their abs:
***The content of www.kayleemay.com is for informational purposes only. The information presented is not to be taken as professional medical advice, diagnosis, or treatment. If you are having pain, or seeking medical advice, talk to your health care provider. Do not delay in seeking treatment because of information you have read on www.kayleemay.com. Taking recommendations presented on www.kayleemay.com is solely at your own risk***
Neck pain is more common than you may realize. According to the National Center for Health Statistics, 15% of American adults who present to the doctor’s office with pain report it in their necks. That number doesn’t include the areas of pain that are so closely related to the neck that poor neck mechanics may actually contribute to the pain. For example, 16% of adults report headaches and migraines, 28% report low back pain, 9% report shoulder pain and 8% report finger pain. These are all related to neck mechanics.
Neck pain takes its toll on all age groups. I have seen high school swimmers with severe neck pain, middle aged salesman with neck pain, and ninety year old bridge players with neck pain.
So what’s the scoop on this neck pain and how can we manage it and/or avoid it?
As always, musculoskeletal pain tells a story about how we move … or how we don’t move.
An excess motion in one direction more than another can lead to neck pain. For example, if swimmers get in the habit of breathing to one side during the free-style stroke, they are setting themselves up for pain. If salesmen consistently talk on their cell phone on the right ear with their head bent slightly to the right, they are setting themselves up for pain. If bridge players are constantly looking down at their cards through their bifocals, they are setting themselves up for pain. In each scenario, the simple solution is what I tell my patients: “Don’t do that!” When swimming, breathe out both sides. When talking on the phone, use speaker phone or headphones. When playing bridge, hold the cards higher. The solution seems very simple … because it is.
Our poor necks support and move a 10 pound head day in and day out. Consider how you move your head each day and what you can do to make sure your movements are symmetrical and not overly excessive.
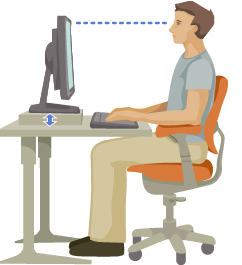
Aside from how we move our necks, we also have to think about what happens when we aren’t moving our necks. What positions do we sustain for long periods of time? The classic example of a sustained position for the neck is how our head is positioned when we are looking at our computers. If you sit at a computer day in and day out, it’s important that you position your head in the most neutral position. Follow these four recommendations for your computer set-up, and you should be good to go:
1. Sit with your knees and hips bent 90 degrees. You may have to raise/lower your chair or put a stool under your feet.
2. Sit all the way back in your chair so that your spine is supported. Most people tend to sit on the edge of their chairs, whether slouched over or erect. This may require you to scoot your chair closer to your computer.
3. The top of your computer monitor (the top of the frame) should be level with your eyes. More than likely, your computer screen may be up too high because when you set it up, you thought your line of eyesight should be straight to the screen. However, this causes a slightly extended position in your neck than can become bothersome.
4. Armrests are a great thing. Use them. A lot of people say “I carry tension in my shoulders” and feel like their upper traps are always sore. They are usually the people who don’t use their arm rests, so their muscles are just tired from holding up their arms all day at a keyboard.
Your sleeping position may also aggravate your neck. Consider whether or not your head is turned toward one side all night. Read my post The Ergonomics of Sleep for good sleeping position ideas.
***The content of www.kayleemay.com is for informational purposes only. The information presented is not to be taken as professional medical advice, diagnosis, or treatment. If you are having pain, or seeking medical advice, talk to your health care provider. Do not delay in seeking treatment because of information you have read on www.kayleemay.com. Taking recommendations presented on www.kayleemay.com is solely at your own risk***
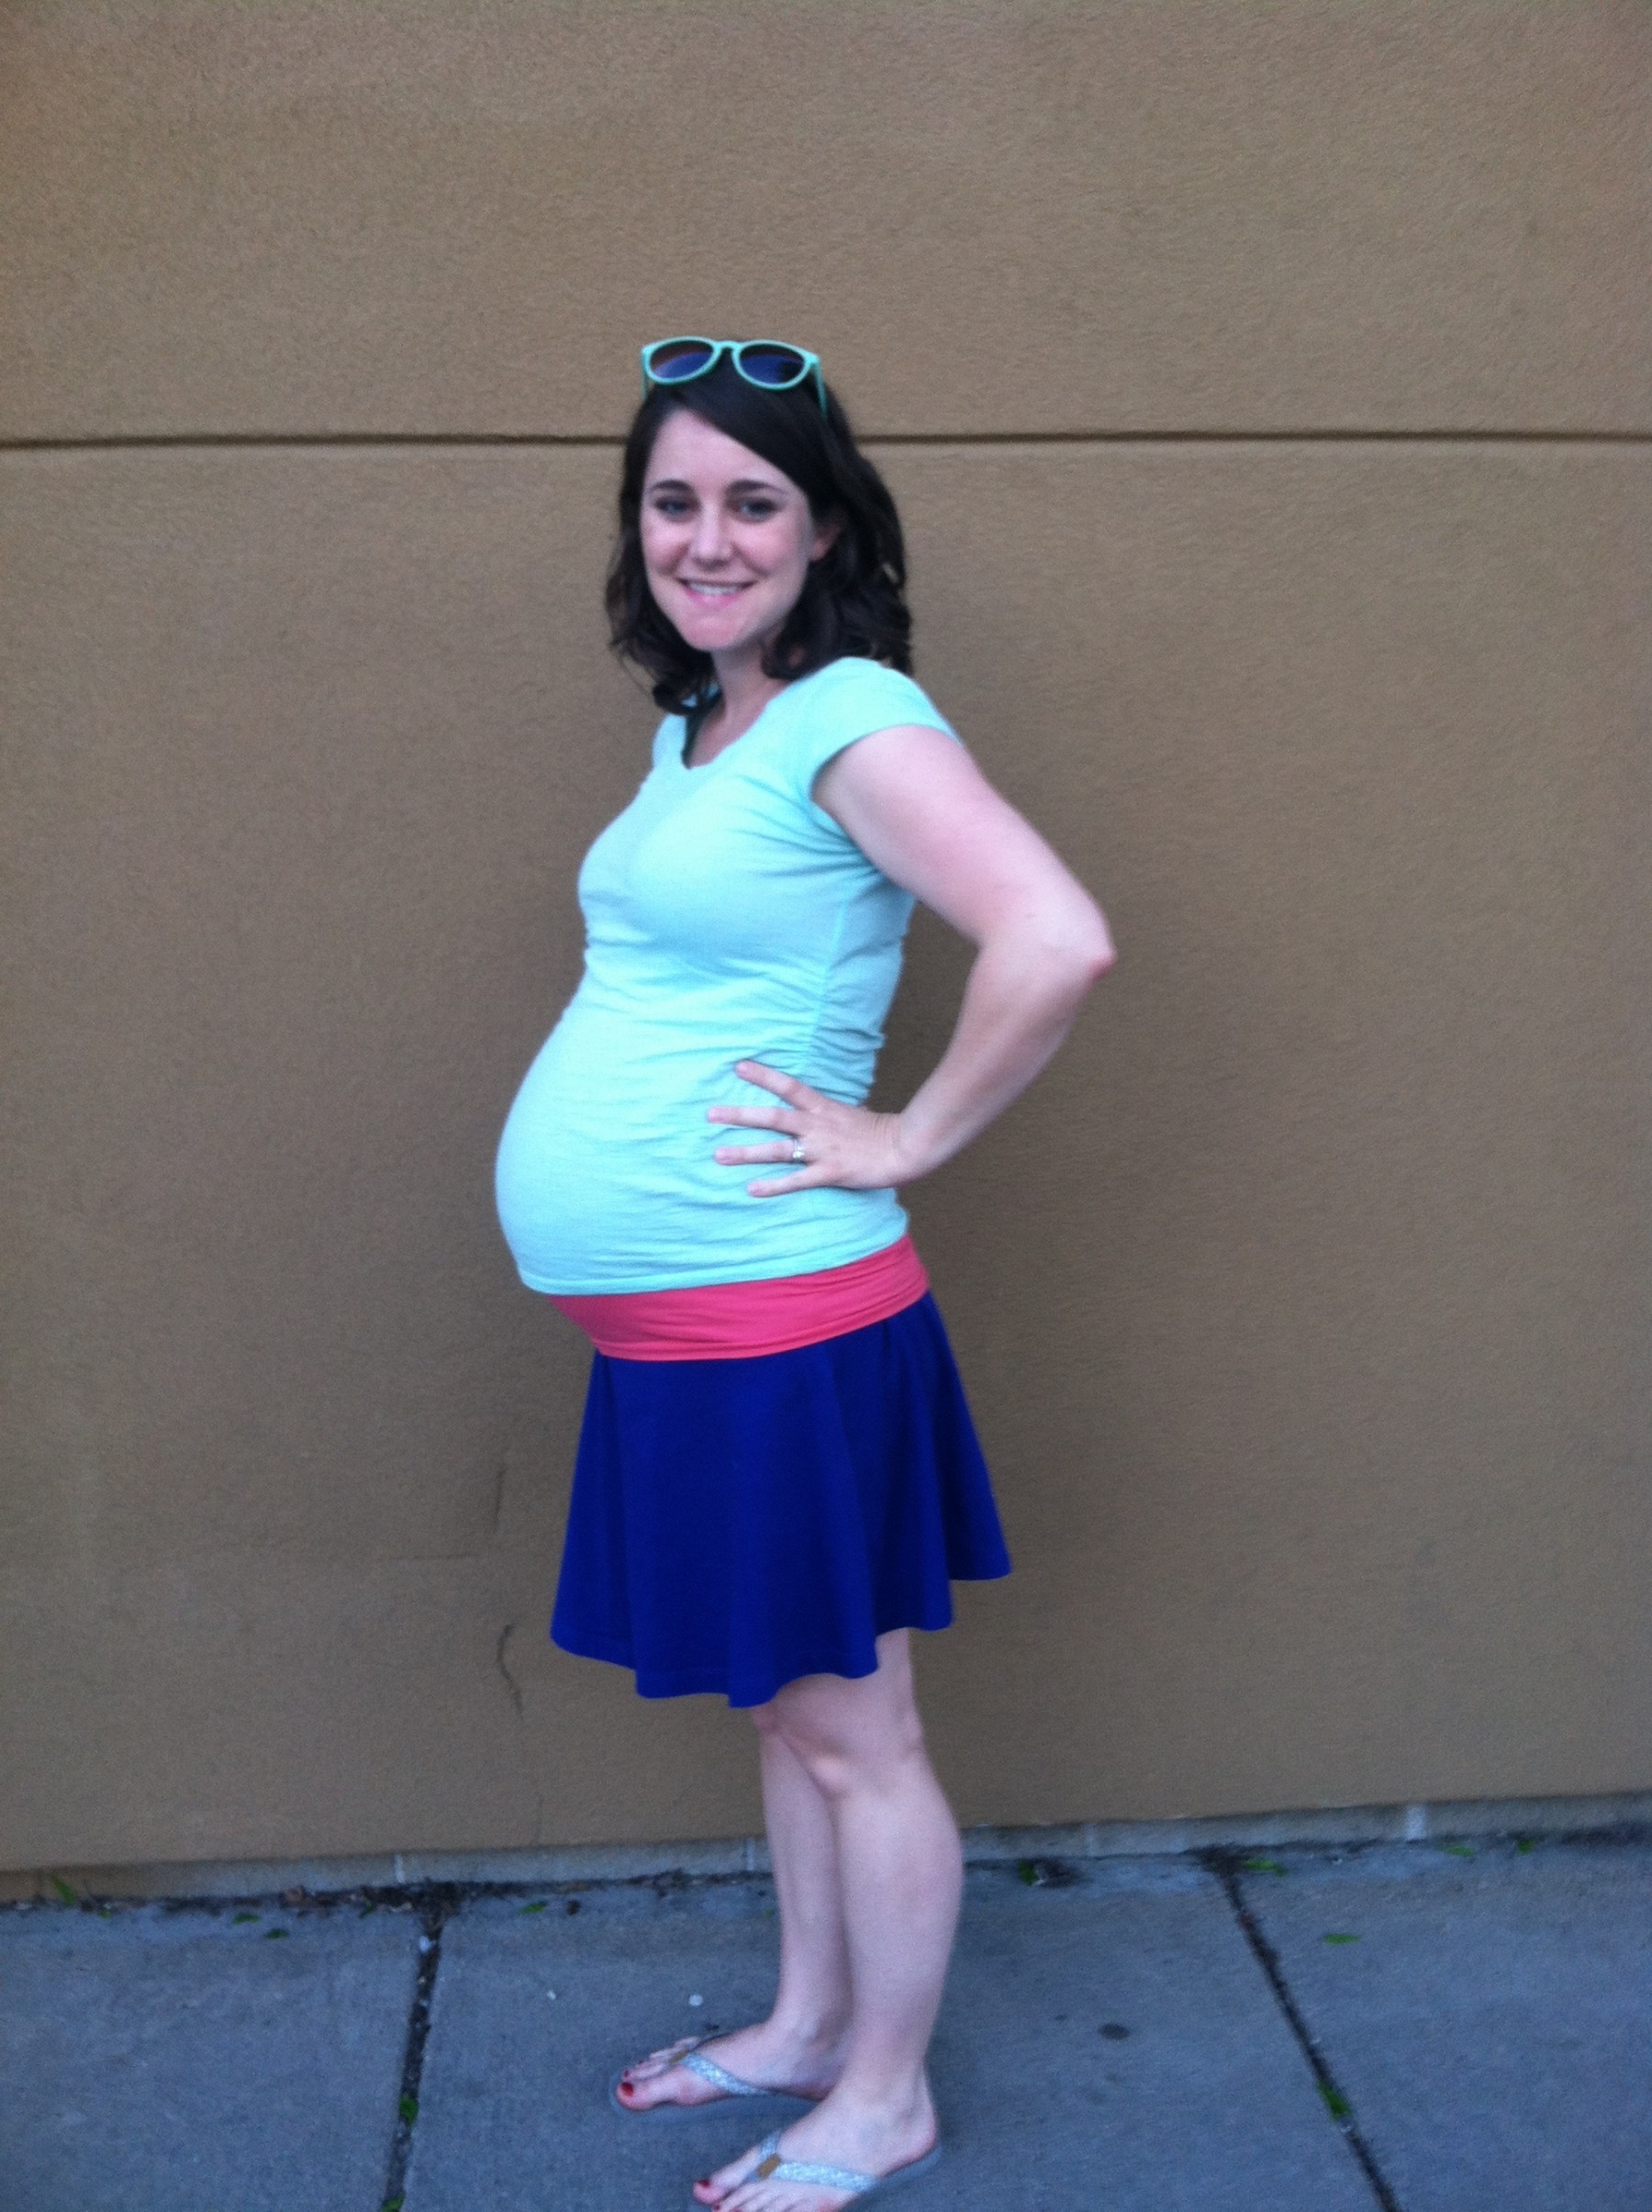
Lately I have been eating, sleeping, and dreaming pregnancy. So when I thought about what I want my readers to know about {health and body} this week, backaches during pregnancy seemed to be an appropriate topic.
Does anyone else’s husband break out into this song when you say to him, “My back aches…”?
No? Just my husband? Figures.
What is it about pregnancy that makes our backs hurt, sometimes to the point of sending shooting pain down our legs?
There are a million-ca-trillion things going on in our bodies during pregnancy that contribute to backaches.
One of the main reasons for back pain is our changing hormones. Yes, you read it right, those little buggers not only bring us into an emotional roller coaster and make us think cruel thoughts. The hormone relaxin also makes our ligaments looser, causing instability in our spine and pelvic area. Instability can lead to pain.
Weight gain, especially rapid weight gain, puts strain on our body by increasing pressure through all our joints. We are supposed to be gaining 25-35 pounds in pregnancy–sheesh! Think about how that weight can pull down on our backs, reducing the space between our vertebrae and causing compression of various nerves and blood vessels.
As pregnancy progresses, our cute bumps start to pull our backs forward leading to an extension force (as described here) The force that pulls our low backs forward also leads to pain.
Additionally we have lost our “natural back brace“, that is, our abdominals. Our abdominals are being stretched to the max, so no matter how hard we try, it’s nearly impossible to use our abdominals to support our backs during daily activities like walking, washing dishes, bending over to pick things up from the floor, and going up and down stairs.
So what’s a pregnant woman to do (besides listening to her husband’s version of Ciara ‘Got Me Good’ daily)? Refer to my previous post on the Top 3 Exercises Every Pregnant Woman Should Do. Each exercise can help relieve back pain and promote stability in our pelvic girdle and spine
.
***The content of www.kayleemay.com is for informational purposes only. The information presented is not to be taken as professional medical advice, diagnosis, or treatment. If you are having pain, or seeking medical advice, talk to your health care provider. Do not delay in seeking treatment because of information you have read on www.kayleemay.com. Taking recommendations presented on www.kayleemay.com is solely at your own risk***
Somewhere between college and #ihavesomanybillstopay aka adulthood, I lost the drive (and time) to keep up with the latest new music. I used to go for runs just to listen to a new CD (I can’t wait to explain to Baby Hiatt in 10 years what a CD is). And when the iPod was invented, I created the greatest playlists to fit my mood for my runs….which may explain why I am a slow runner (I was just an emo kid trying to hash out my emotions on some trail). But something happened–maybe work? a career? Katy Perry?–and I just can’t keep up with new music.
Now, my workouts are to the soundtrack of opinionated TED talkers. If I love the TED talk, I go home to Davey and spend twice as long explaining the talk to him than it took the speaker. If I hate the TED talk, I argue in my head with them for 20-30 minutes and come up with my own talk to rival theirs.
I love sleep. My husband can tell you that I take my sleep time very seriously. My well being (and his) depends on how well I sleep.
But I have noticed with my patients that sleep can have a negative impact on our muscles and bones if we sleep in the wrong position.
With every evaluation I perform at the clinic, I ask “What is your preferred sleeping position?” because the position we lay in for a long period of time is the position that directs the way our body moves during the day.
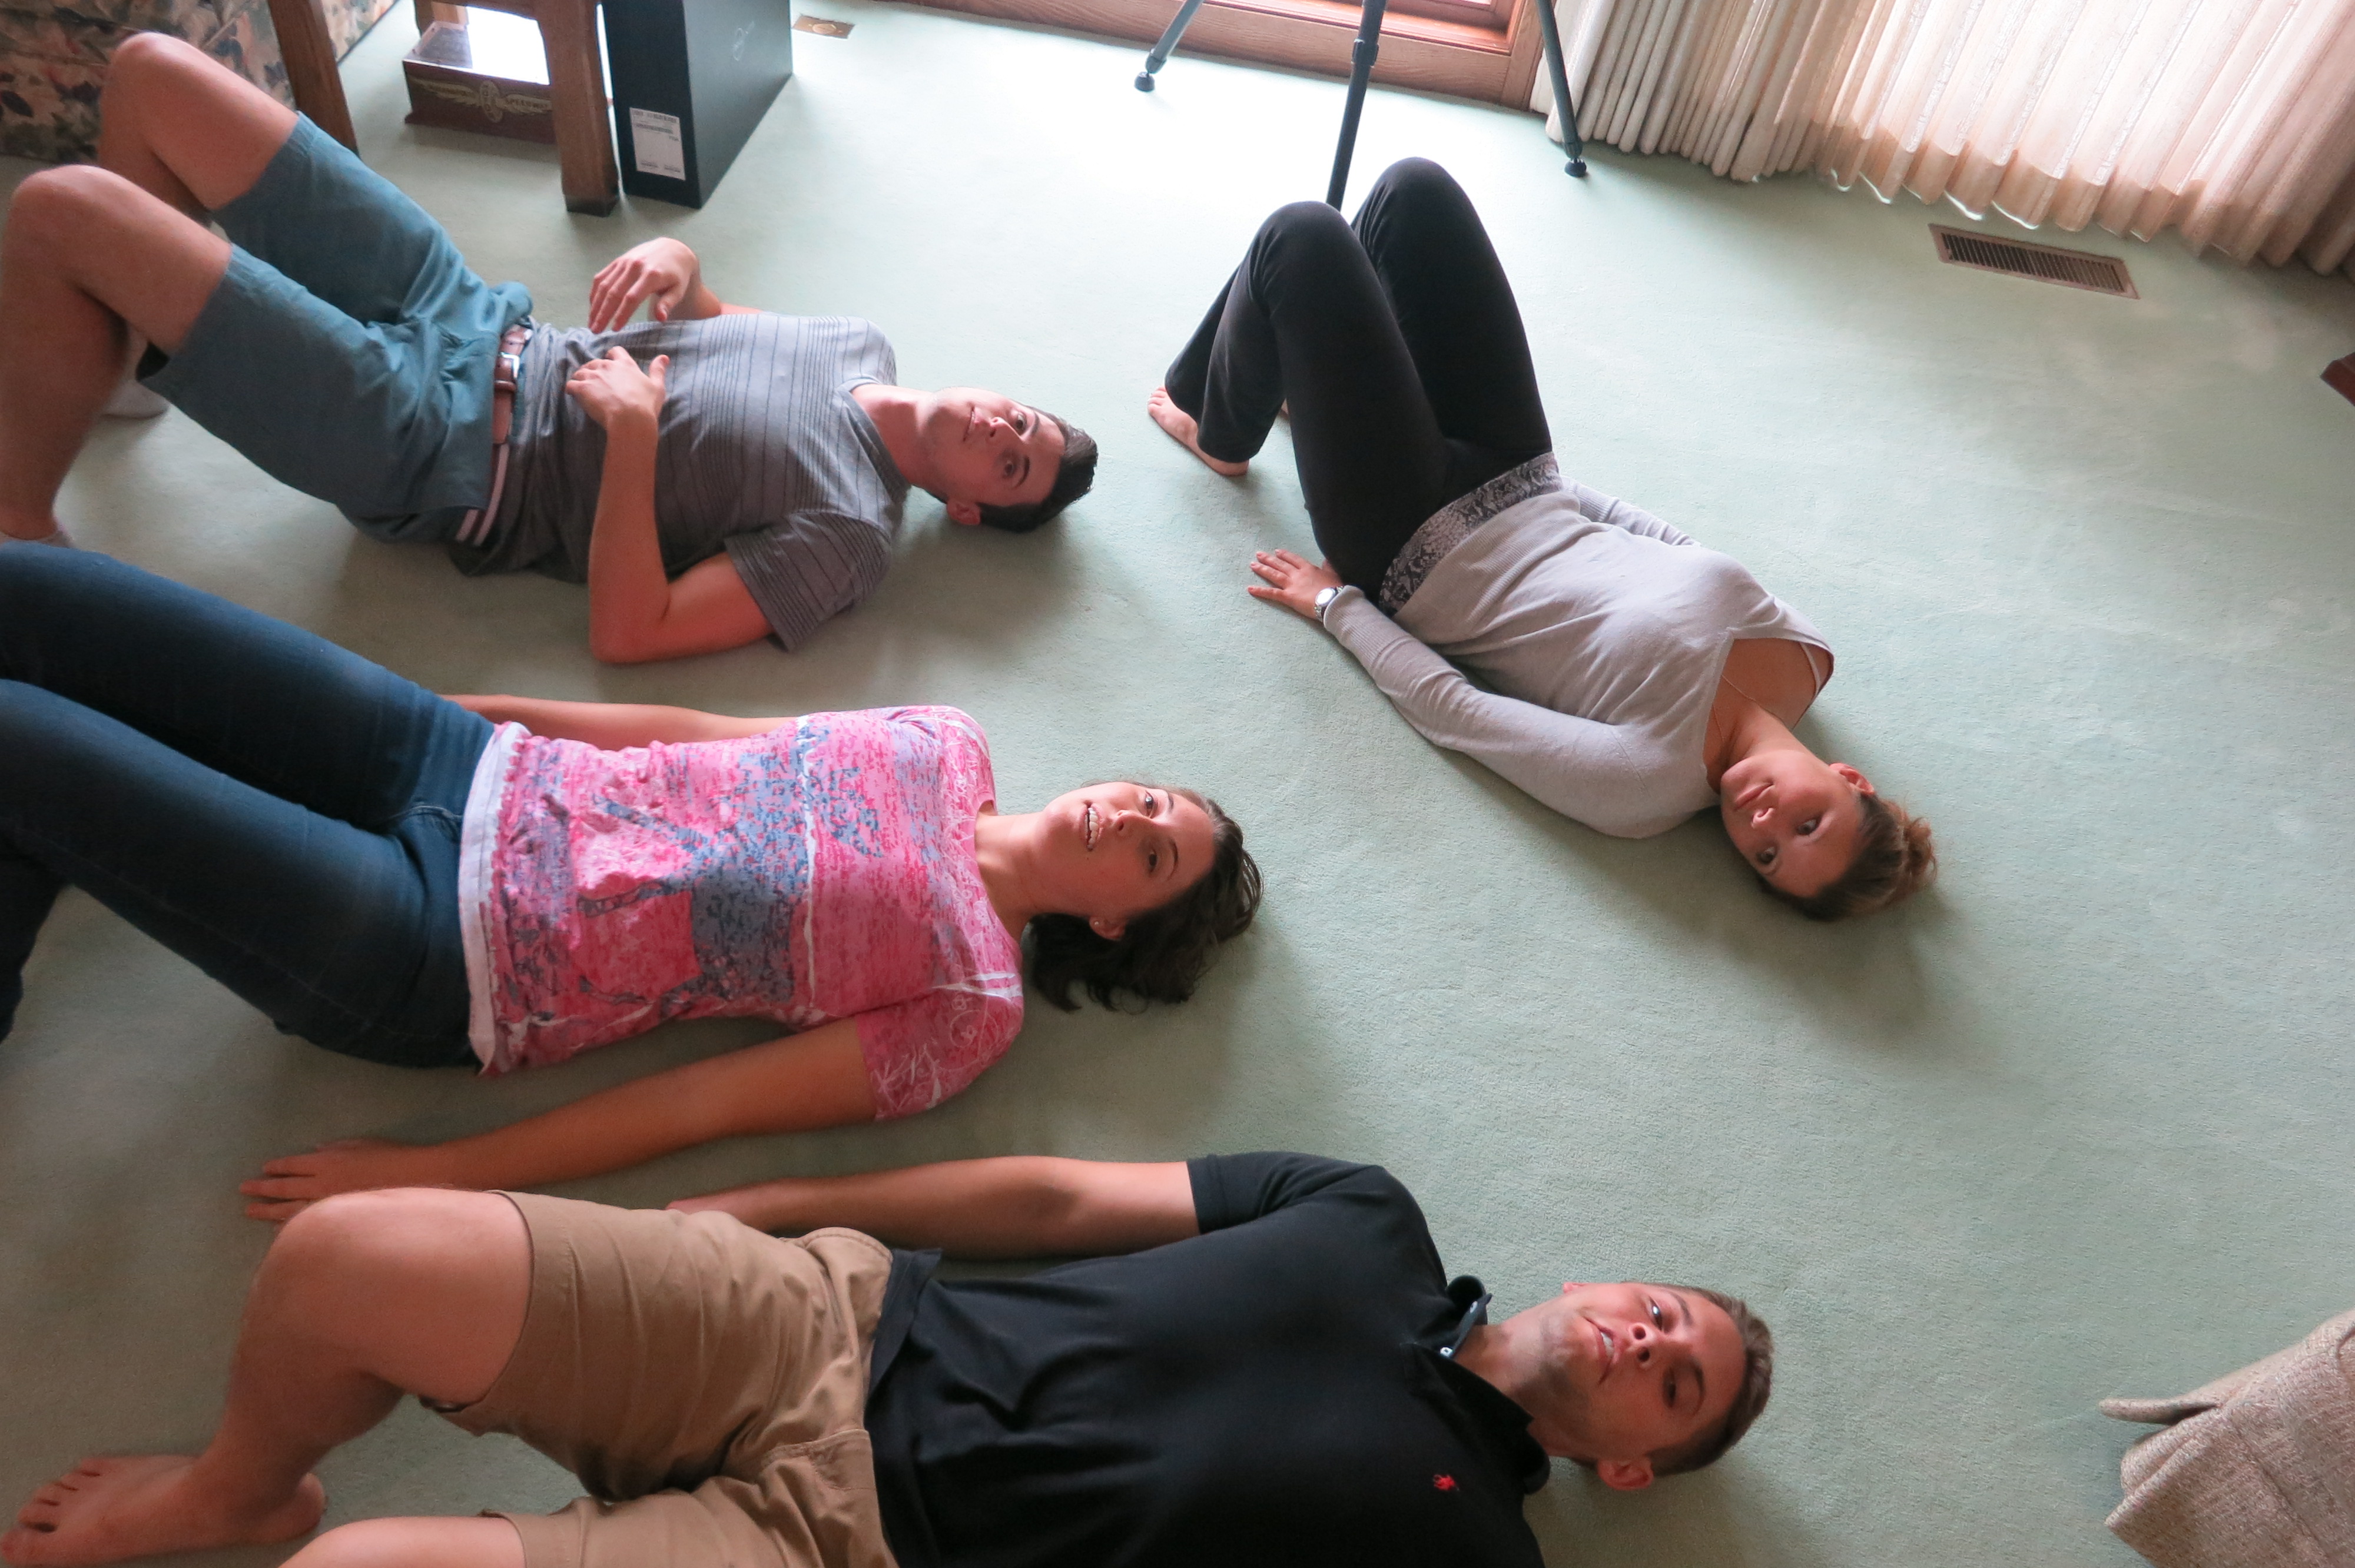
Take for example what I like to call the “road kill” position, a favorite among young women:
If you like to sleep in this position, you are all over a mess the next day. My neck hurts just looking at this! People who sleep in this position traditionally face the same way each night, which overly stretches their neck. Upon evaluation, I notice that they have too much neck rotation one direction and not enough rotation the other direction. The road kill sleeper may also stick one arm under a pillow, meaning that night after night, they over-stretch their rotator cuff muscles (the shoulder stabilizers), making the shoulder weak, loose, and often painful.
The road kill sleeper also comes into the physical therapy clinic with low back pain and hip pain because the asymmetrical alignment of the hips rotates the pelvis and low back.
Night after night, this makes the back overly flexible into rotation, meaning that the back will tend to rotate during daily activities (like walking, climbing stairs). The lumbar spine (low back) is not designed for rotation, so rotating the back during daily activities leads to pain. When a young woman tells me she has “sciatic pain” (a generic term for pain that is referred down one leg), chances are that she sleeps with her legs in an asymmetrical position.
There are a number of ways we sleep, and night after night, we allow our bodies to adapt and form into our preferred sleeping position. So what’s the best position to sleep in?
Every person is different, but it’s good to keep symmetry in mind. The legs should be symmetrical, the neck should be in a neutral position, and the low back should be in a neutral position (not too bent, not too extended, not too rotated). Try laying on your side with 1-2 pillows between your knees (all the way down to your shins). If you have shoulder or neck pain, it’s a good idea to hug a pillow with your top arm. Make sure your bottom arm isn’t consumed under your head pillow….you’re just asking for your hand to go numb because you’re impinging on nerves.
Changing the way you sleep may seem an impossible task. You’ll likely wake up in the road kill position with the extra pillows on the floor — but keep trying. If we start protecting our bodies now, they will last us a lot longer!
***The content of www.kayleemay.com is for informational purposes only. The information presented is not to be taken as professional medical advice, diagnosis, or treatment. If you are having pain, or seeking medical advice, talk to your health care provider. Do not delay in seeking treatment because of information you have read on www.kayleemay.com. Taking recommendations presented on www.kayleemay.com is solely at your own risk***
As technology becomes a greater influence, it becomes more common for me to hear from my patients that they previously looked up exercises to treat their injury on Google before they even get to me. Part of me thinks, Yes! People are taking ownership of their health! And the other part of me cringes in anticipation to hear what they read online. It’s a great thing that we have so many resources at our fingertips to learn how to take care of our bodies, but it’s really hard to know what to trust when reading through things online.
The runners I treat all have their own understanding of how to strengthen their abdominals. So I put myself in my patients’ (running) shoes and Googled “abdominal strengthening exercises” to see where they were getting their information.
I wanted to cry. None of them were exercises I would refer to the majority of my patients, and certainly none of them were exercises I would suggest to my runners.
When strengthening our abdominals (which is an important part of a good running stride), we have to consider what movements are happening during the exercise. We want the exercise to essentially mimic the movement of the stride. When does the movement of a sit-up occur during running?! NEVER! When does a “crunch” happen during a running stride?! NEVER! So why is the internet telling us to bend our backs repeatedly to strengthen our abs for running? Just because we feel a muscle burn does not mean the exercise is beneficial.
During running, we want our low back to stay relatively still. The movement we generate is coming from our limbs. I want to provide runners with a guide to abdominal strengthening that mimics the running stride.
This post will take you through 5 abdominal exercises, each progressively more difficult. You will notice that the low back does not move at any point in the exercises. Rather, the abs work to stabilize as the limb movement becomes progressively more challenging. To work through the exercises, you must first successfully perform up to 20 repetitions correctly before progressing to the next exercise. Therefore, you may be on one level for up to 2 weeks before you feel you are ready for the next. If you can not perform an exercise without moving your low back (arching it away from the floor, pushing into the floor, or allowing your abdominal muscles to “pooch” up toward the ceiling), you must go back down to the previous level.
Level 1
Level I Abdominal Strengthening for Runners
Step 1: Lay on back with knees bent and feet flat on floor.
Step 2: Contract abdominals buy pulling navel toward your spine as you exhale.
Step 3: Hold 5-10 seconds.
Step 4: Repeat 10-20 times.
Watch out! Do not push your back into the floor or arch it away from the floor. Your stomach should be sinking DOWN, not pushing UP toward the ceiling.
Perform exercise daily until you feel you are able to do 20 repetitions correctly.
Level 2
Level 2 Abdominal Strengthening for Runners
Step 1: Perform abdominal contraction as in Level 1.
Step 2: Raise one leg so hip is bent 90 degrees while maintaining abdominal contraction.
Step 3: Place leg back to starting position as in Step 1.
Step 4: Raise contralateral leg so hip is bent 90 degrees while maintaining abdominal contraction.
Step 5: Place leg back to starting position as in Step 1.
Step 6: Repeat 10-20 times.
Watch out! Do not push your back into the floor or arch it away from the floor. Your stomach should be sinking DOWN, not pushing UP toward the ceiling.
Perform exercise daily until you feel you are able to do 20 repetitions correctly.
Level 3
Level 3 Abdominal Strengthening for Runners
Step 1: Perform abdominal contraction as in Level 1.
Step 2: Raise one leg so hip is bent 90 degrees while maintaining an abdominal contraction.
Step 3: Maintain position of Step 2 and raise opposite leg so hip is bent 90 degrees.
Step 4: Place one foot back to starting position (keep those abs contracted!)
Step 5: Place the other foot back to the starting position (keep those abs contracted!)
Step 6: Repeat 10-20 times.
Watch out! Do not push your back into the floor or arch it away from the floor. Your stomach should be sinking DOWN, not pushing UP toward the ceiling.
Perform exercise daily until you feel you are able to do 20 repetitions correctly.
Level 4
Level 4 Abdominal Strengthening for Runners
Step 1: Perform abdominal contraction as in Level 1.
Step 2: Raise one leg so hip is bent 90 degrees.
Step 3: Raise opposite leg so hip is bent 90 degrees.
Step 4: Straighten out one leg, keeping heel close to the floor.
Step 5: Bring leg back to position in Step 3 (bent 90 degrees).
Step 6: Straighten opposite leg, keeping heel close to the floor.
Step 7: Bring leg back to position in Step 3 (bent 90 degrees).
Step 8: Continue alternating extending each leg (as if running!) while keeping abdominals contracted for 10 -20 repetitions.
Watch out! Do not push your back into the floor or arch it away from the floor. Your stomach should be sinking DOWN, not pushing UP toward the ceiling. If you cannot straighten your leg without moving your back, try sliding your heel on the floor. Progress to being able to straighten your leg with your heel just above the floor.
Perform exercise daily until you feel you are able to do 20 repetitions correctly.
Level 5
Level 5 Abdominal Strengthening for Runners
Step 1: Perform abdominal contraction as in Level 1.
Step 2: Lift one leg so hip is bent 90 degrees.
Step 3: Lift other leg so hip is bent 90 degrees.
Step 4: While maintaining your abdominal contraction, straighten BOTH legs so heels are just above floor.
Step 5: Bring both legs back up to being bent 90 degrees.
Step 6: Repeat straightening both legs at the same time for 10-20 repetitions.
Watch out! Do not push your back into the floor or arch it away from the floor. Your stomach should be sinking DOWN, not pushing UP toward the ceiling. If you cannot straighten your leg without moving your back, try sliding your heel on the floor. Progress to being able to straighten your leg with your heel just above the floor.
***The content of www.kayleemay.com is for informational purposes only. The information presented is not to be taken as professional medical advice, diagnosis, or treatment. If you are having pain, or seeking medical advice, talk to your health care provider. Do not delay in seeking treatment because of information you have read on www.kayleemay.com. Taking recommendations presented on www.kayleemay.com is solely at your own risk***
This week brought the warmest temperatures we have felt since last fall and our first visitor to Minnesota! Mom made her way to Minnesota on Monday and was able to stay until Thursday. As usual, I am left wishing I took more photos to capture our time together. It was so much fun to show Mom around our new town!
My mom is awesomely thoughtful! We came home from work to find Easter treats. 🙂 We also found a new box of Kleenex in our Kleenex dispenser that had been empty since January, extra food in a our refrigerator, Easter cookies…etc!! Mom things. 🙂
Davey and I have been getting outside every chance we get in this warm weather. We keep thinking it’s going to snow again, so we better get outside when we can. We took a long walk around one of Minneapolis’ many lakes!
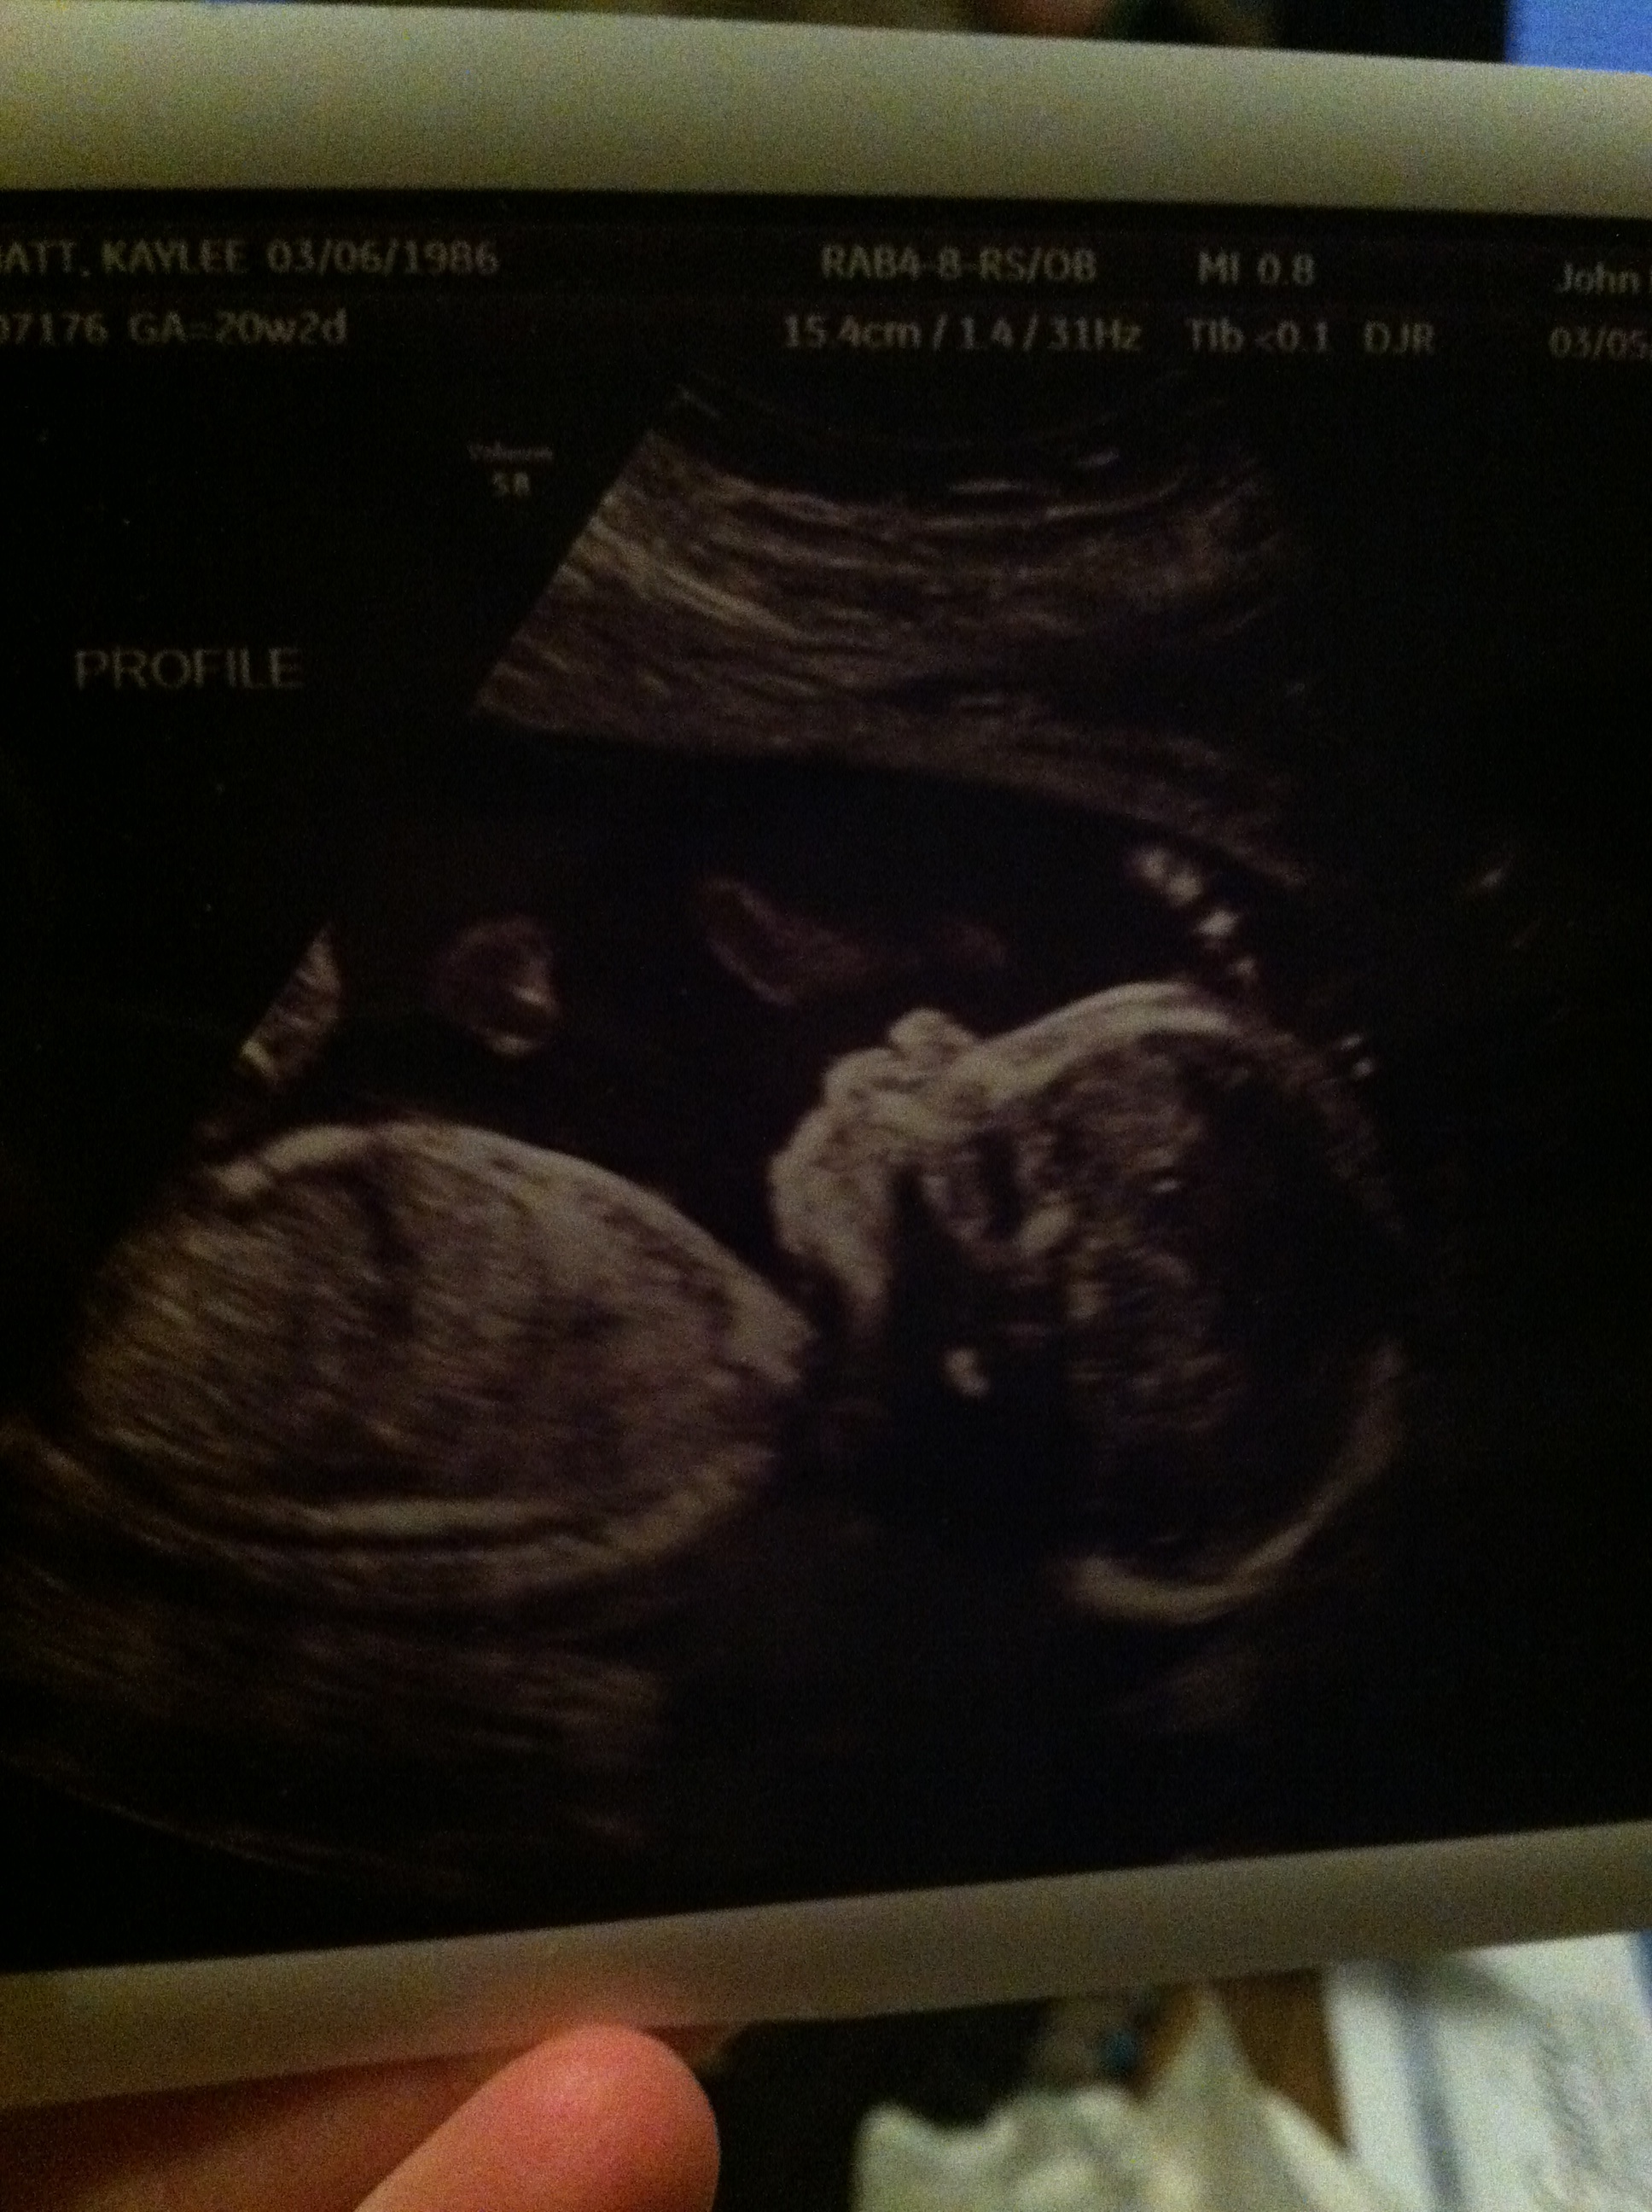
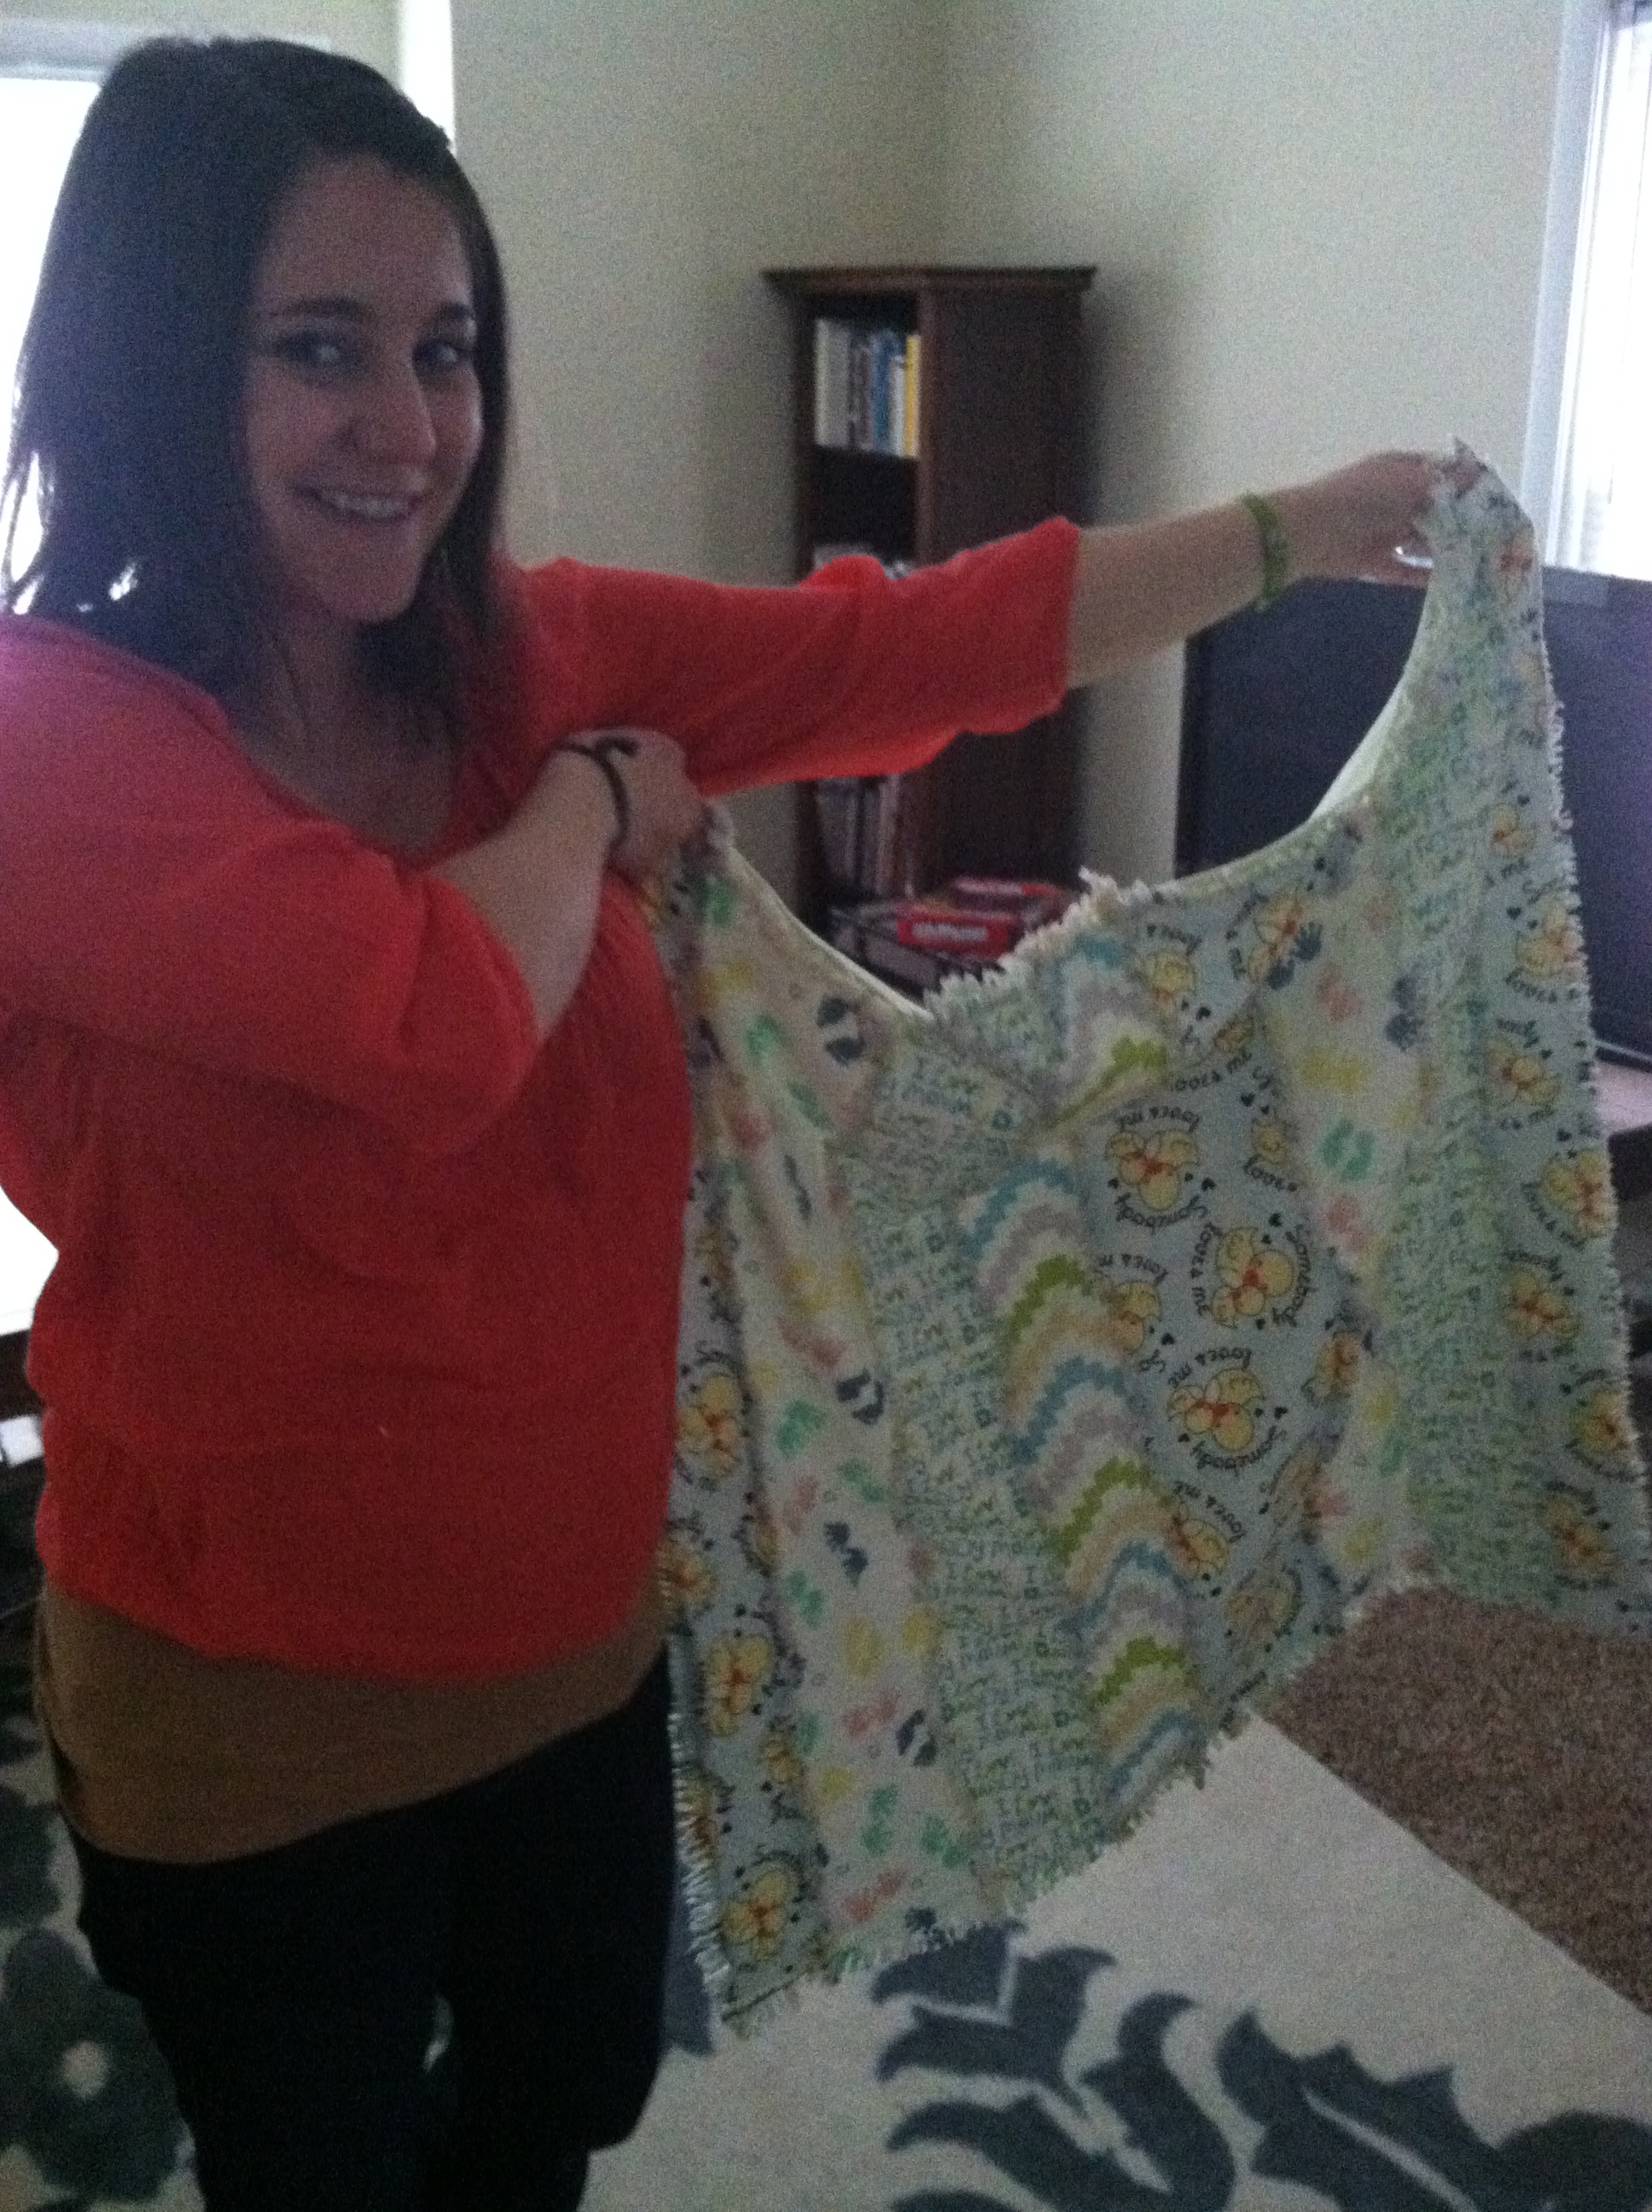
And Baby Hiatt has started to collect handmade baby blankets from my sweet, thoughtful patients!
We have 14 more weeks until we get to meet Baby Hiatt…I can’t stop thinking about what the baby will be like!