While I was uploading videos onto my computer from this weekend (a process that has now taken over 24 hours…), I found this little gem….Davey’s first diaper change caught on camera just hours after Seton was born. At the time, we didn’t realize the diaper would have a blue line if it was wet. In my post labor exhaustion, I told Davey to “just touch it” to see if it was wet bahahahahaha
Growing up, my family rarely went out to dinner. When we did, we were not allowed to order sodas because they were too expensive. Water for everyone, it was. While this was frustrating as a ten year old eyeing the root beer on the table next to us, I learned the importance of saving money by resisting the temptation to spend it on things that don’t matter.
Luckily, my husband was taught the same thing.
My husband is in the business of saving money to make money. His theories on saving money have debunked the old saying, “money doesn’t grow on trees.” The truth is, if you have a little money, you can make a little money. If you have a lot of money, you can make a lot of money. The trick is to save enough money and plant it in the right soil.
Since Davey’s job is showing people how to save money, invest money, and watch money grow, I asked him to name the most important steps for someone to take control of his financial life.
1. Figure out where you spend your money
Start by making two lists. The first list should include all your monthly essentials such as bills, groceries, and rent/mortgage. Make a second list of things you spend money on each month but you don’t need to live. Include entertainment, cable, Internet, and haircuts.
Add up all these expenses and subtract them from your monthly take-home pay. If it looks like you are coming up even, it’s safe to say you going into debt. Consider making lifestyle changes by coming up with ways to live below your means. By getting rid of internet at home, learning to cut you own hair, bringing lunch to work, and going to a pre-paid cell phone service you can easily keep another $100-$200 in your pocket.
2. Start using cash
Credit cards can be a good thing for building credit and getting rewards. However, it is easy to fall into the trap of spending money you do not actually have. By using cash, you will have better control over your finances. If you are in debt, using cash should be a priority. Quite simply, if you don’t have the cash for it, you cannot afford it and you should NOT be buying it.
3. Pay down debt
There is good debt and bad debt. Good debt is necessary debt like student loans or home mortgage. Bad debt is generally considered voluntary and related to credit cards and unsecured loans. Pay off all bad debt first. If you have credit card debt, pay off one card at a time. Start to pay off chunks of the high interest card first while paying the minimums on the others. Also explore using debt consolidation such as a home equity line of credit (HELOC). This should get all your debt in one place and usually at a lower interest rate. If you do this, be sure to not go back to the credit cards.
Here are some resources:
National Foundation for credit counseling (www.nfcc.org)
Association of Independent Consumer Credit Counseling Agencies (www.aiccca.org)
4. Save and live below your means
Start your retirement savings… NOW. This is the most important thing you can do for yourself. Talk to your human resources at work to discover how you can have a portion of your paycheck immediately deducted and placed in a retirement account. Additionally, consider starting an IRA through an investment firm.
Also, don’t forget to have an emergency fund. Everyone’s emergency fund size is different and should be at least 3-months of your essential living expenses. This money should only be used for emergencies.
5. Make money automatic and automatically
Start by trying to make everything automatic. Use the budget lists you created in step 1 to figure out what bills you have and when they are due. If you get paid on the 1st and the 15th of the month, be sure to set up automatic bill payments equally to each paycheck.
To make saving for retirement automatic, talk to human resources at work (see above) or call your bank and ask them to move $100 on the 1st and 15th of each month from your checking account where your paycheck goes to a separate savings account.
The trick is to get money out of your account before you have a chance to spend it. Pay yourself first. If you decide to go the whole month without saving but pledge to save whatever is left at the end, chances are you will have nothing left to save.
With these 5 steps, you will seeing your savings grow and have more control over your financial life.
Our household has been eating oatmeal for breakfast for as long as we have been a household. We eat it completely for the health benefits and not at all for the taste. Because it tastes disgusting. Let’s stop kidding ourselves.
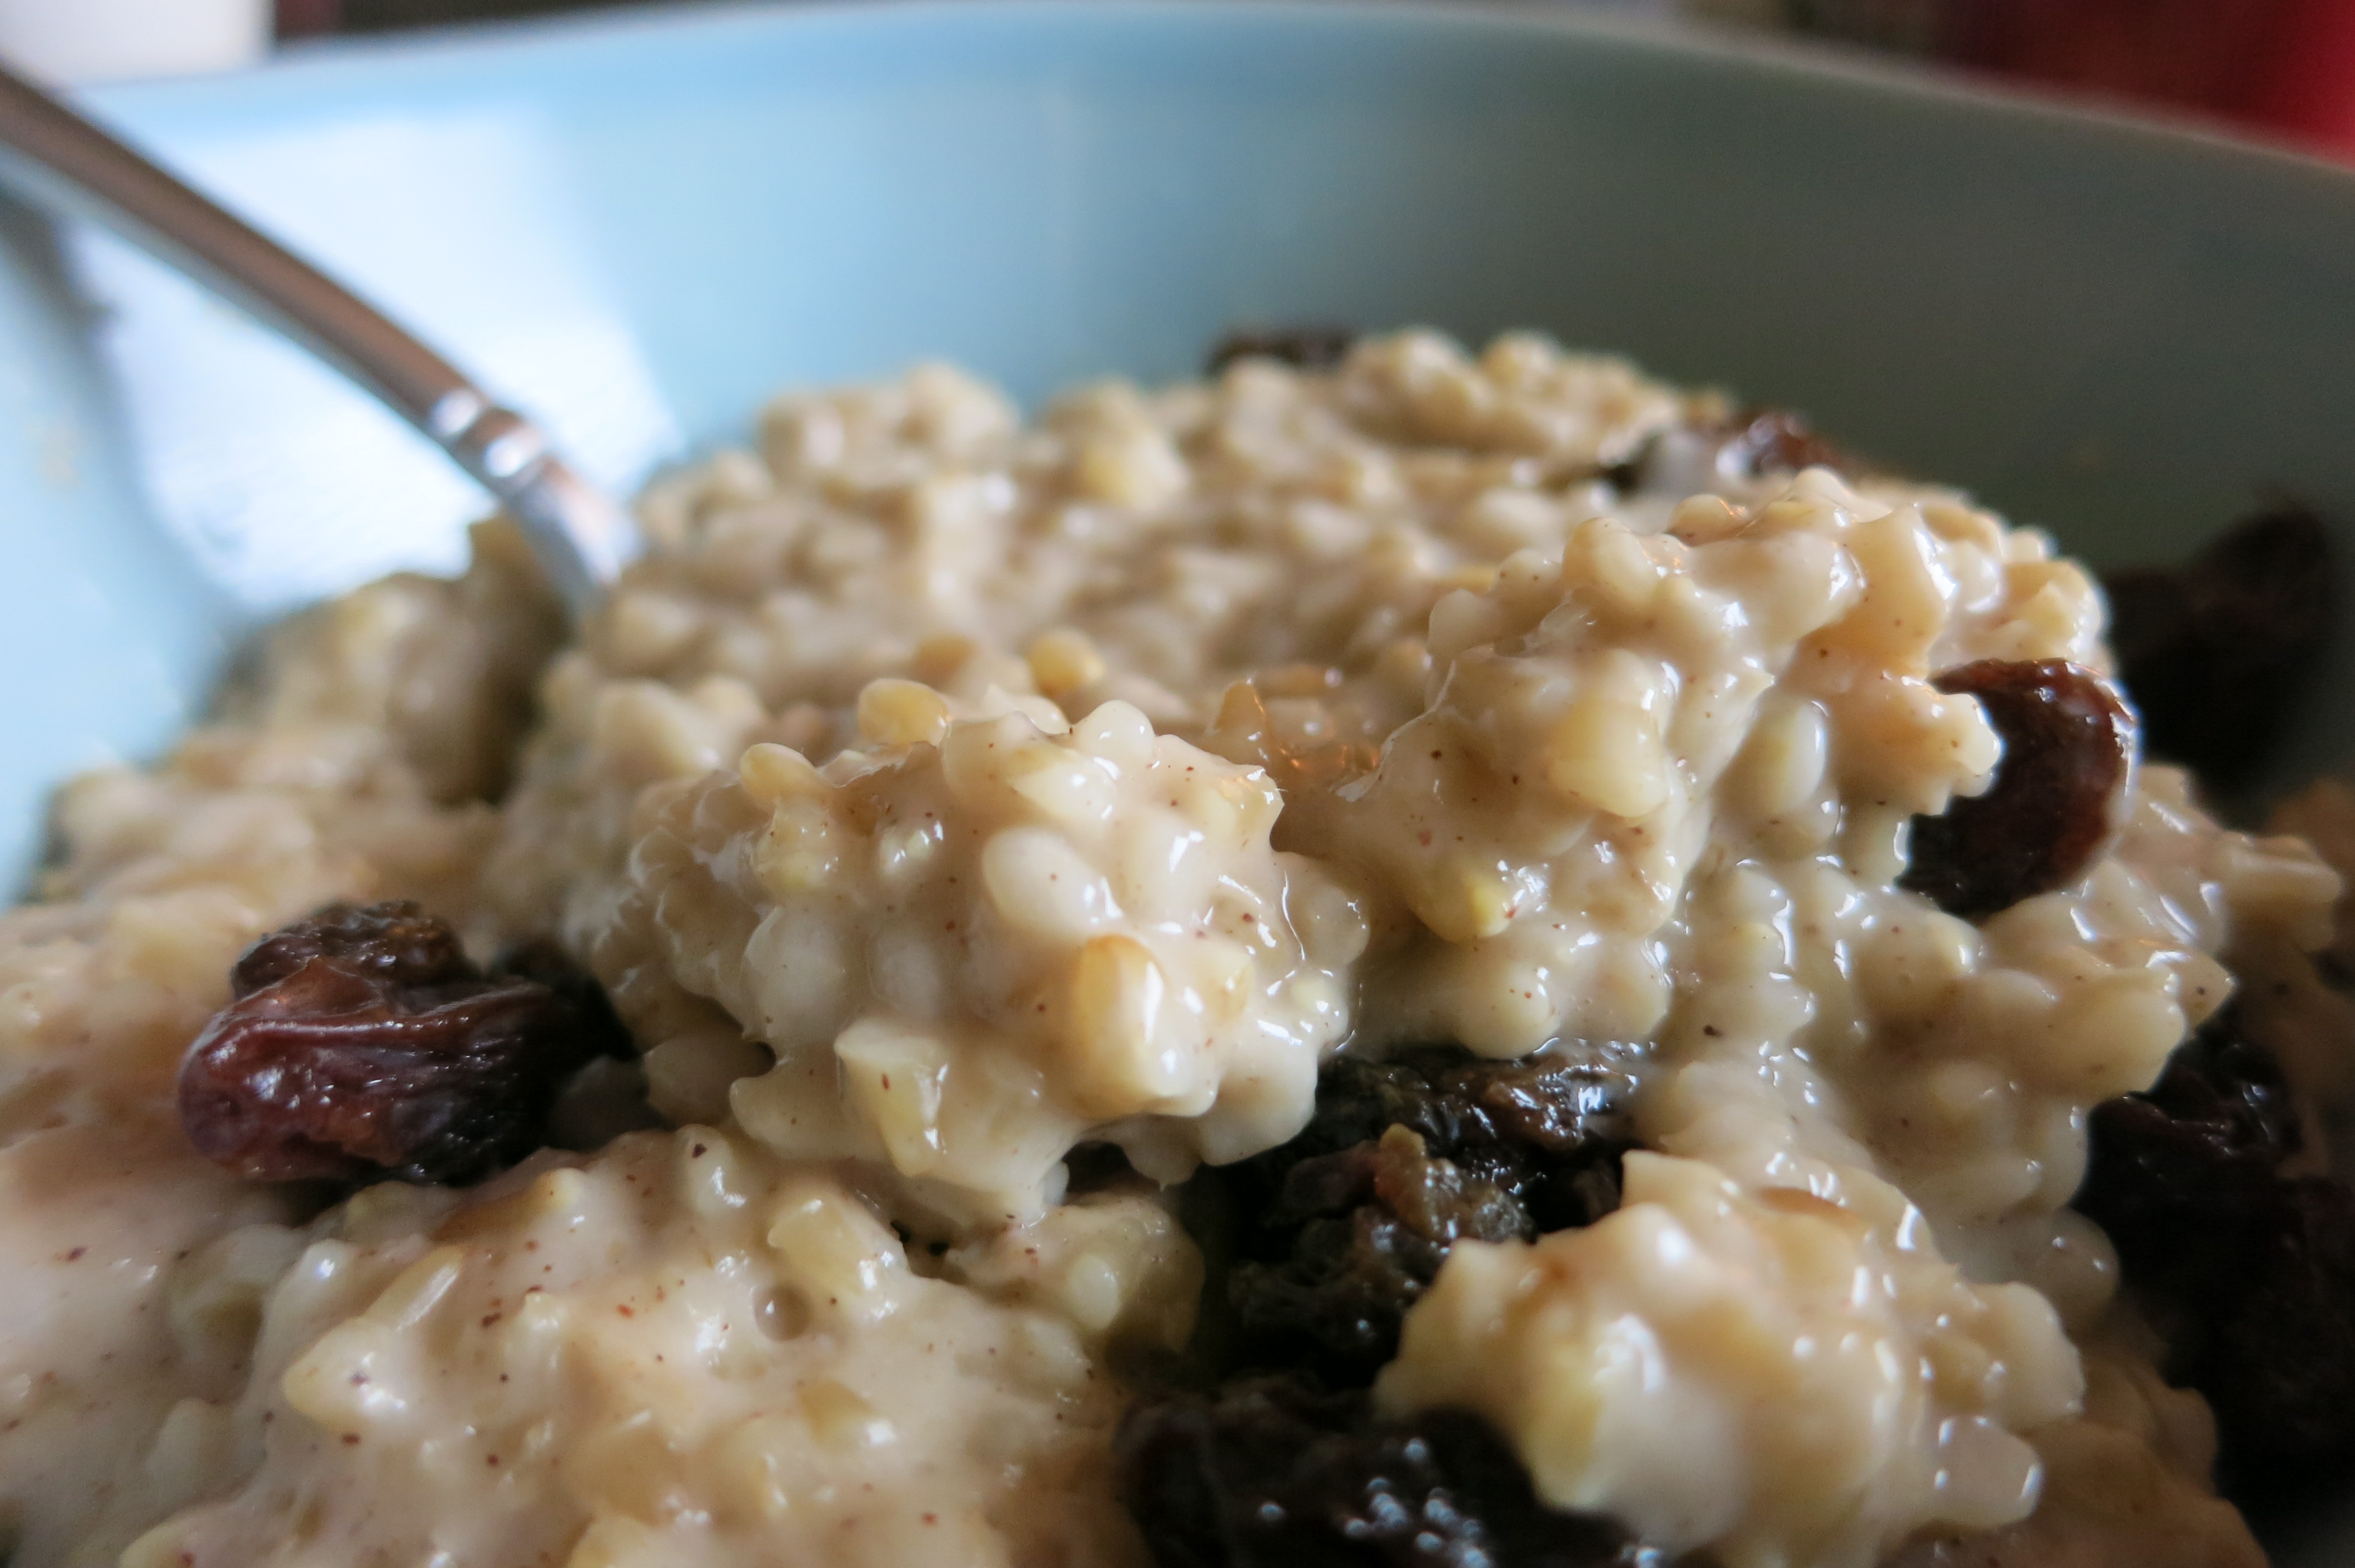
Davey got tired of shoveling down mush every morning so he decided to cook it with almond milk, cinnamon, and some honey from his hive.
Now we eat amazingness every morning. I have successfully tricked myself into thinking I am eating dessert for breakfast.
Ingredients
2 cups almond milk (vanilla almond milk is EXTRA tasty)
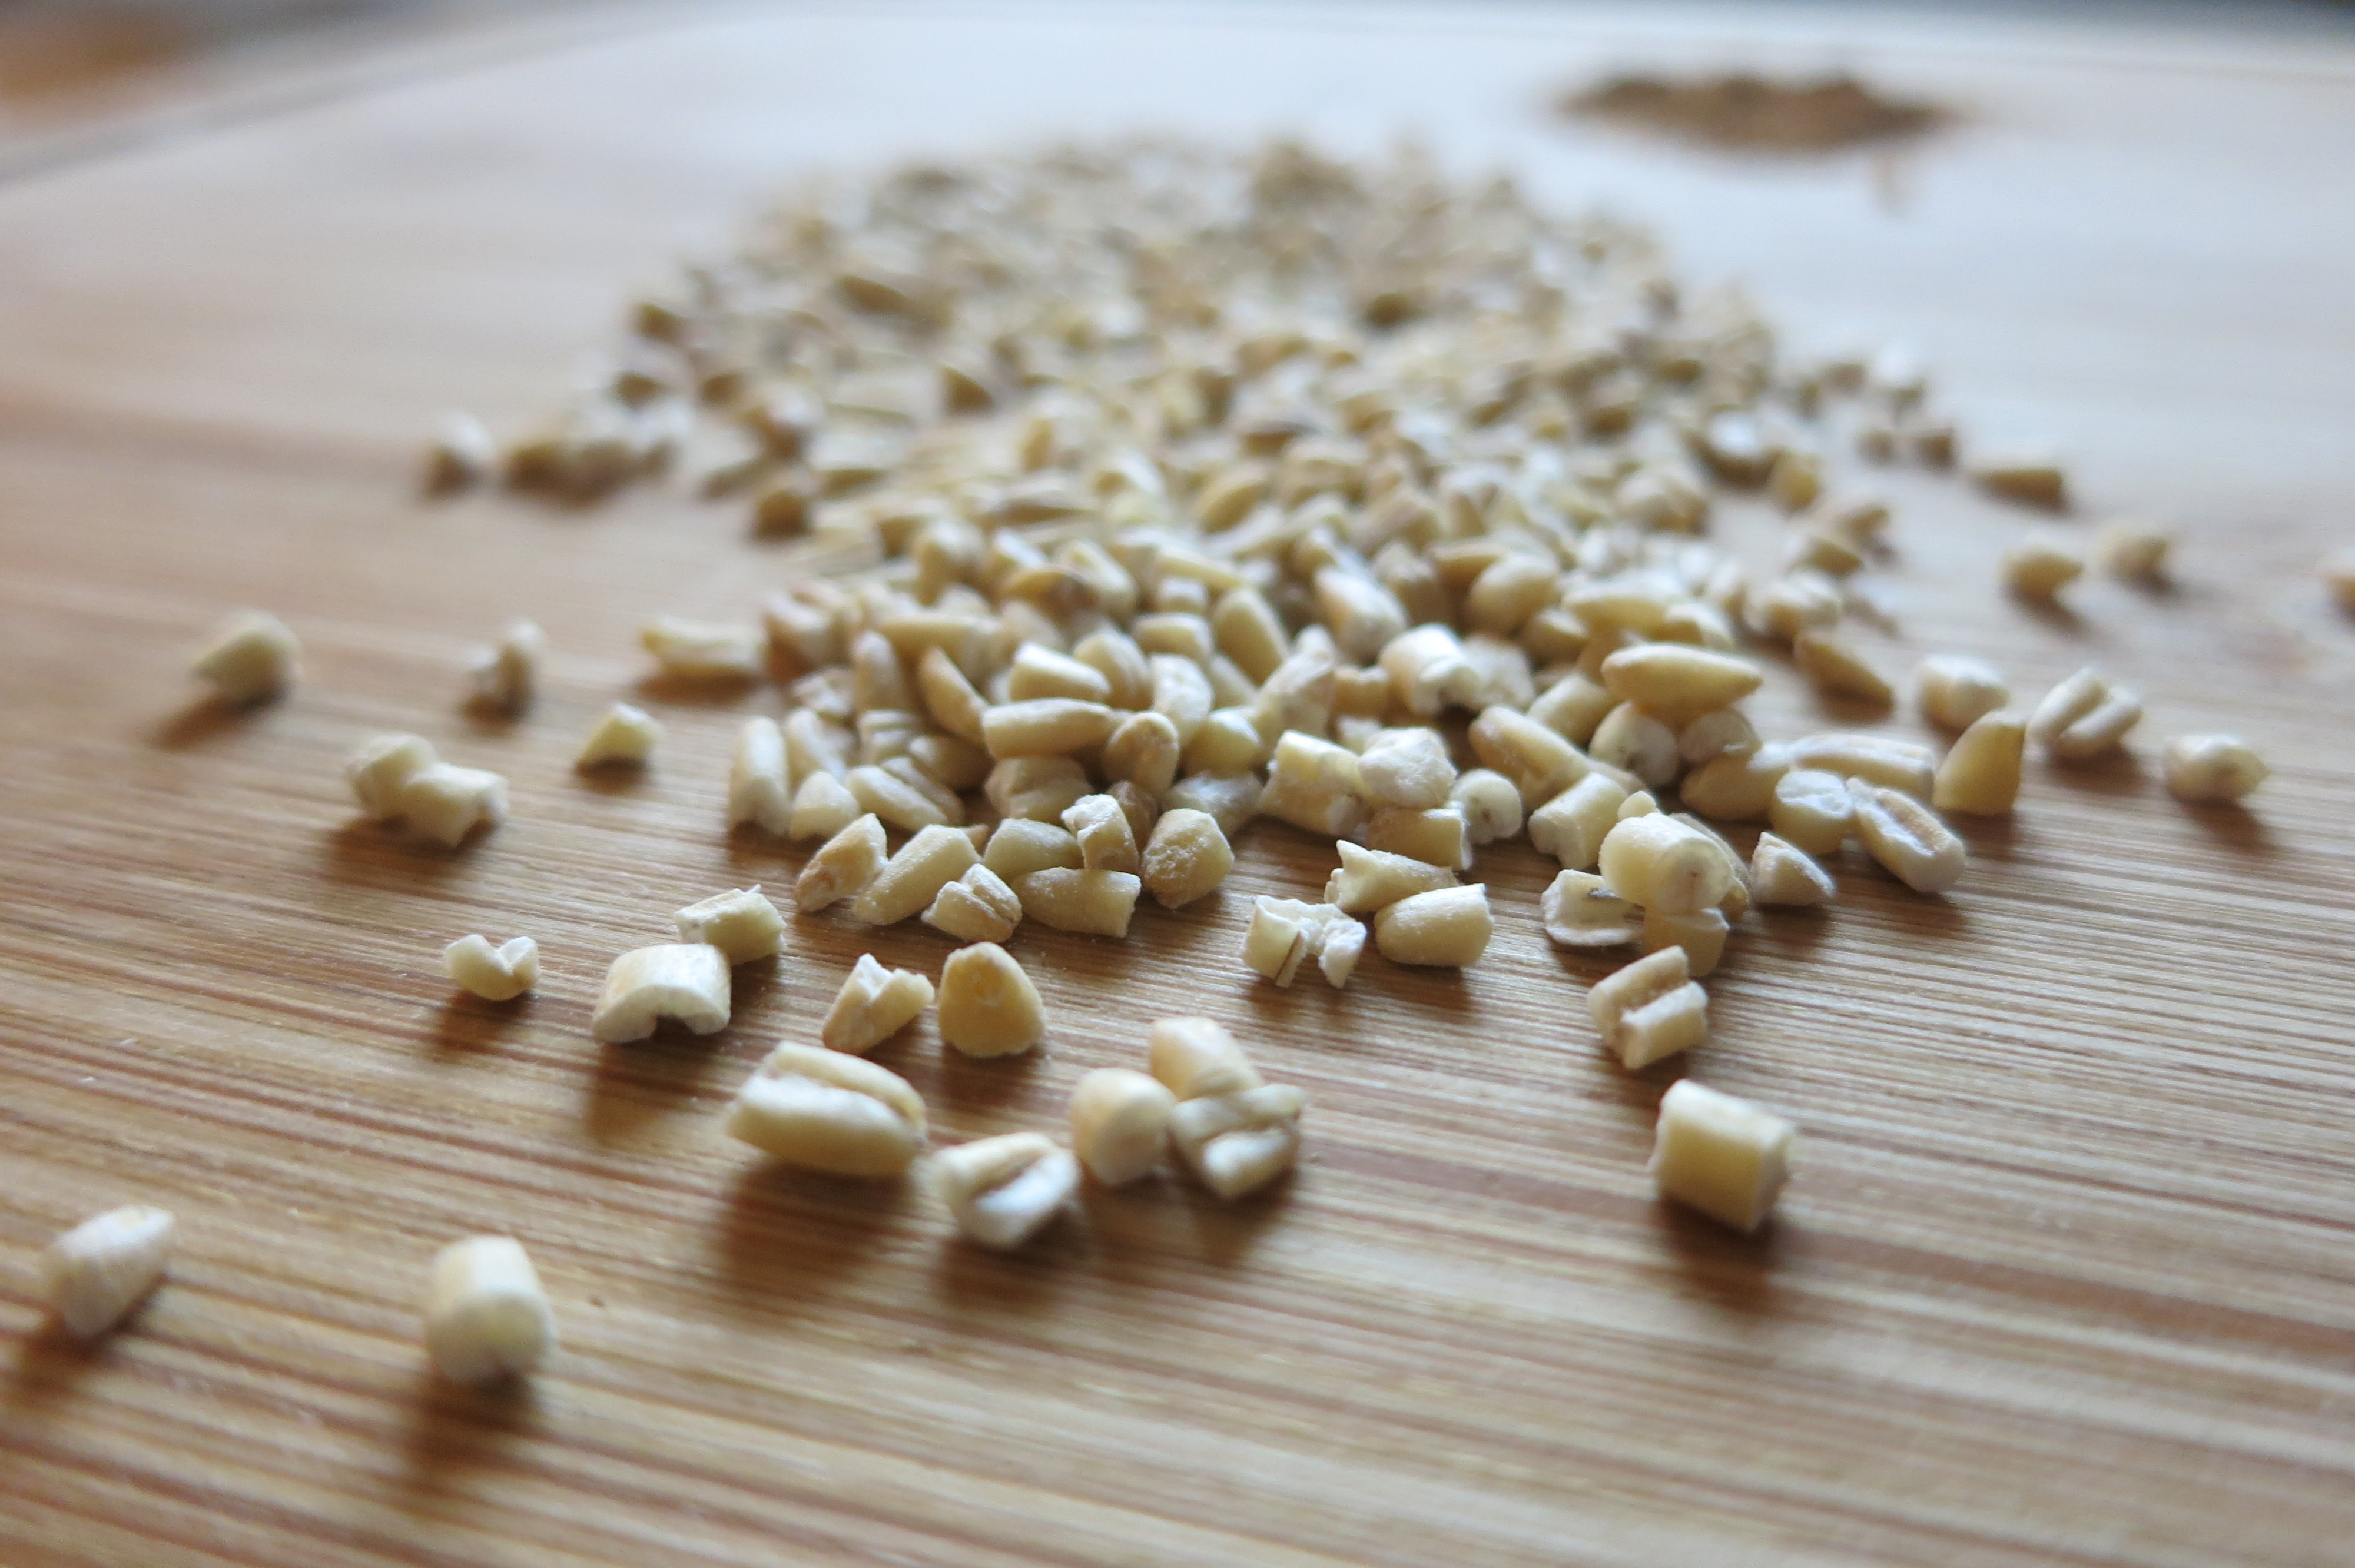
1/2 cup Steel cut oats
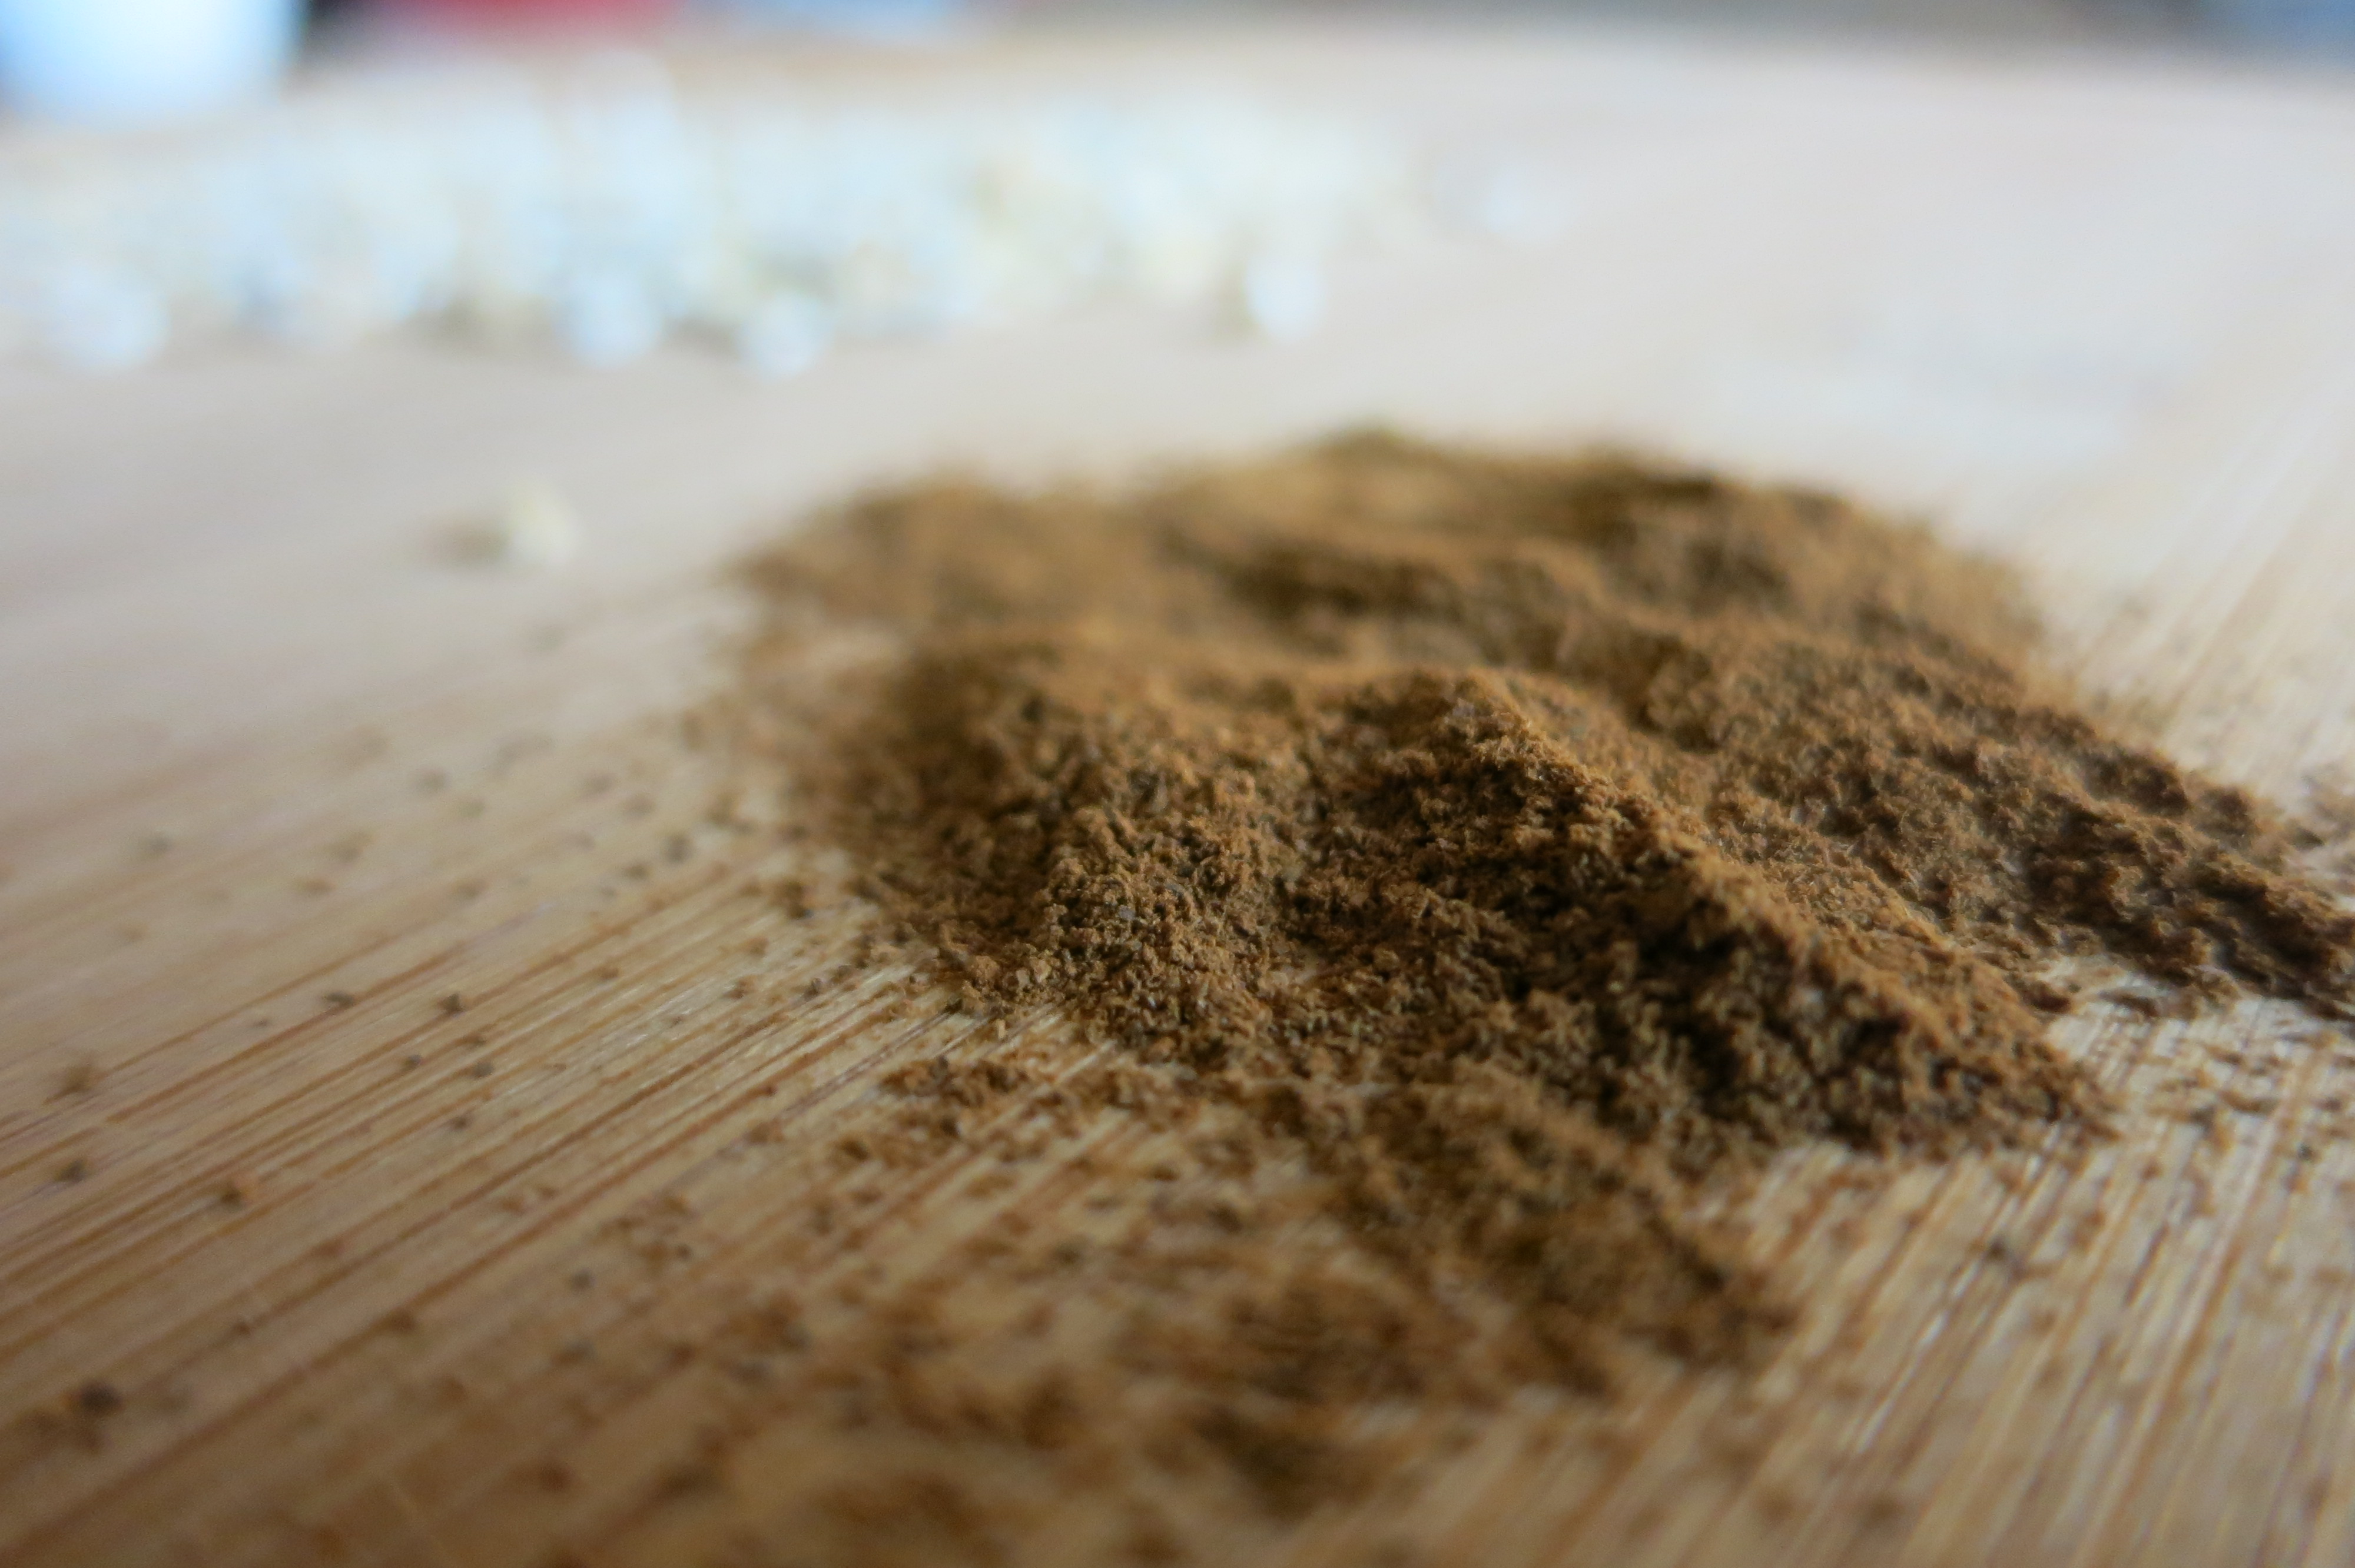
A couple dashes of cinnamon
A spoonful of honey
Raisons
Directions
Bring almond milk to a boil. Stir in oats and turn heat to medium-low. Let oats cook for 20-30 minutes. When oats have softened, stir in a couple dashes of cinnamon and a spoonful of honey. Top with raisons.
This recipe is for one person. Double if cooking for two.
I am concerned about my husband. He seems to enjoy making carnival foods like homemade cinnamon sugar pretzels and homemade caramel corn. I am bracing myself for the day he approaches me with the idea to start a food stand for the carnival and live our life on the road. If you know my husband, you know the manifestation of this idea is entirely probable.
There is no question about it, Davey is the chef/cook/baker around here. He likes to keep busy, so I think it’s one way he keeps himself entertained when we are at home. I get the benefits of being the taste-tester and blogger behind it.
I wanted to share this recipe for Homemade Caramel Corn because its fun to eat in the fall and will make great Christmas gifts for coworkers, neighbors, and teachers.
Davey found an original recipe here and modified it a bit. Here is how he did it:
Ingredients
1/2 cup unpopped popcorn kernels (about 16 cups popped corn)
1/2 cup salted butter
1/2 cup light brown sugar
1/6 cup light corn syrup
1/2 tsp kosher or sea salt
Directions
Preheat oven to 300 degrees. Pop popcorn kernels over stove or with use of an air popper. Once the popcorn is done, empty into a large baking pan.
In a small sauce pan, melt butter, brown sugar, corn syrup, and salt over medium heat. Once melted together, stir and bring to a boil. Boil for 2-4 minutes.
Take caramel mixture immediately from stove and drizzle on top of popcorn. Stir the popcorn to coat evenly. Place popcorn in oven and bake for 20-30 minutes, stirring occasionally to redistribute the caramel mixture.
Cool mixture. Continue to stir occasionally to prevent clumping.
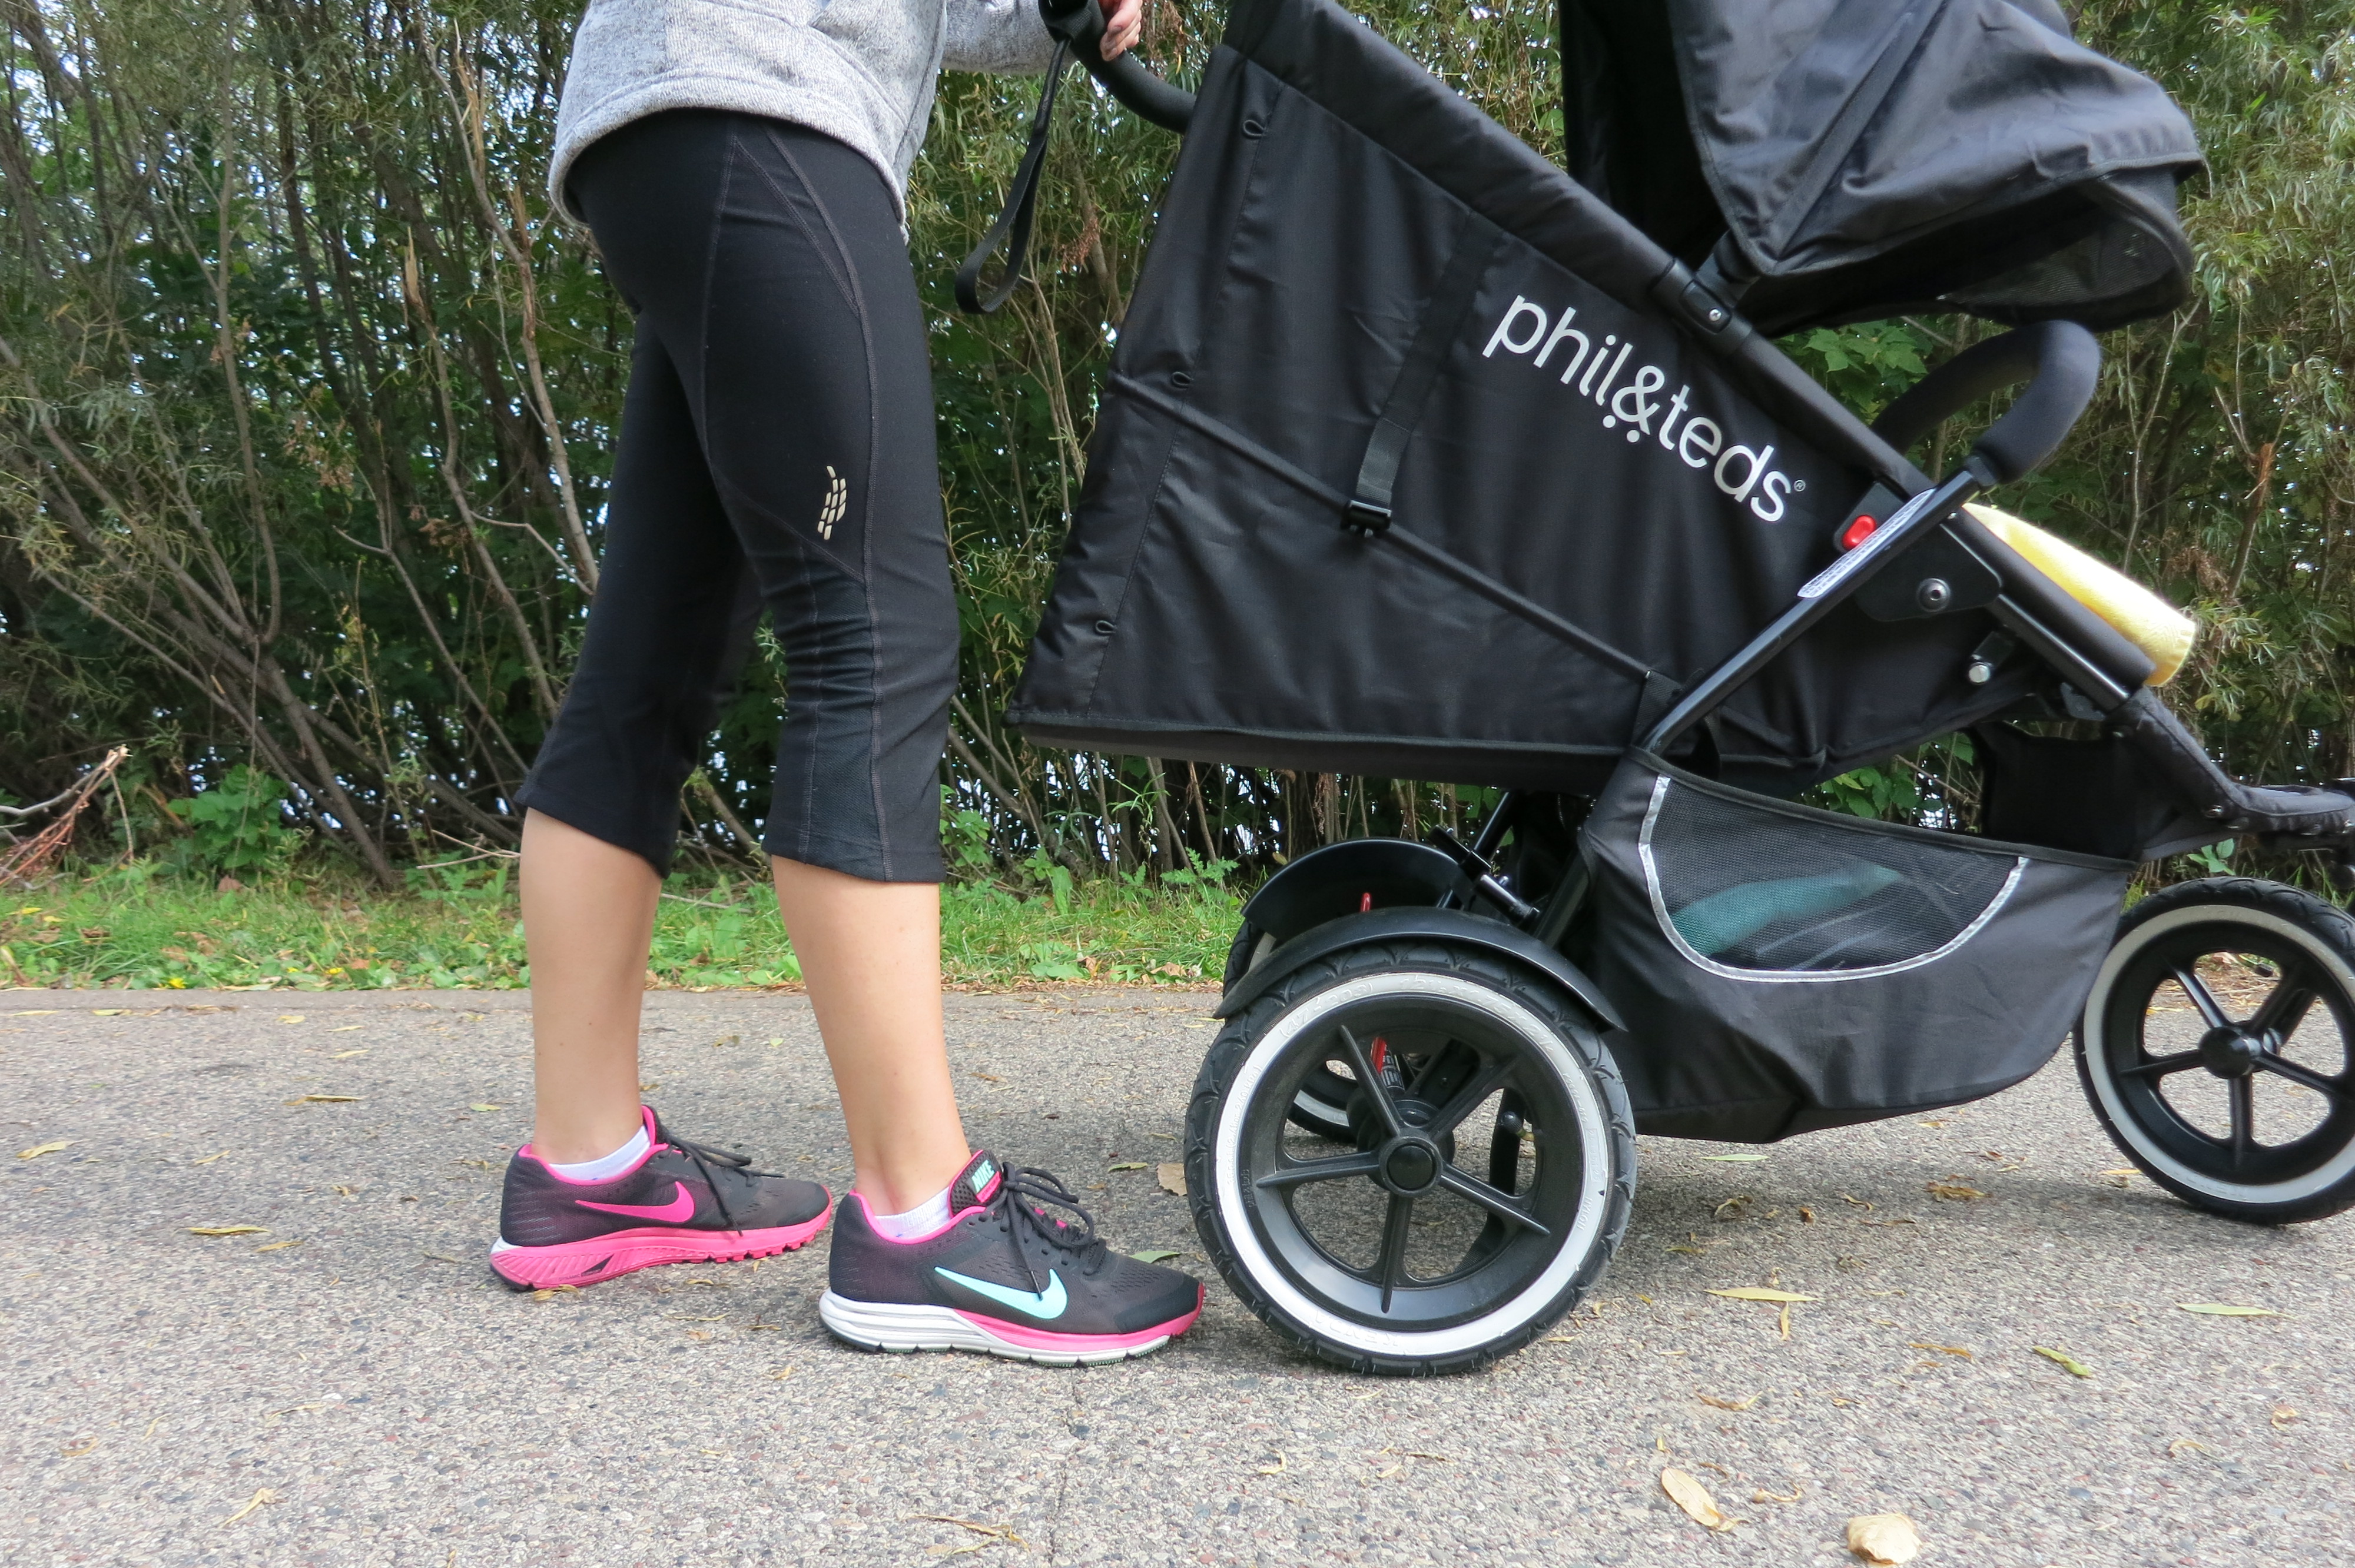
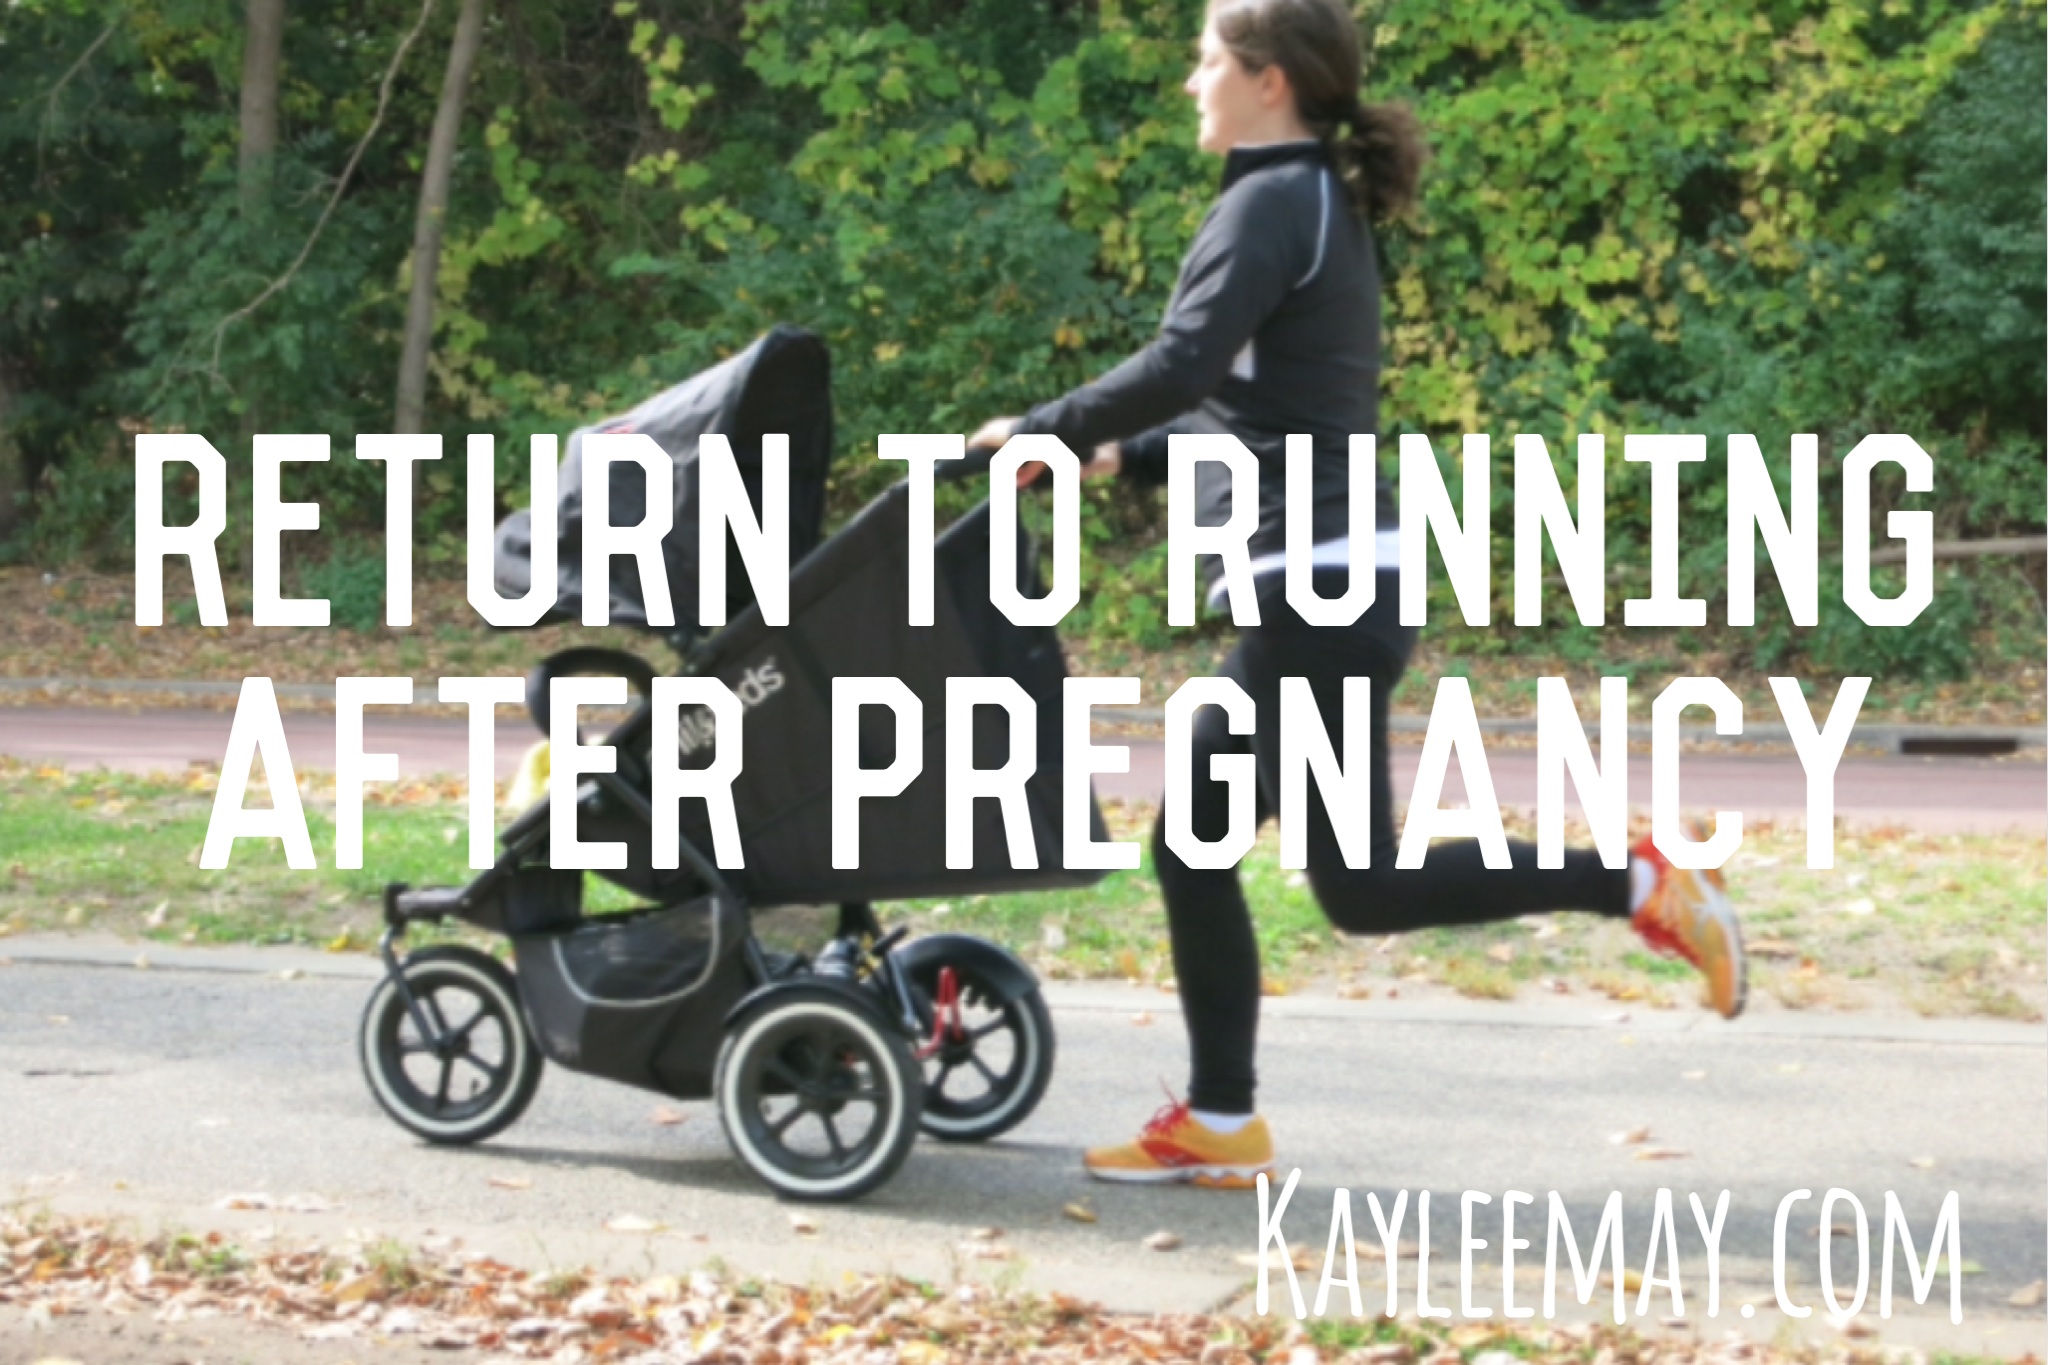
Postpartum has been a long road. And not the kind of “oh, what a journey…” road. The first days after Seton’s birth I didn’t so much want to roll over in bed. I was definitely not dreaming of tying up my shoelaces and going for a run. But eventually, albeit after many weeks, I found myself promising the exercise gods that I would never complain about working out again as I watched Netflix count down to the next episode of my TV marathon in utter disbelief that my current state of life existed on a couch. Being restricted from doing something just makes you want to do it, right? I longed for the feeling of my tennis shoes hitting pavement, my heart beating through my chest, and my frequent breath mixing with the fall air.
We may be anxious to return to running after pregnancy, but it’s important to make our comebacks gradual. Lots of changes just happened to our bodies and, as mothers, we now need our bodies to take care of our babies. Being injured isn’t an option.
To prepare for running, I encourage you to strengthen your abdominals and pelvic floor muscles through the abdominal progression and pelvic floor exercise progression I recommend. Having strong abdominals for running can reduce the risk of injury to our backs, hips, knees, ankles, and even should girdles and necks! The abdominals will work to stabilize our backs and pelvis to allow the limbs to generate movement for each step.
I also encourage you to strengthen your gluteals. You should do this the same way I recommended doing it throughout your pregnancy: by performing Hip Abduction with Lateral Rotation (“The Clamshell”). You can read through the steps in my post Top 3 Exercises Every Pregnant Woman Should Do.
When you feel as though your abdominals and pelvic floor muscles are strong enough that you can keep them contracted throughout the course of the day (even when going up/down stairs or getting up for the floor while holding your baby), you are likely ready to begin a running progression. Make sure your doctor has cleared you to exercise!
To begin, start with running and walking at one minute intervals, aka run a minute, walk a minute. Prior to pregnancy, I told my patients to do this for 30-minutes. But, now that I am experiencing the joys of postpartum first-hand, I recommend doing this for as long as you can up to 30-minutes. I started my progression (ahem, last night) and barely made it to 18 minutes. I walked that last 12 minutes telling myself, “whatever, I’m strong…I pushed a human out of my body!” as I somehow heard my heart beating the way you do after an insane workout.
Since you are only running one minute at a time, use the minute to focus on running with good form. After pregnancy, our bodies will forget we have abdominals and gluteals, so we will be relying on muscles like the tensor fascia lata (TFL, which is the muscle that controls the infamous IT band) that can lead to injury. Focus on contracting your abdominals. Review my post Improve Your Running Stride Part II: The Gluteals which will help you use your gluteals to improve your stride.
Once you hit this walk/run cycle for 30 minutes, start aiming for running 2-minutes, then walking 1-minute up to 30-minutes.
Add a minute to your running spurts when you feel ready (should be every three to five runs), and so on.
Keep in mind:
Do not push yourself too quickly. Your muscles need time to catch up to what you are asking your body to do.
Do not set time goals until you are confident you can run with good form.
If you’re having unusual aches, pains, or … ahem, dare I say leaking, talk to your physical therapist.
And, lastly, you may want to wear two bras. 🙂
This was my reaction to finally getting the green light from my doctor to exercise:
Hopefully you enjoy you first run back as much as I did.
***The content of www.kayleemay.com is for informational purposes only. The information presented is not to be taken as professional medical advice, diagnosis, or treatment. If you are having pain, or seeking medical advice, talk to your health care provider. Do not delay in seeking treatment because of information you have read on www.kayleemay.com. Taking recommendations presented on www.kayleemay.com is solely at your own risk***
*These exercises are based off the Sahrmann Low Abdominal Progression.*
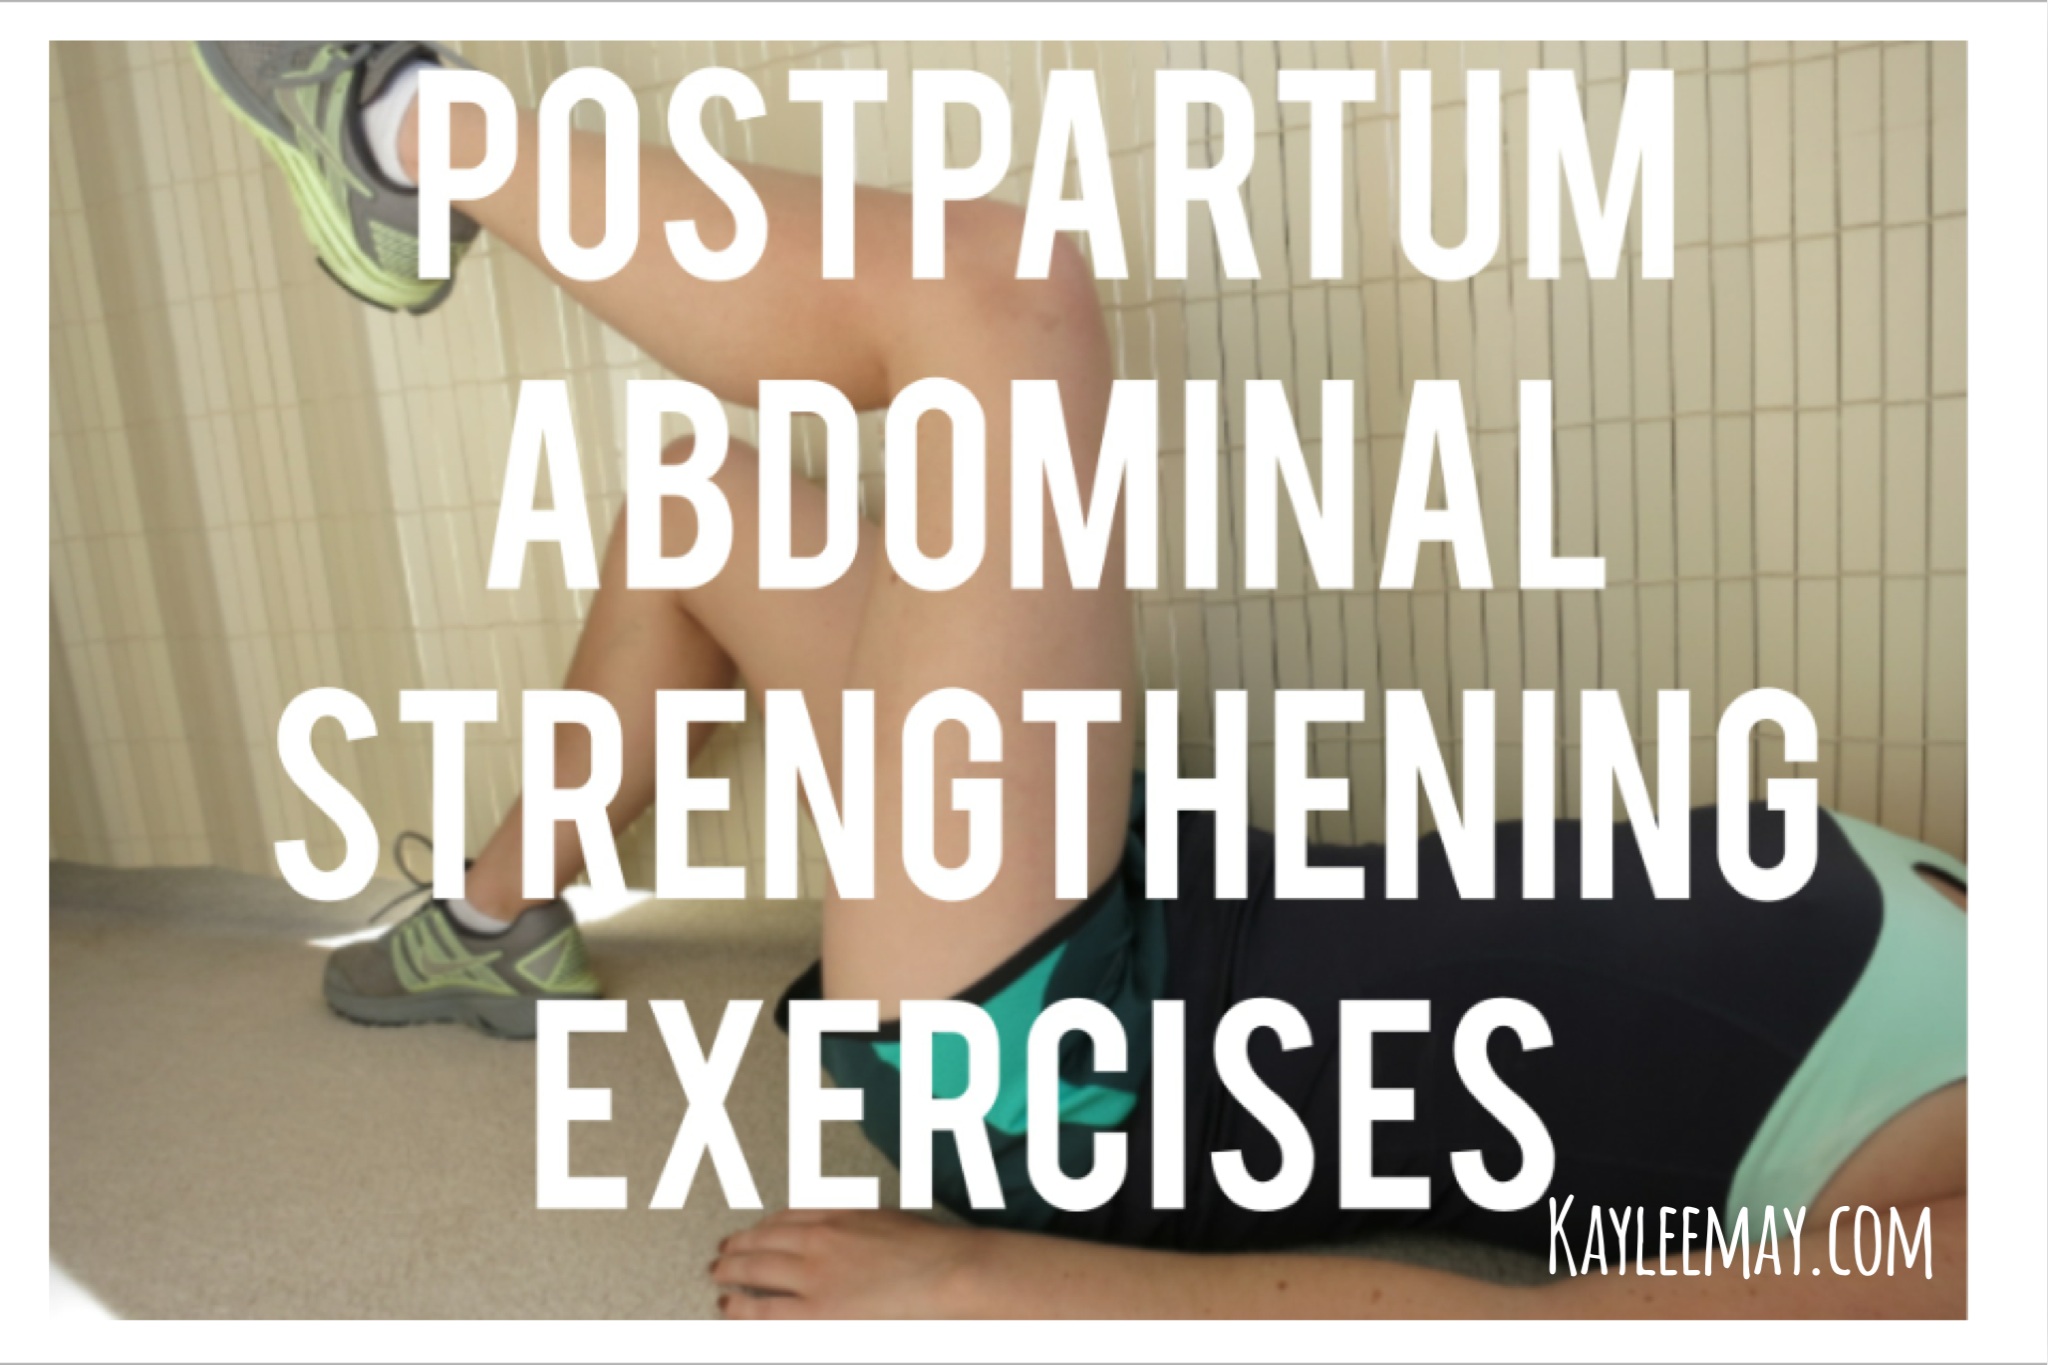
I swore to myself I wouldn’t get that certain post pregnancy “pooch” that stays with me the rest of my life…we all know what I am talking about. Yeah, good for Kate Middleton for going out in public right after giving birth with a pregnancy pooch, but let’s be honest… that kind of thing sticks around a whole lifetime for us normal folk. I thought I would share my postpartum abdominal strengthening program for those in the same position as me.
This post will look very familiar to those of you who read my series on tips for runners. Postpartum abdominal strengthening is very similar to how I recommend my runners strengthen their abdominals with a few key differences.
One difference is that it is important to take it slow and remember that your abs have been stretched to their limits over the course of 9 months. The initial goal of postpartum abdominal exercises is to first be able to contract the muscles. The subsequent goal is to strengthen the abdominals to support your low back, pelvis, and hips. After all, you will be carrying extra weight around (aka the babe and that extremely heavy carseat…grr), and you need your abdominal brace to support your back and hips! Many of my patients’ musculoskeletal problems can be traced back to poor movement patterns due to weak abdominals that they never strengthened after being pregnant. The final goal, for vanity’s sake, is to reduce the chance of the friendly pooch being with us the rest of our life.
One other difference of postpartum abdominal strengthening is that it is necessary to contract your pelvic floor muscles (you’ve heard of Kegels) when you contract your abs. I tell this to my runners as well, but it is especially important after giving birth.
Lastly, and most importantly, ask your doctor and physical therapist before initiating any abdominal strengthening postpartum. It didn’t take me long after giving birth to realize we all have different birth stories (it seemed like everyone else got an epidural because they worked #lies #imnotbitter #yesiam), therefore different rates and amounts of healing required. This goes for any type of birth– Cesarean, water, natural, epidural, in a rain forest like that crazy lady on Youtube (don’t Google it, I warned you)…anything! Your doctor will likely want you to wait a certain amount of time before initiating exercise.
The postpartum abdominal strengthening progression takes you through five abdominal exercises, each progressively more difficult. You will notice that the low back does not move at any point in the exercises. Rather, the abs work to stabilize as the limb movement becomes progressively more challenging. To work through the exercises, you must first successfully perform up to 20 repetitions correctly before progressing to the next exercise. Therefore, you may be on one level for up to 2 weeks before you feel you are ready for the next. If you can not perform an exercise without compensations (arching it away from the floor, pushing into the floor, or allowing your abdominal muscles to “pooch” up toward the ceiling), you must go back down to the previous level.
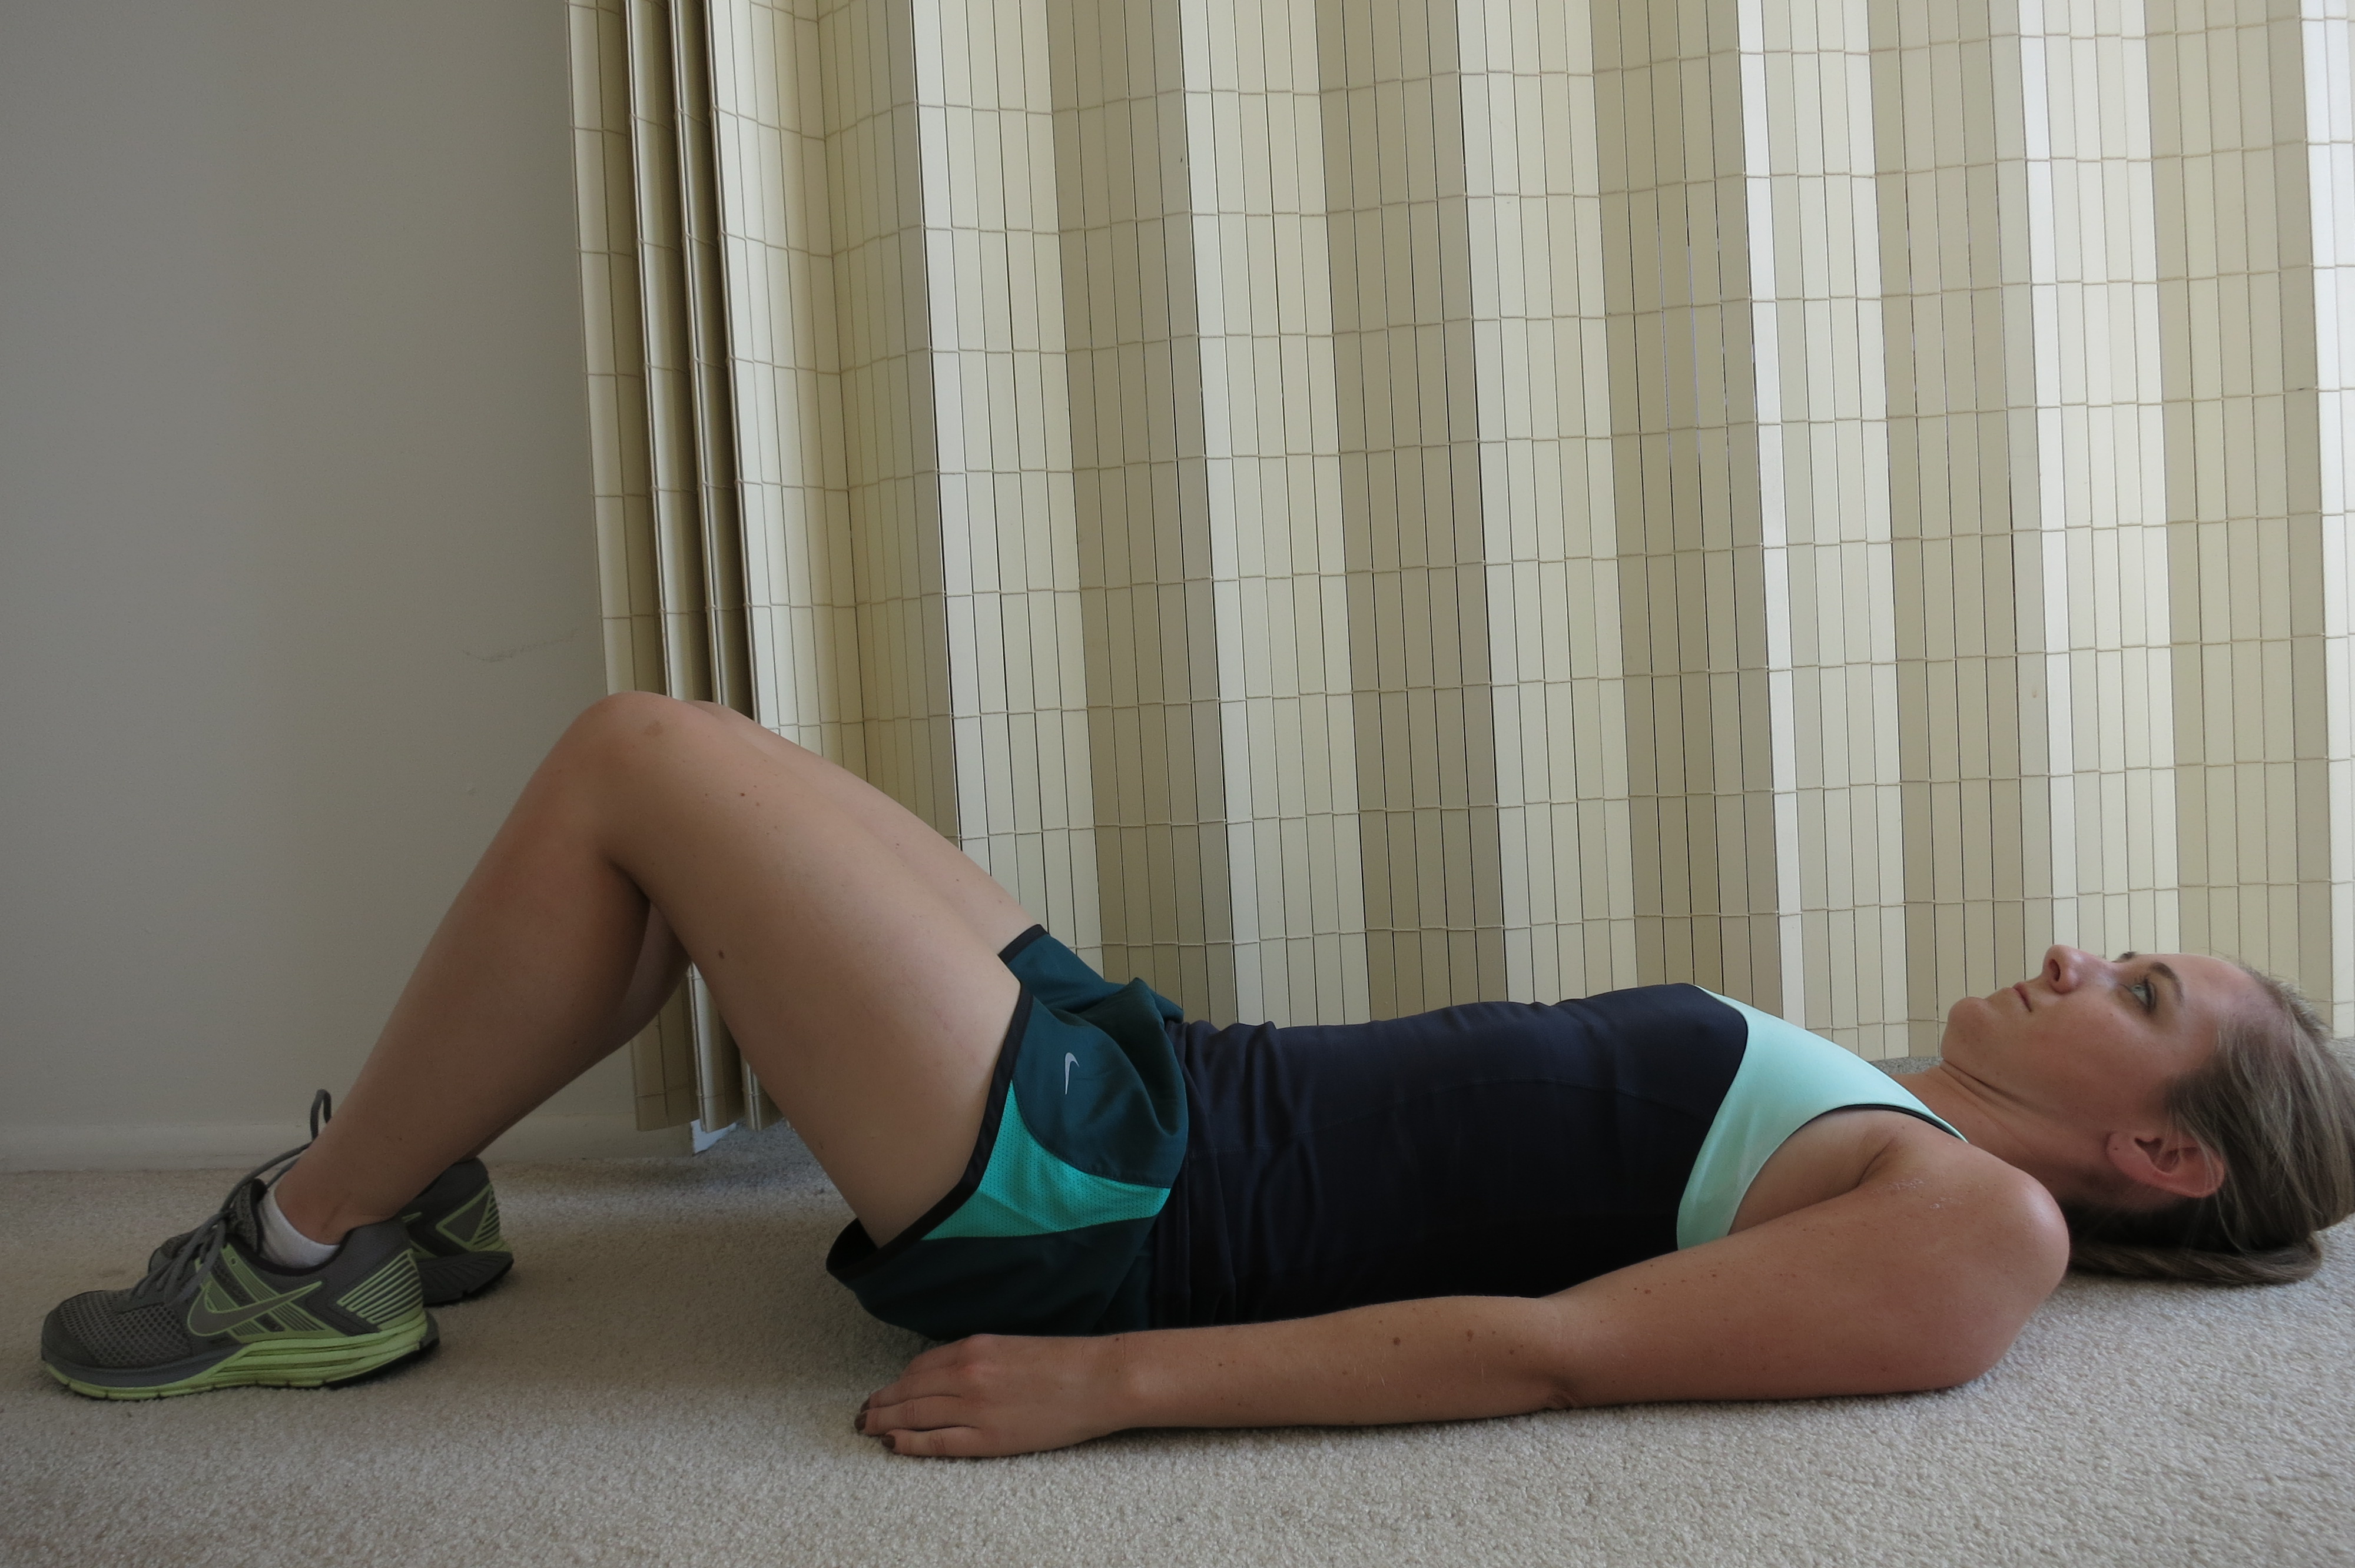
Level 1
Level I Abdominal Strengthening
Step 1: Lay on back with knees bent and feet flat on floor.
Step 2: Contract abdominals buy pulling navel toward your spine as you exhale. Contract pelvic floor muscles (the muscles you use to stop the flow of urine).
Step 3: Hold 5-10 seconds.
Step 4: Repeat 10-20 times.
Watch out! Do not push your back into the floor or arch it away from the floor. Your stomach should be sinking DOWN, not pushing UP toward the ceiling.
Perform exercise daily until you feel you are able to do 20 repetitions correctly.
Level 2
Level 2 Abdominal Strengthening
Step 1: Perform abdominal and pelvic floor contraction as in Level 1.
Step 2: Raise one leg so hip is bent 90 degrees while maintaining abdominal contraction.
Step 3: Place leg back to starting position as in Step 1.
Step 4: Raise contralateral leg so hip is bent 90 degrees while maintaining abdominal contraction.
Step 5: Place leg back to starting position as in Step 1.
Step 6: Repeat 10-20 times.
Watch out! Do not push your back into the floor or arch it away from the floor. Your stomach should be sinking DOWN, not pushing UP toward the ceiling.
Perform exercise daily until you feel you are able to do 20 repetitions correctly.
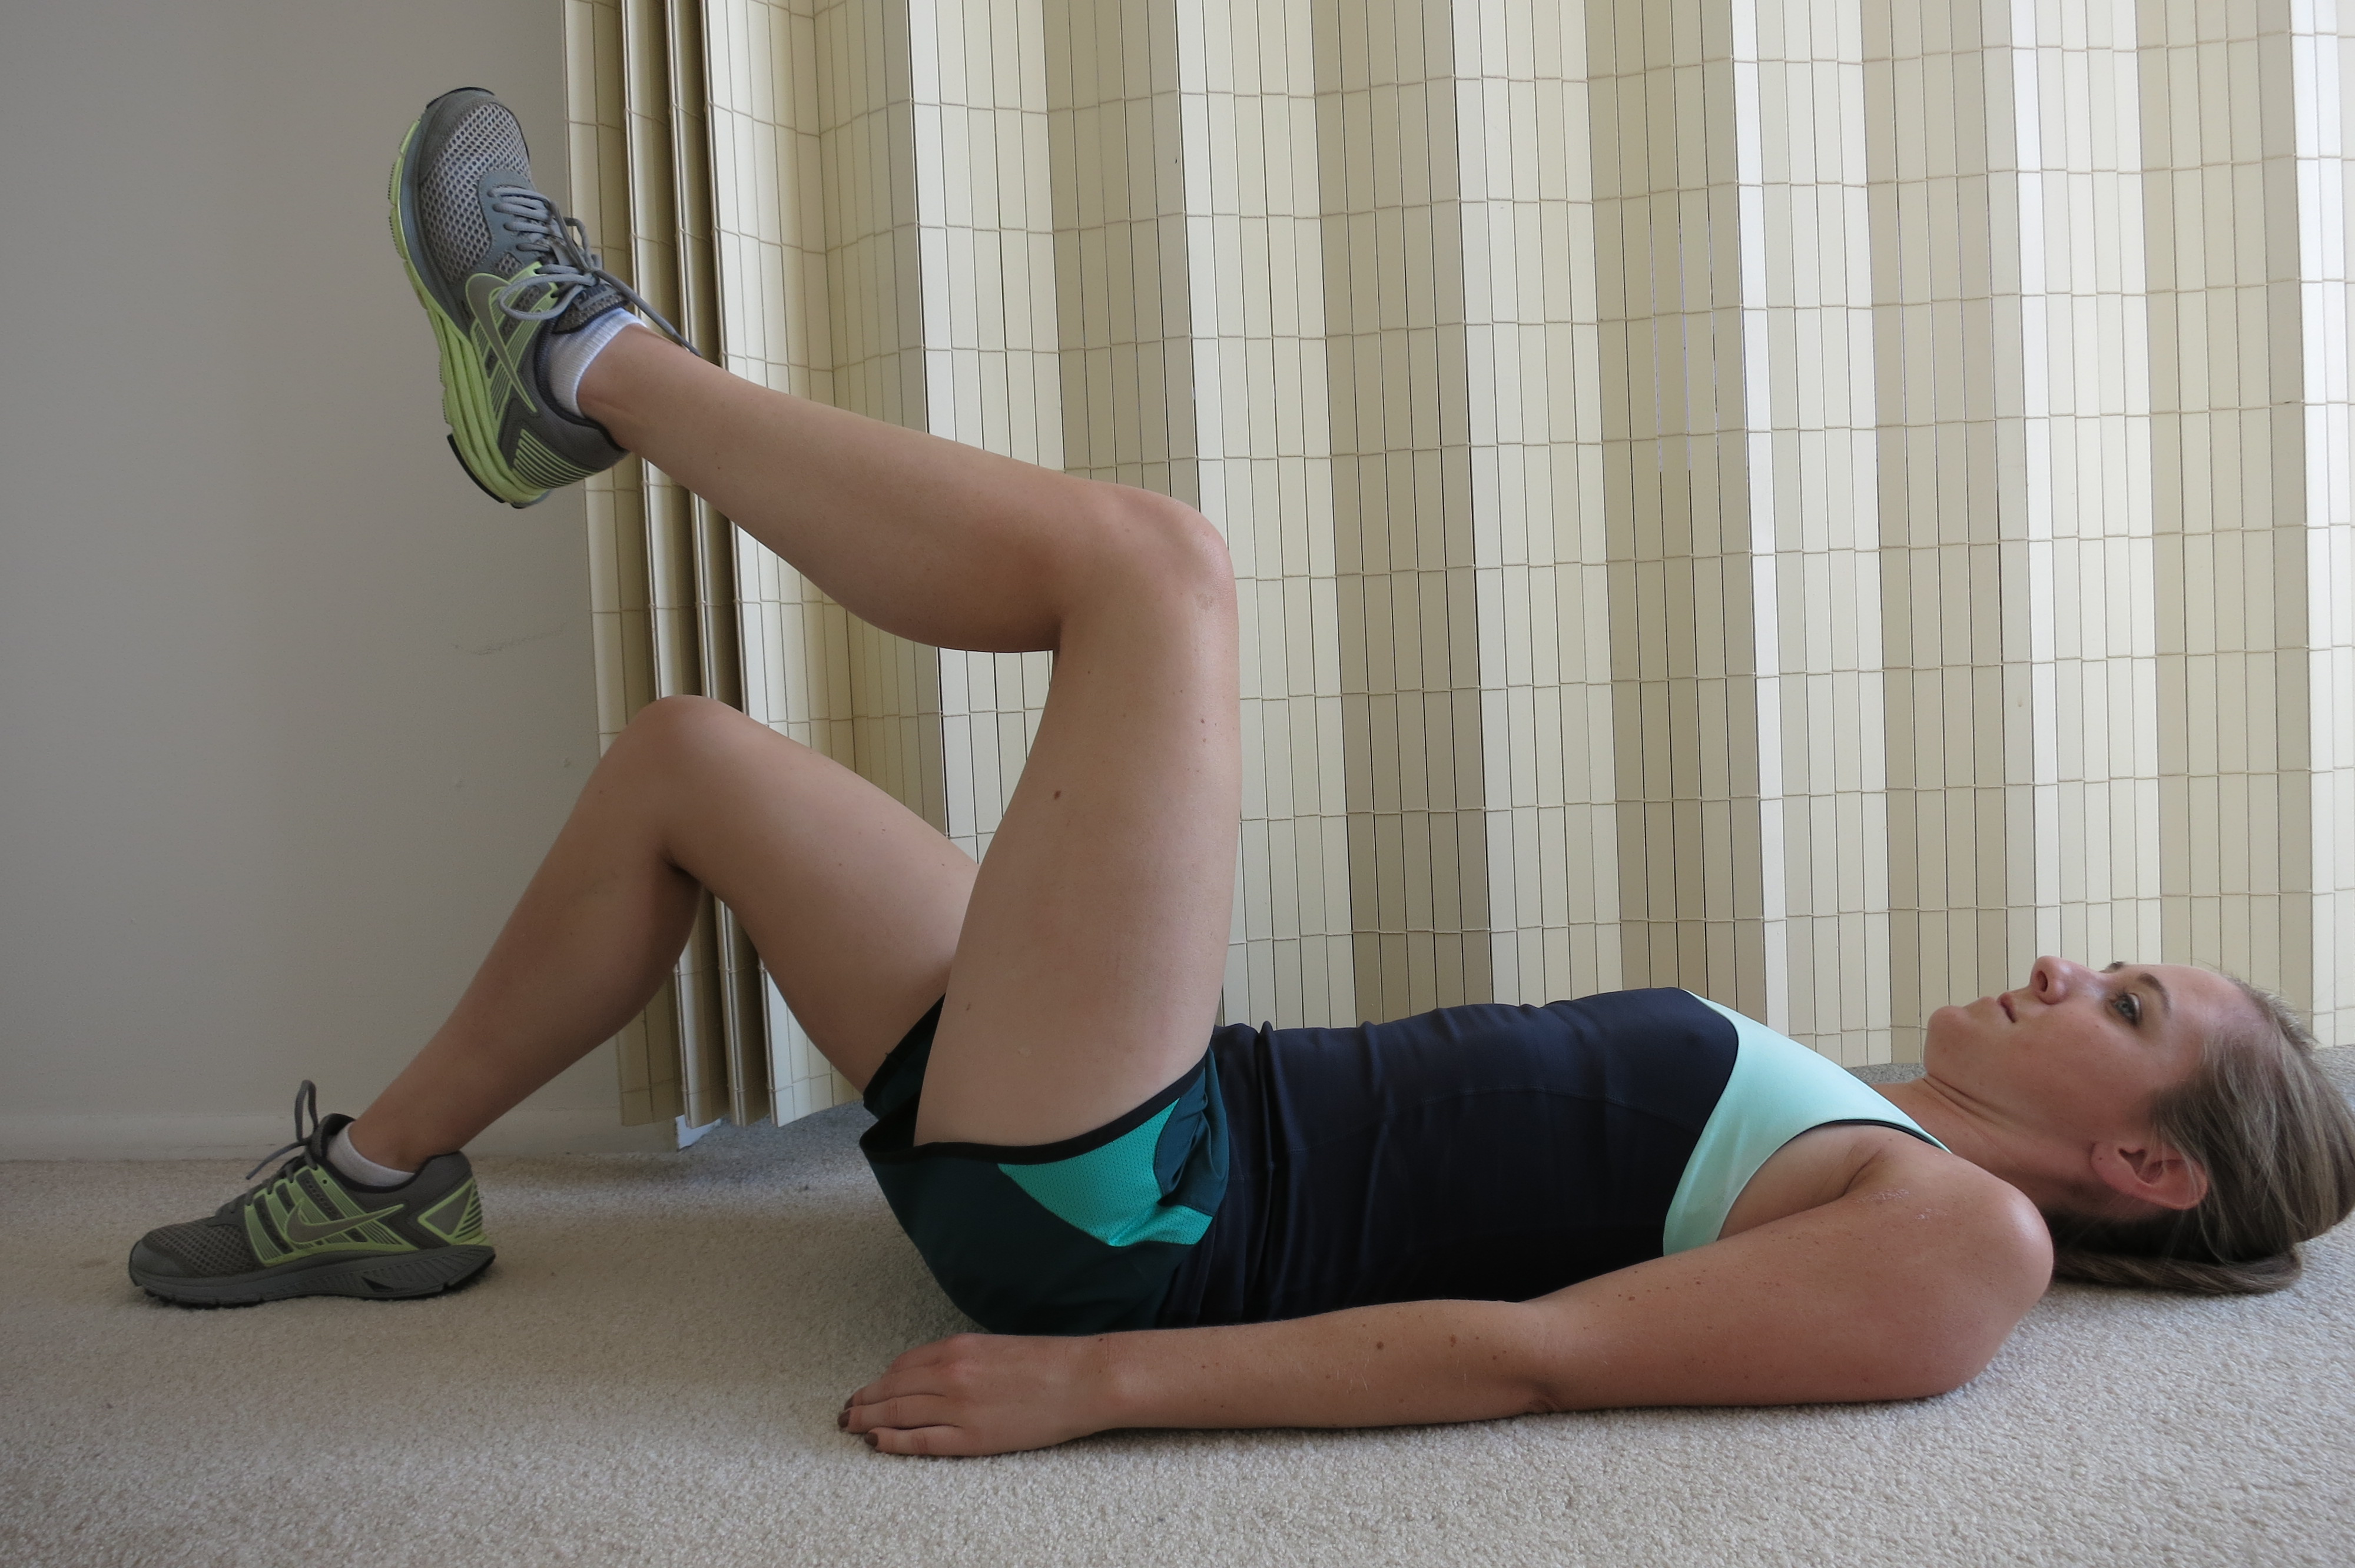
Level 3
Level 3 Abdominal Strengthening
Step 1: Perform abdominal and pelvic floor contraction as in Level 1.
Step 2: Raise one leg so hip is bent 90 degrees while maintaining an abdominal contraction.
Step 3: Maintain position of Step 2 and raise opposite leg so hip is bent 90 degrees.
Step 4: Place one foot back to starting position (keep those abs contracted!)
Step 5: Place the other foot back to the starting position (keep those abs contracted!)
Step 6: Repeat 10-20 times.
Watch out! Do not push your back into the floor or arch it away from the floor. Your stomach should be sinking DOWN, not pushing UP toward the ceiling.
Perform exercise daily until you feel you are able to do 20 repetitions correctly.
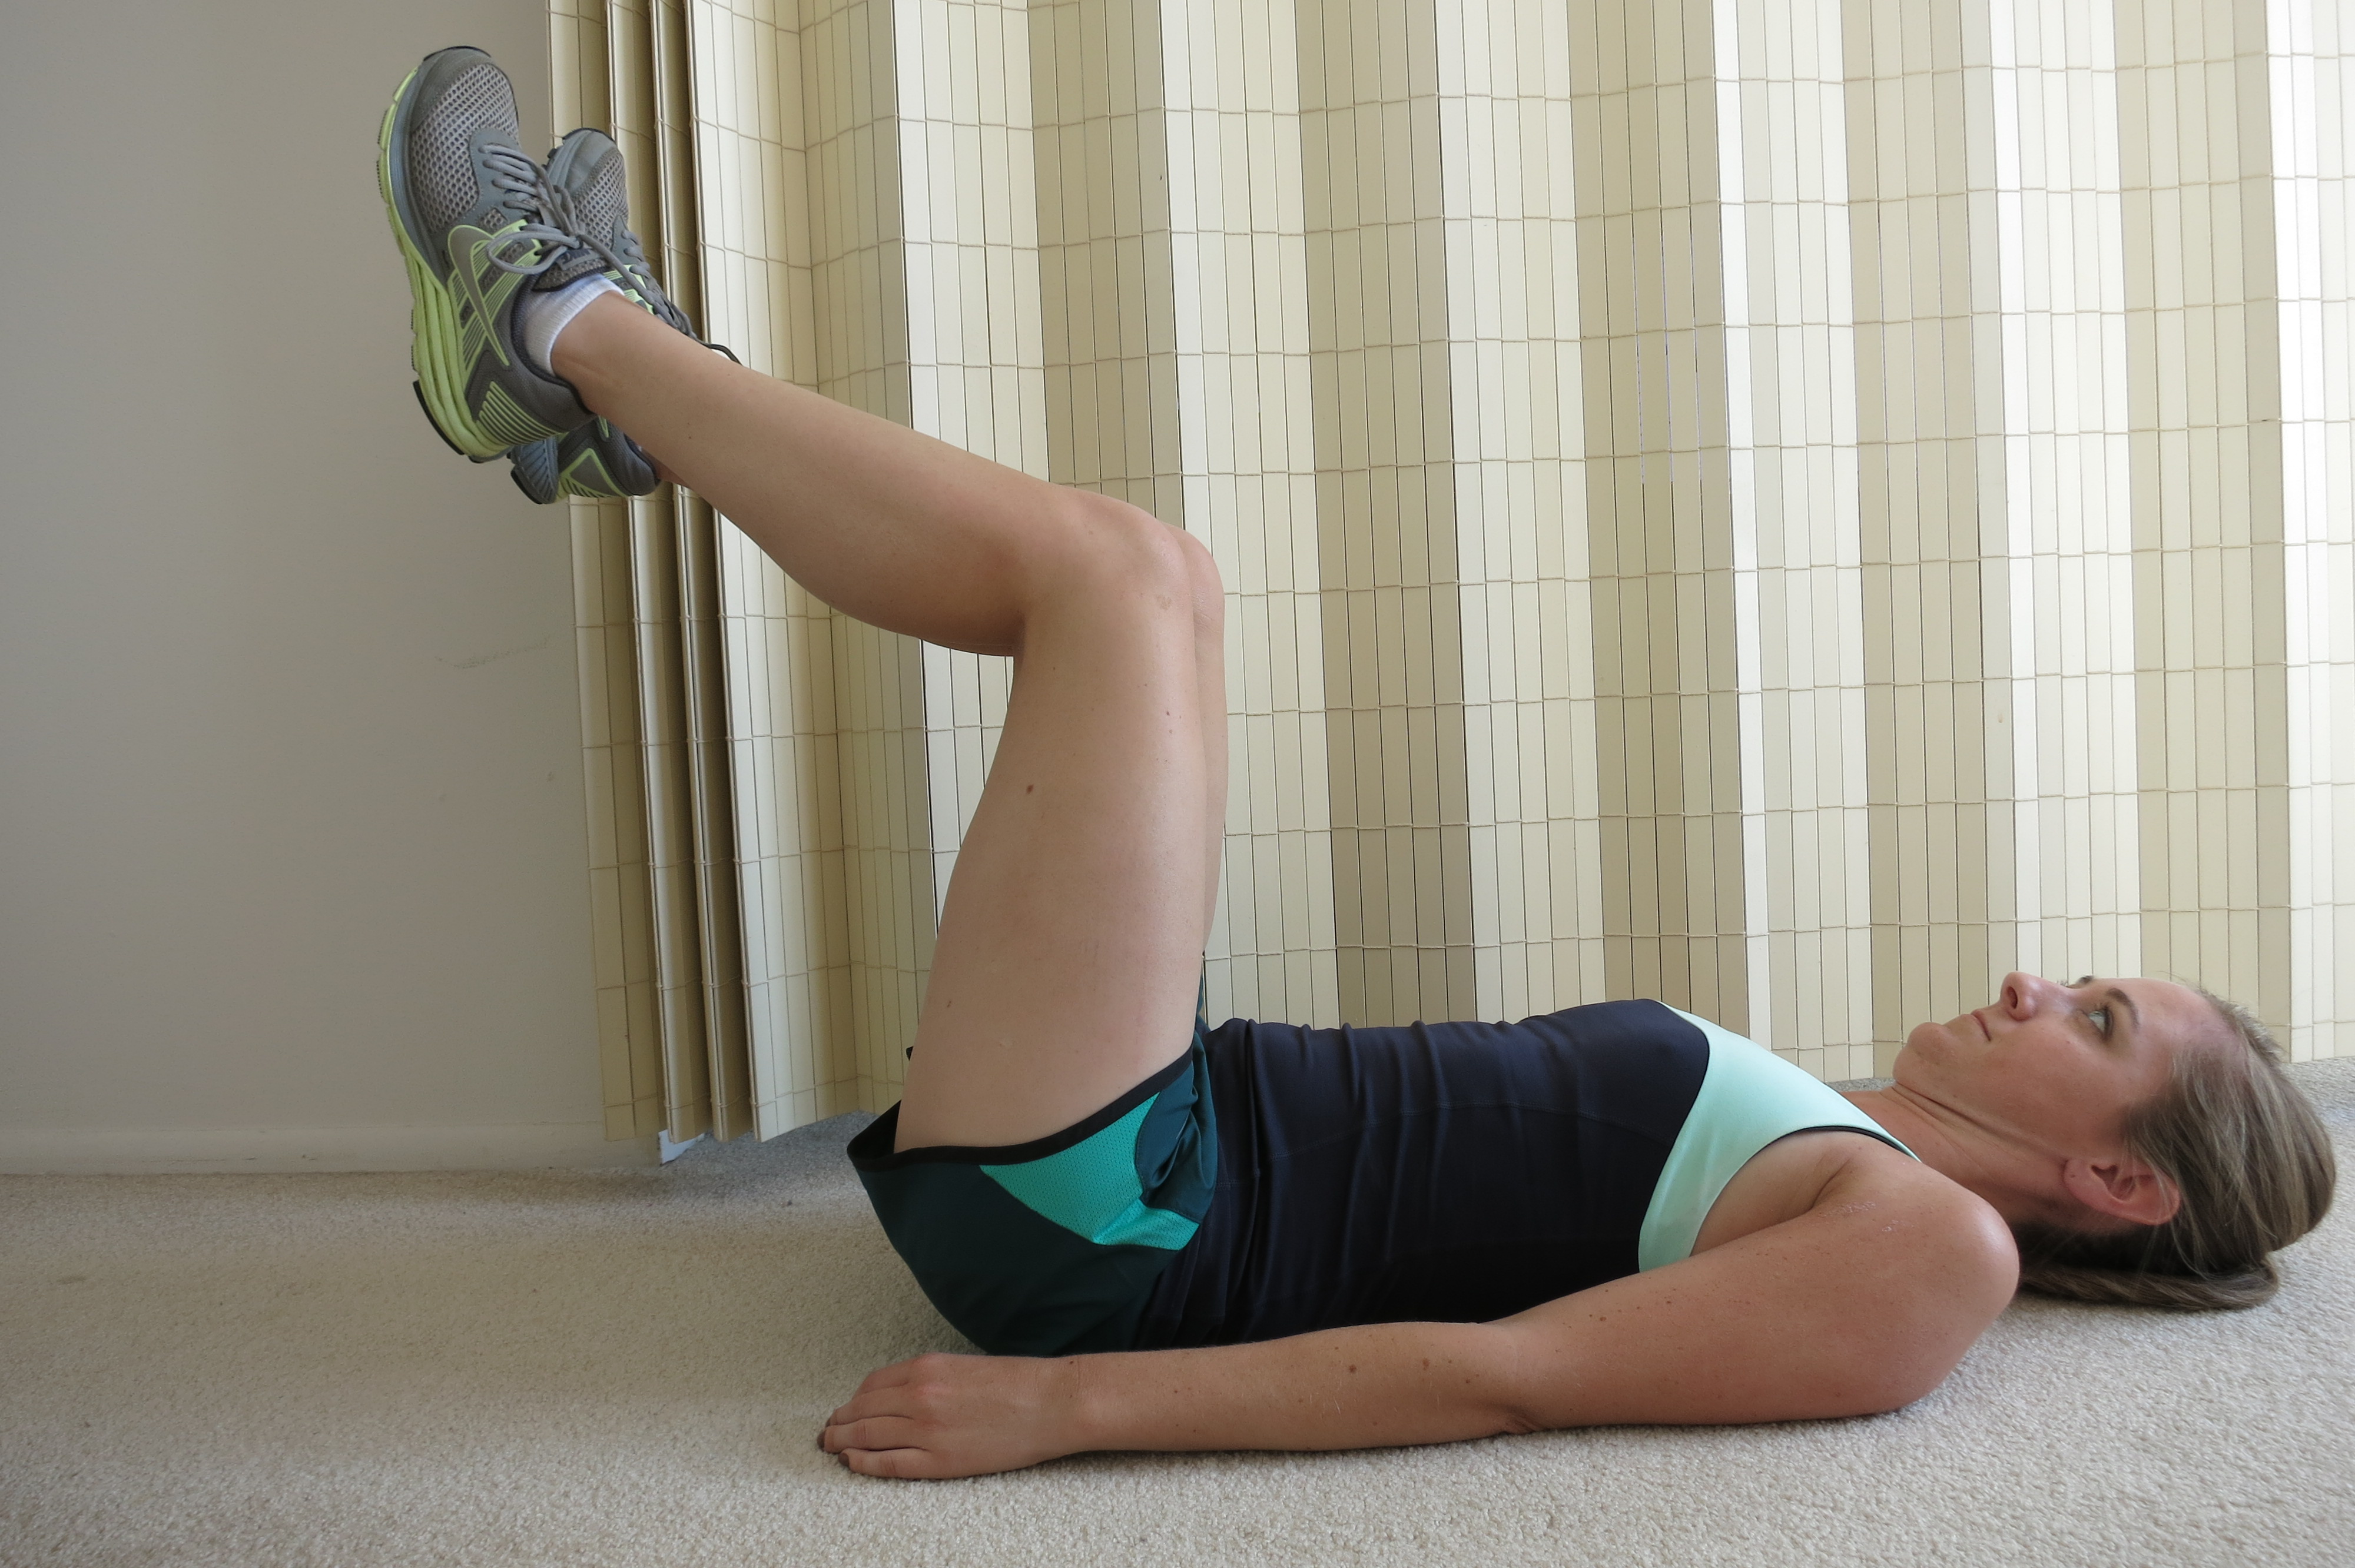
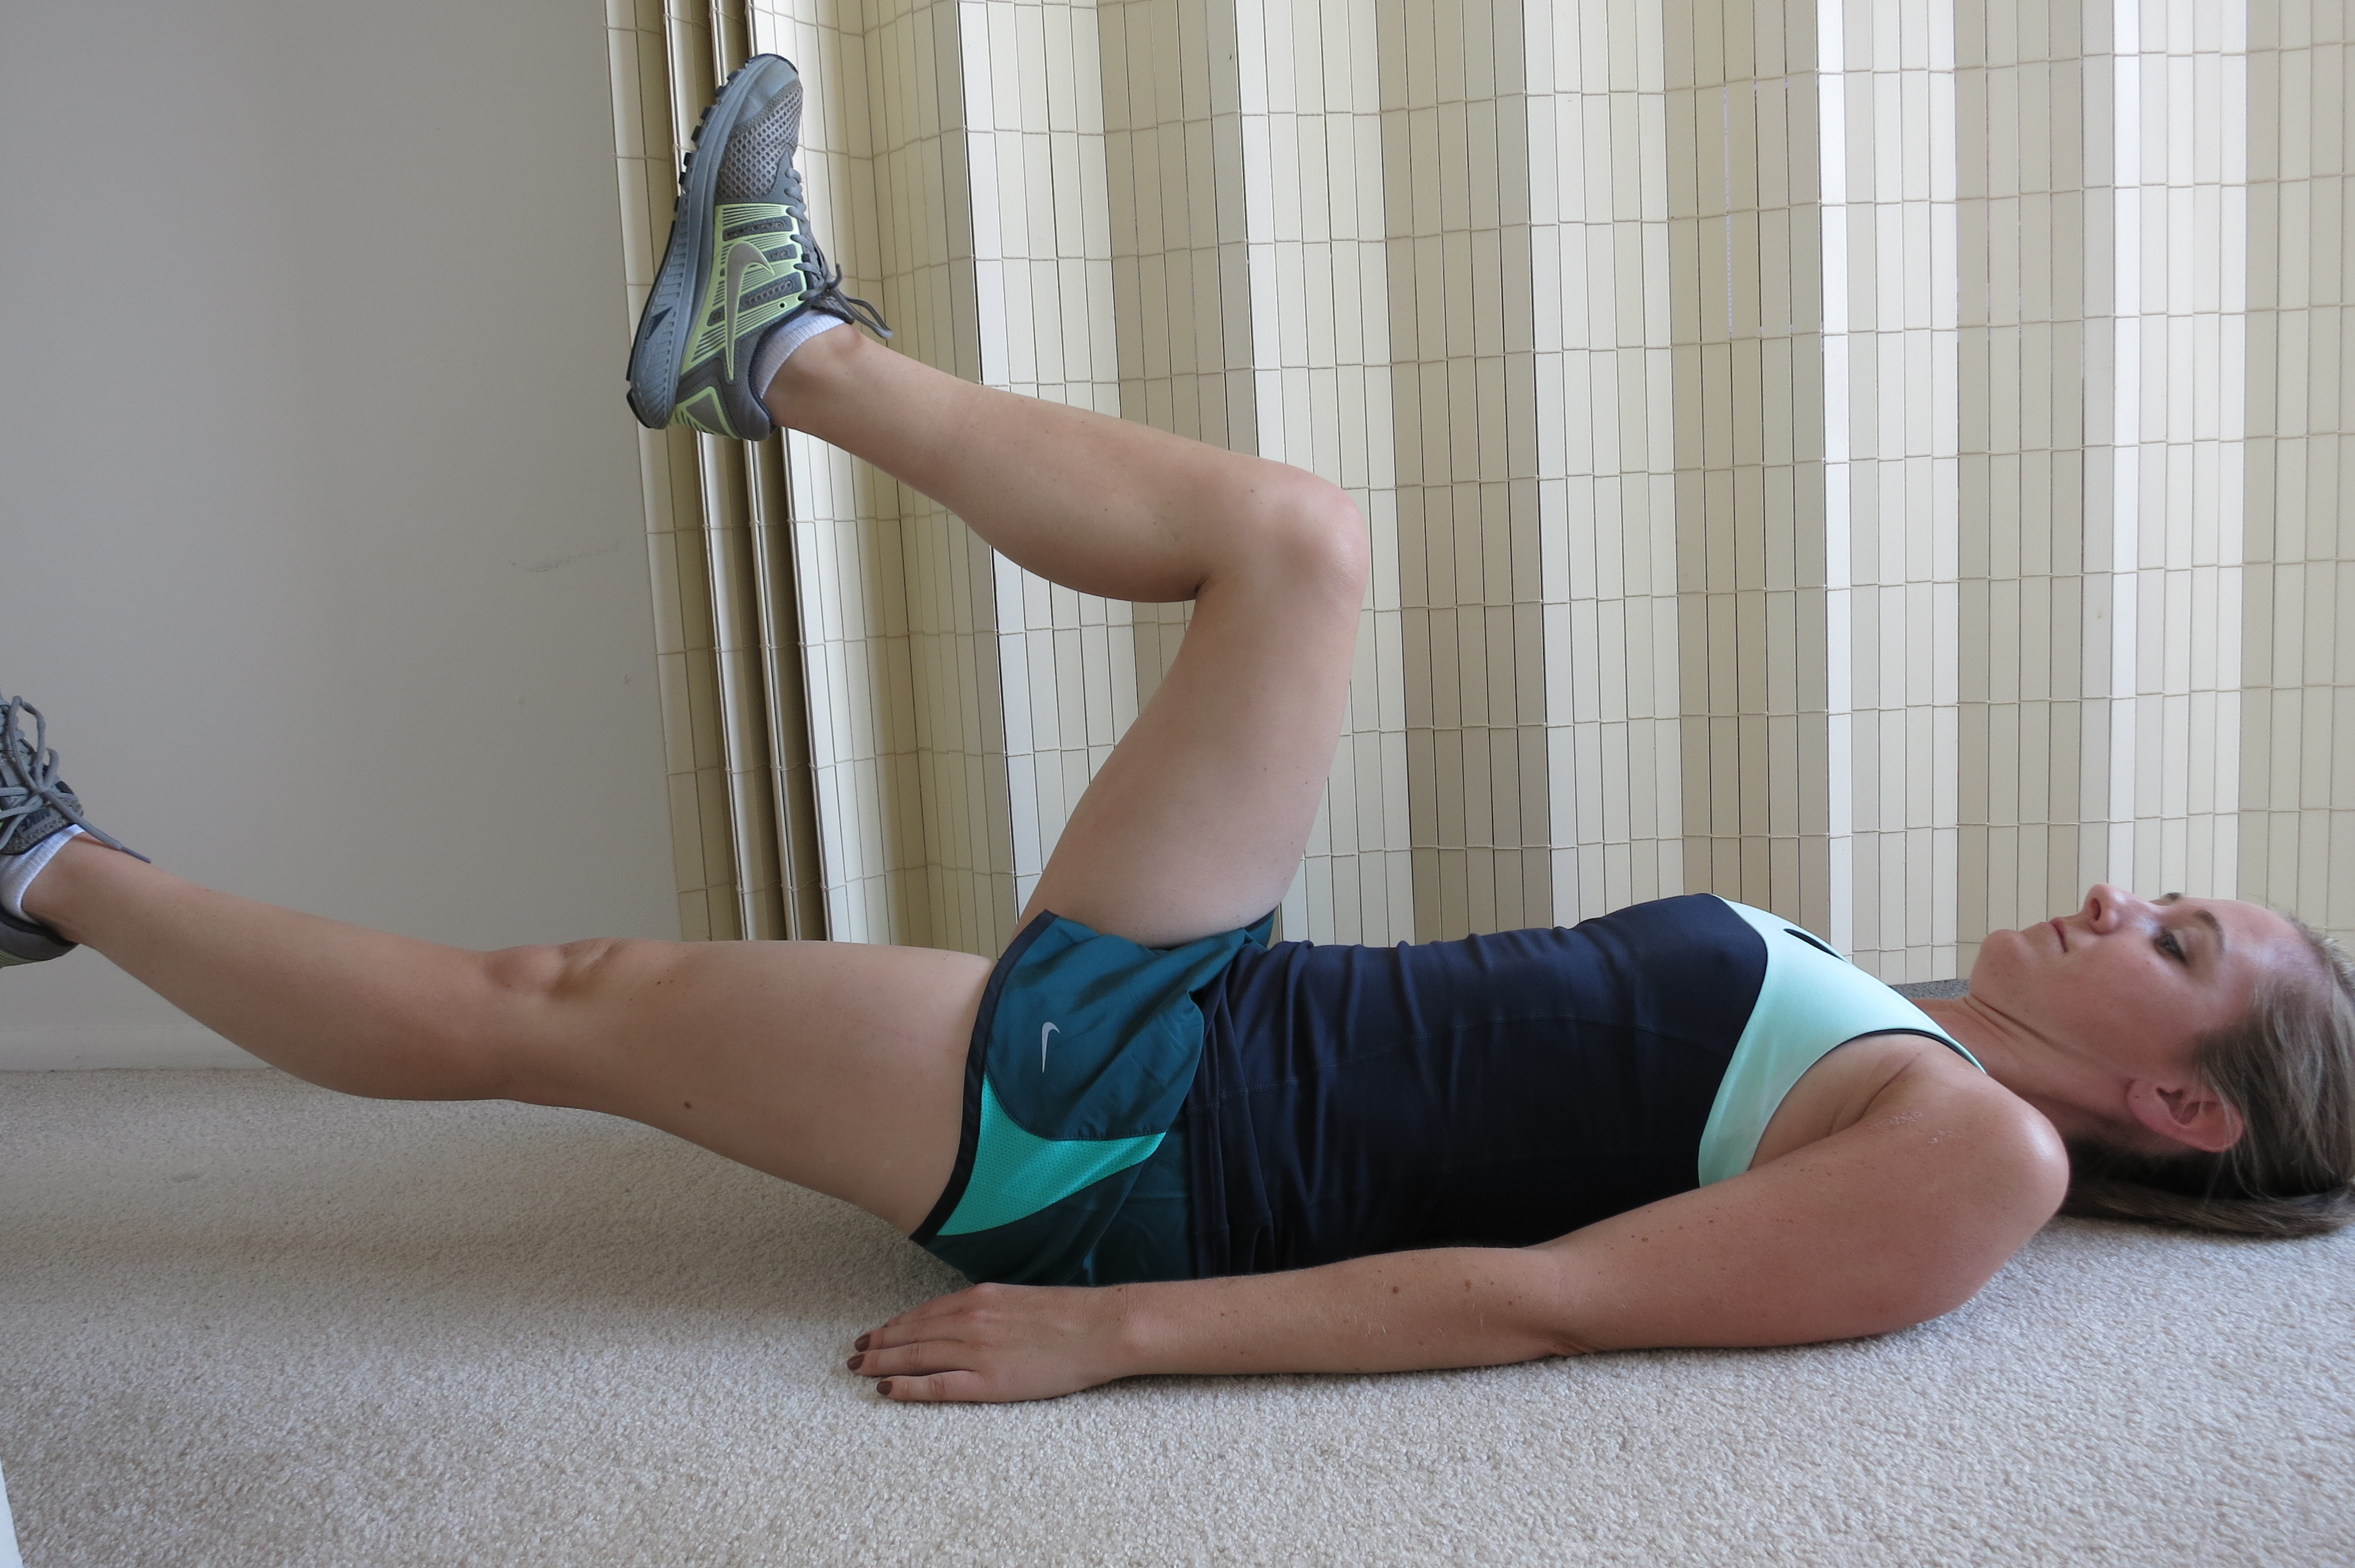
Level 4
Level 4 Abdominal Strengthening
Step 1: Perform abdominal and pelvic floor contraction as in Level 1.
Step 2: Raise one leg so hip is bent 90 degrees.
Step 3: Raise opposite leg so hip is bent 90 degrees.
Step 4: Straighten out one leg, keeping heel close to the floor.
Step 5: Bring leg back to position in Step 3 (bent 90 degrees).
Step 6: Straighten opposite leg, keeping heel close to the floor.
Step 7: Bring leg back to position in Step 3 (bent 90 degrees).
Step 8: Continue alternating extending each leg (as if running!) while keeping abdominals contracted for 10 -20 repetitions.
Watch out! Do not push your back into the floor or arch it away from the floor. Your stomach should be sinking DOWN, not pushing UP toward the ceiling. If you cannot straighten your leg without moving your back, try sliding your heel on the floor. Progress to being able to straighten your leg with your heel just above the floor.
Perform exercise daily until you feel you are able to do 20 repetitions correctly.
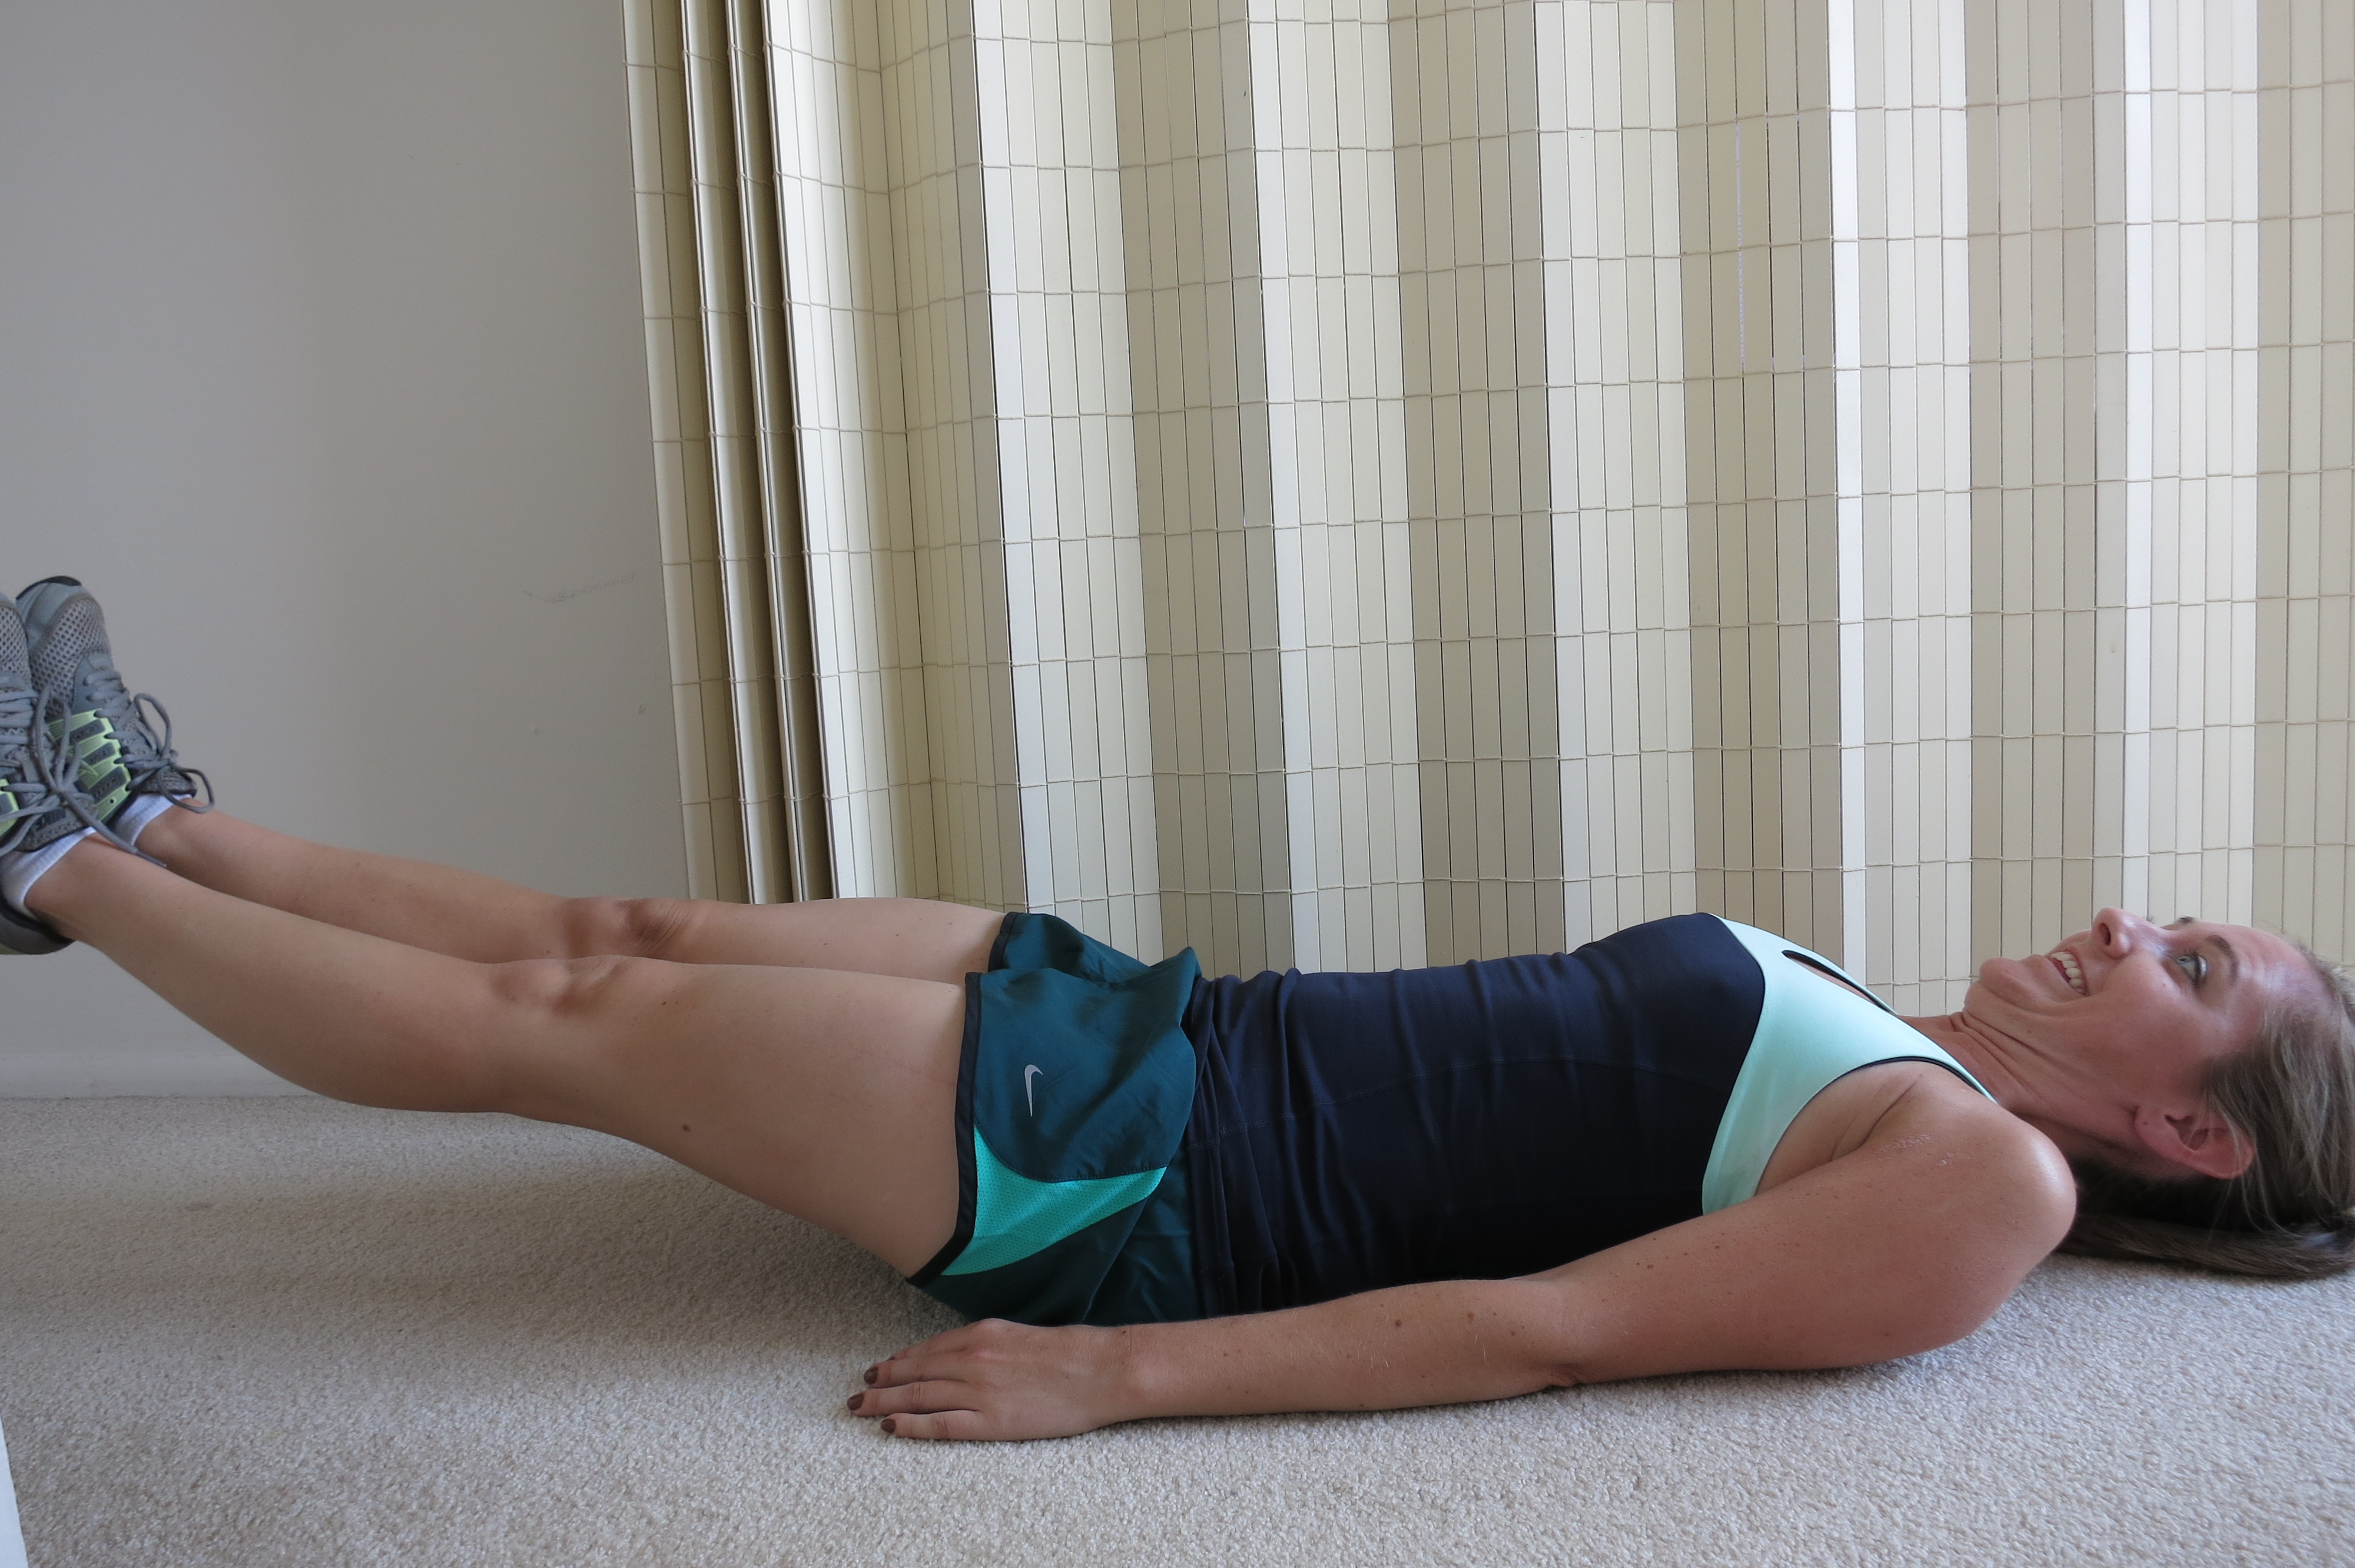
Level 5
Level 5 Abdominal Strengthening
Step 1: Perform abdominal contraction as in Level 1.
Step 2: Lift one leg so hip is bent 90 degrees.
Step 3: Lift other leg so hip is bent 90 degrees.
Step 4: While maintaining your abdominal contraction, straighten BOTH legs so heels are just above floor.
Step 5: Bring both legs back up to being bent 90 degrees.
Step 6: Repeat straightening both legs at the same time for 10-20 repetitions.
Watch out! Do not push your back into the floor or arch it away from the floor. Your stomach should be sinking DOWN, not pushing UP toward the ceiling. If you cannot straighten your leg without moving your back, try sliding your heel on the floor. Progress to being able to straighten your leg with your heel just above the floor.
Perform exercise daily.
You also want to integrate the program into your daily life. Be sure to contract your abs when walking, getting up from a chair, carrying your baby (and that carseat…grrr), etc.
For humor, here is what family gatherings look like when you are related to a physical therapist and someone asks how to strengthen their abs:
***The content of www.kayleemay.com is for informational purposes only. The information presented is not to be taken as professional medical advice, diagnosis, or treatment. If you are having pain, or seeking medical advice, talk to your health care provider. Do not delay in seeking treatment because of information you have read on www.kayleemay.com. Taking recommendations presented on www.kayleemay.com is solely at your own risk***
This recipe was inspired by our favorite food blog, Pinch of Yum. Go to the original recipe here to see our inspiration!
I haven’t posted much recently because I have been staring at this the past 3 weeks:
And laughing when she makes faces like this:
Luckily, Davey has been off work the past three weeks. Thank GOD. Praise JESUS. I would be dead by now if he had been gone all day long leaving me to fend for myself and the baby. Dead, I tell you. Since giving birth was actually really hard (I know, I was warned, but still a shock), I have had a great excuse to avoid cooking and dishes. This means I get to enjoy Davey’s creations all the time. Davey has a thing for sweet potato fries, so when I saw Pinch of Yum’s Healthy Grilled Sweet Potato Nachos, I forwarded him the link and let his creative brain take over from there (a subtle “hint hint” never hurt anyone). I knew he would come up with something that was typical “Davey Special”: Simple, quick, and easy. Here it is, folks:
Directions:
Slice potatoes thinly.
Spread evenly on pizza brick or baking sheet.
Drizzle with olive oil and sprinkle with a dash of salt and pepper.
Bake at 350 degrees for 20-30 minutes or until slightly crispy.
Top with your favorite toppings. Davey used:
Refried beans
Black beans
Corn
Diced onions
Shredded cheese
Our beautiful daughter was born on Sunday, July 20, 2014 at 3:21am.
And just like that, our lives have changed.
Seton Grace Hiatt was named after St. Elizabeth Ann Seton, the first American-born saint. Our precious girl has already been blessed with so many graces. There were candles lit for her in Rome during our pregnancy, my sister was saying the rosary for her during her birth, and Davey and I were able to attend mass just before going to the hospital. I was surprisingly able to pay attention to the homily through nine contractions. 🙂 I loved that I could share the last Eucharist with her before her birth.
I’ll spare the gory details of laboring, but I can’t type this post without advising you to go hug your mothers. Seriously.
Here is our precious baby’s first day in the world:
We have gone out to eat, been to church breakfasts, seen more live music, and watched a bike race. We even tried our first Jucy Lucy at Matt’s Bar. (Sorry we were late, Barack!)
Remember how I said 2 weeks ago that our good cameras were packed in the hospital bag, and I wasn’t going to unpack them until they get used for baby’s first life moments? Well, they are still in the hospital bag, charged and ready with no place to go (yet).
Here is a little recap via the iPhone of our Sunday walk around Hopkins when we stumbled upon the Raspberry Festival’s bike race:
A shaky video, but at least I know my mom will like it. 🙂 Hi, Mom!
Davey and I look for recipes that are suuuuuper easy to make. When I say easy, I am talking 5 ingredients and less than 20 minutes of prep time.
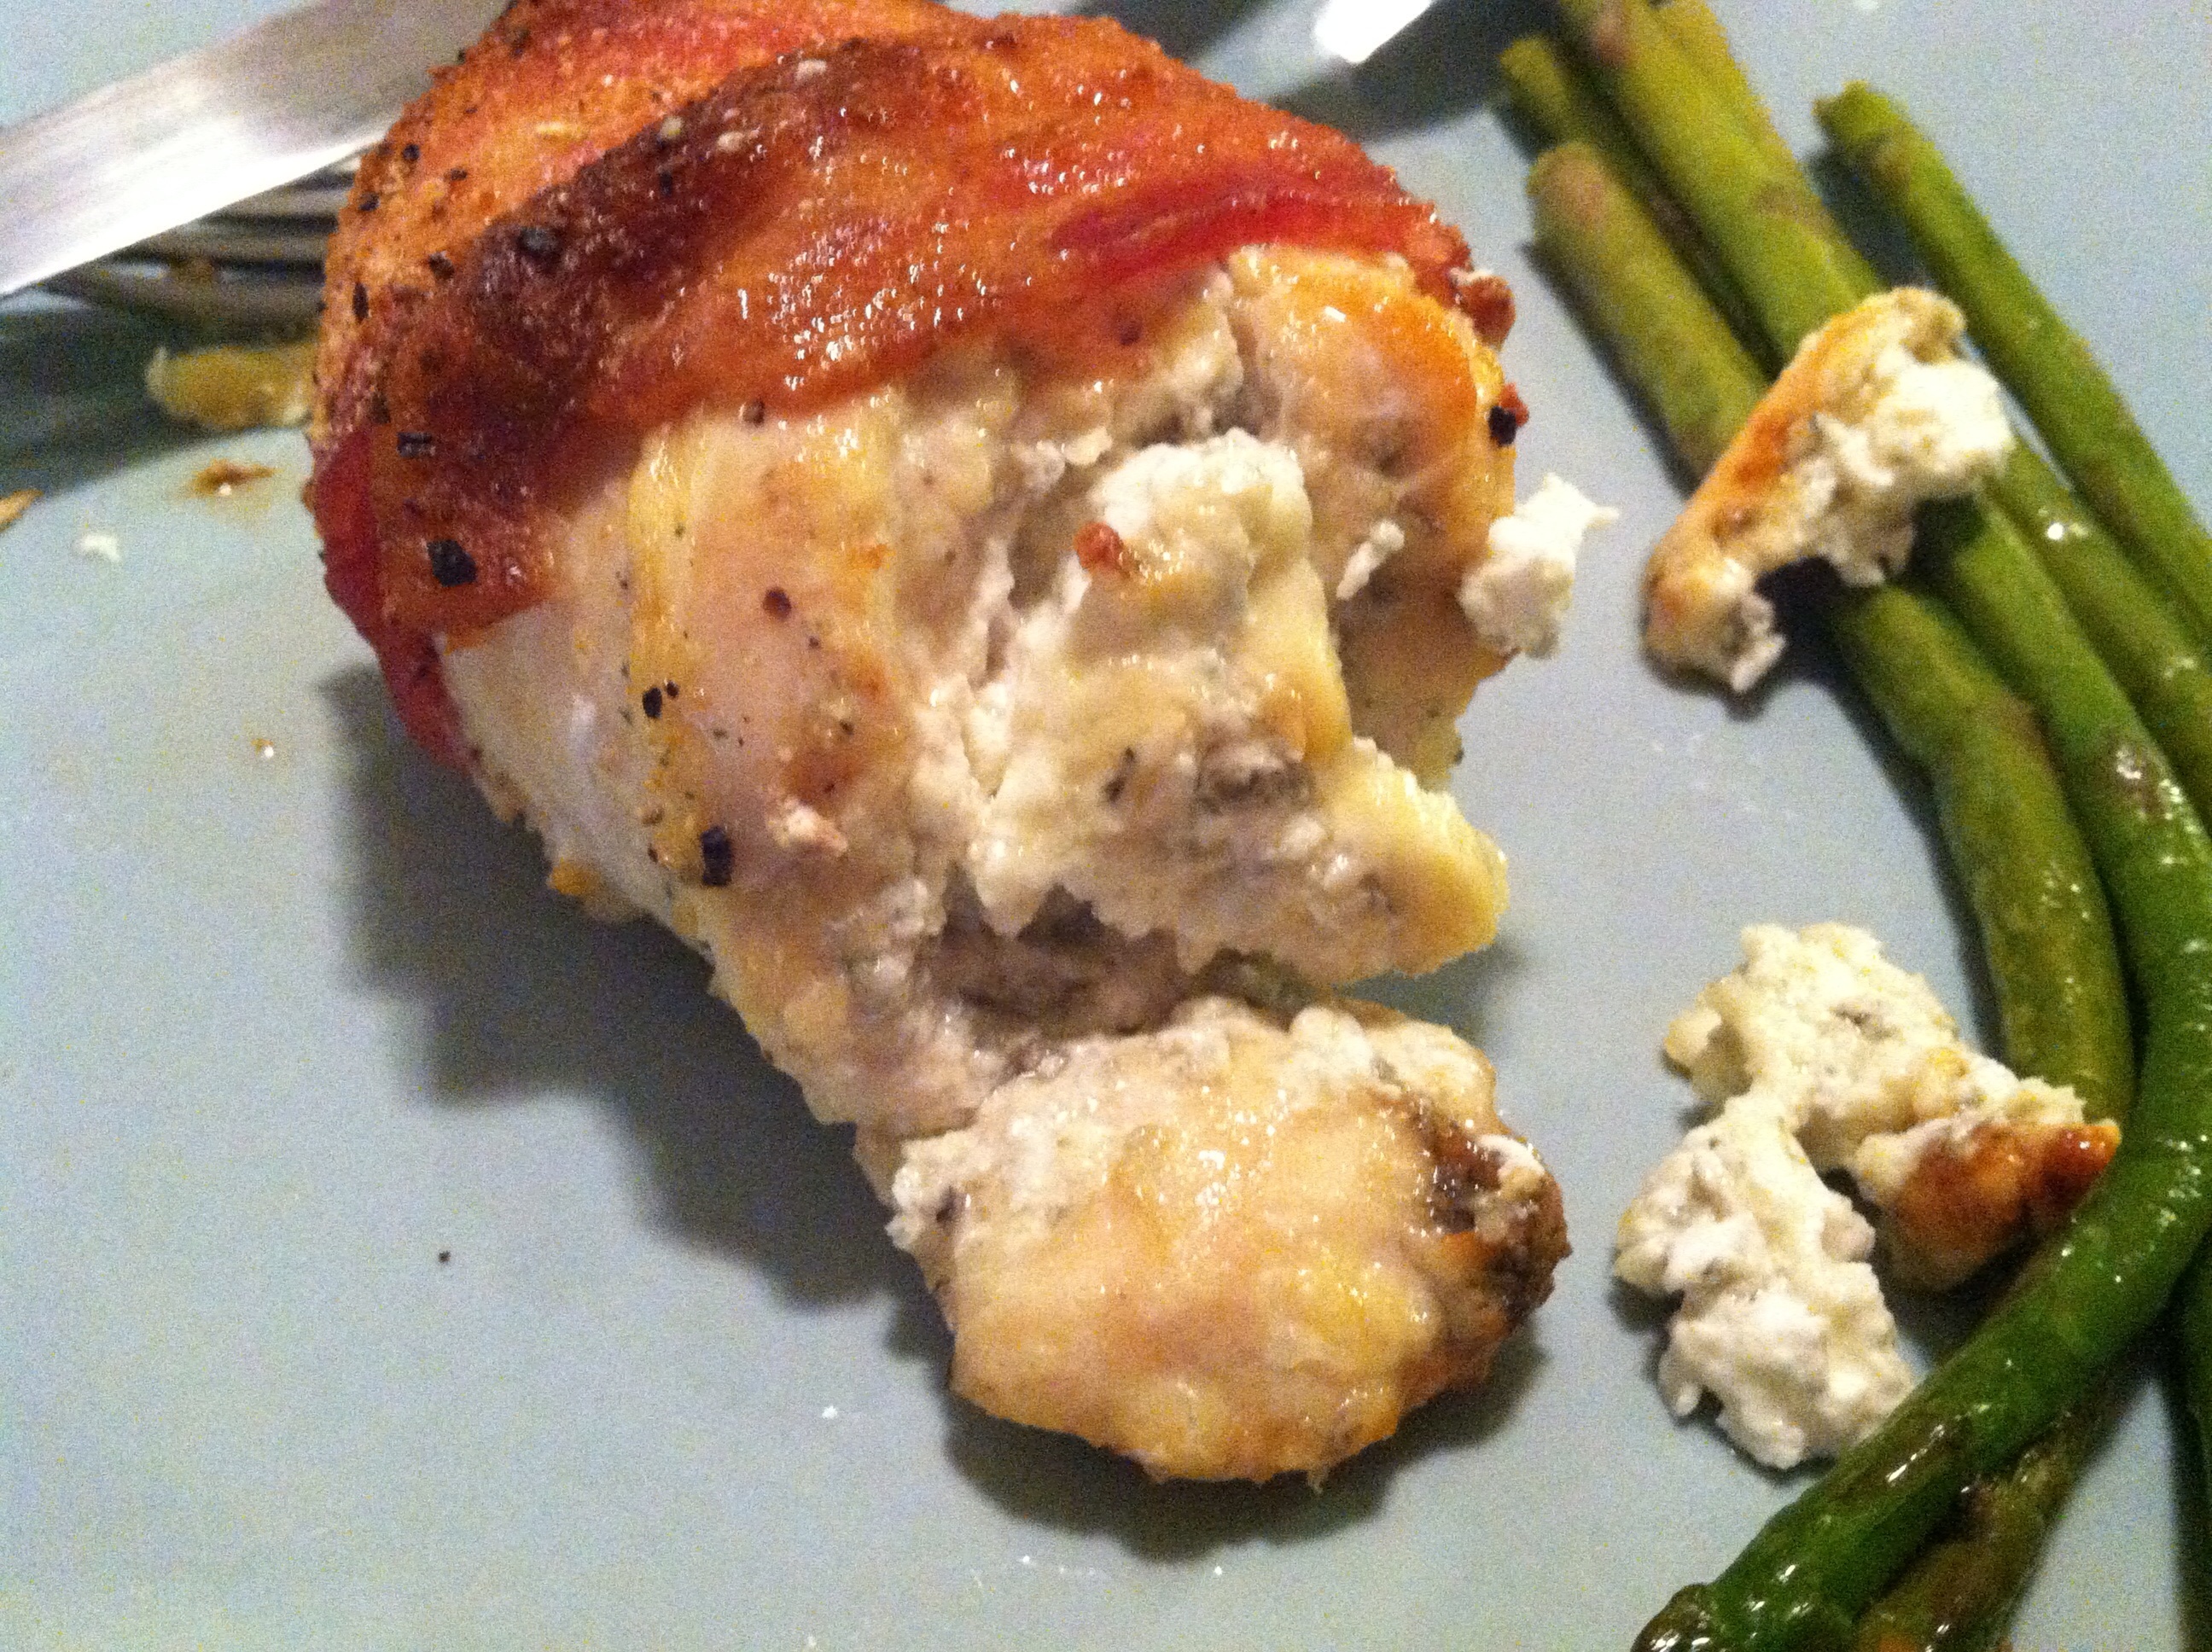
This Cheesy Bacon Wrapped Chicken recipe is easy and quick. When we ate it for dinner last night, we both commented that this is a good recipe to make when we have guests for dinner because it can easily pass for being classier than it actually is.
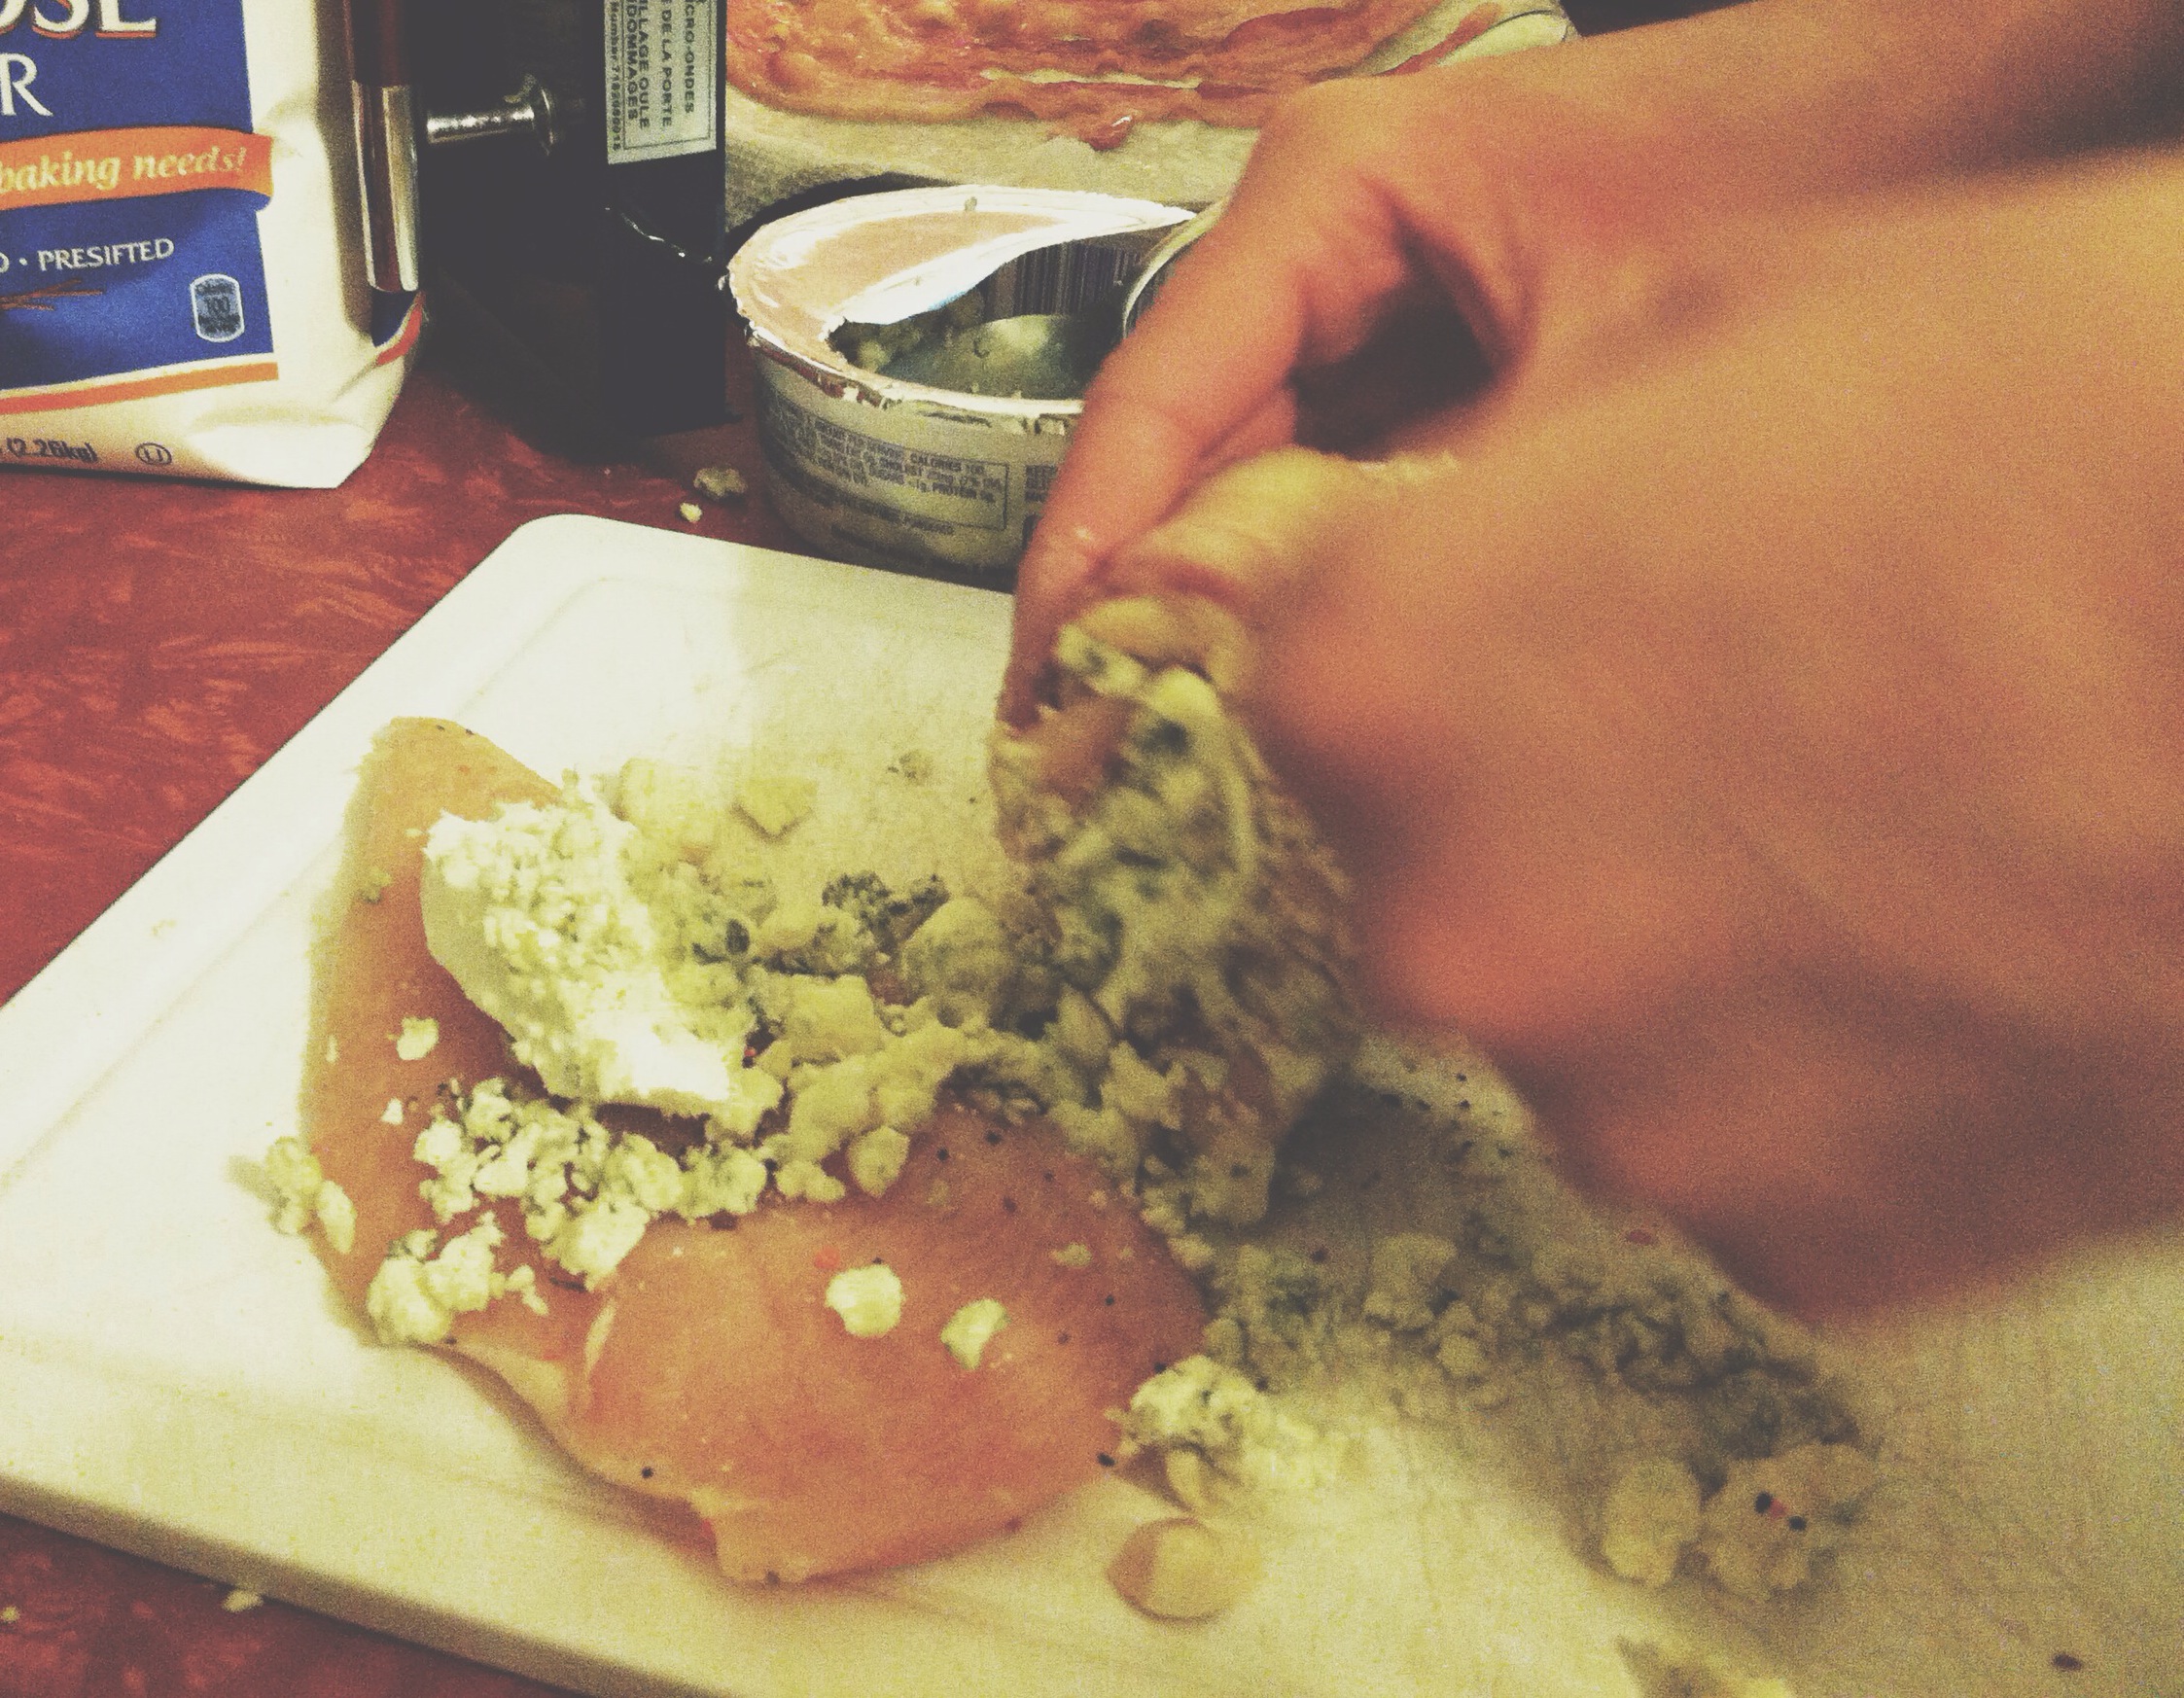
Here is how we did it (and by “we,” I clearly mean Davey):
Ingredients:
3 boneless chicken breasts
cream cheese
blue cheese
salt/pepper for taste
6 strips of bacon
Directions:
Cut uncooked chicken breasts in half. Spread cream cheese on each of the halves. Sprinkle blue cheese over the cream cheese. Add salt/pepper as desired. Roll each chicken breast so the cheesy filling is on the inside. Keep the chicken rolled tight by wrapping with a slice of bacon. Secure with a toothpick.
Cook at 425 degrees uncovered in a baking or casserole dish for 15 minutes or until chicken is cooked through.