*These exercises are based off the Sahrmann Low Abdominal Progression.*
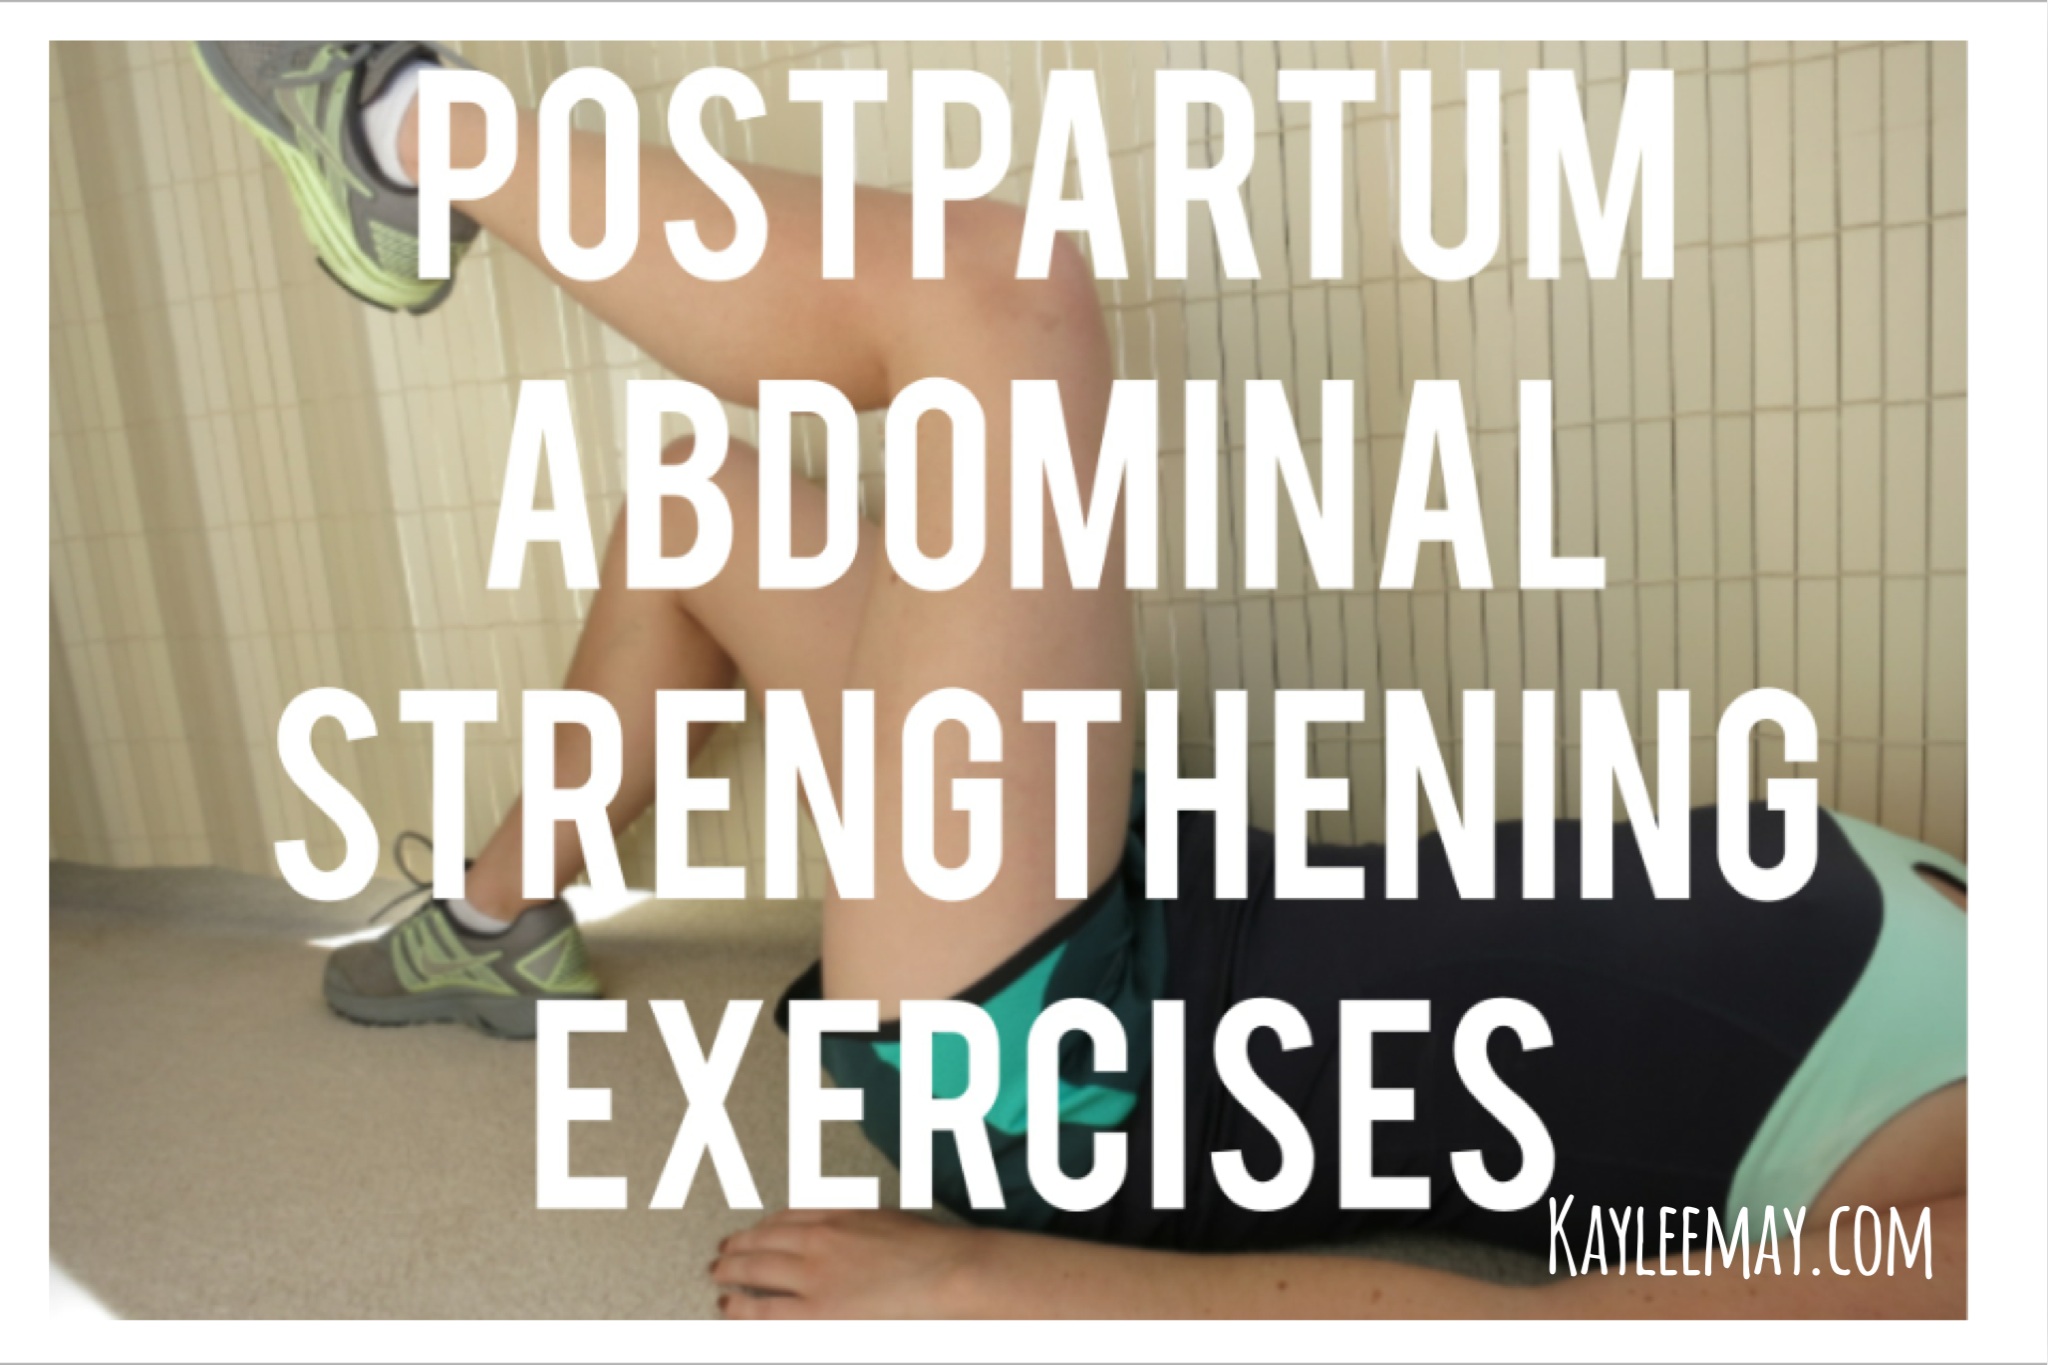
I swore to myself I wouldn’t get that certain post pregnancy “pooch” that stays with me the rest of my life…we all know what I am talking about. Yeah, good for Kate Middleton for going out in public right after giving birth with a pregnancy pooch, but let’s be honest… that kind of thing sticks around a whole lifetime for us normal folk. I thought I would share my postpartum abdominal strengthening program for those in the same position as me.
This post will look very familiar to those of you who read my series on tips for runners. Postpartum abdominal strengthening is very similar to how I recommend my runners strengthen their abdominals with a few key differences.
One difference is that it is important to take it slow and remember that your abs have been stretched to their limits over the course of 9 months. The initial goal of postpartum abdominal exercises is to first be able to contract the muscles. The subsequent goal is to strengthen the abdominals to support your low back, pelvis, and hips. After all, you will be carrying extra weight around (aka the babe and that extremely heavy carseat…grr), and you need your abdominal brace to support your back and hips! Many of my patients’ musculoskeletal problems can be traced back to poor movement patterns due to weak abdominals that they never strengthened after being pregnant. The final goal, for vanity’s sake, is to reduce the chance of the friendly pooch being with us the rest of our life.
One other difference of postpartum abdominal strengthening is that it is necessary to contract your pelvic floor muscles (you’ve heard of Kegels) when you contract your abs. I tell this to my runners as well, but it is especially important after giving birth.
Lastly, and most importantly, ask your doctor and physical therapist before initiating any abdominal strengthening postpartum. It didn’t take me long after giving birth to realize we all have different birth stories (it seemed like everyone else got an epidural because they worked #lies #imnotbitter #yesiam), therefore different rates and amounts of healing required. This goes for any type of birth– Cesarean, water, natural, epidural, in a rain forest like that crazy lady on Youtube (don’t Google it, I warned you)…anything! Your doctor will likely want you to wait a certain amount of time before initiating exercise.
The postpartum abdominal strengthening progression takes you through five abdominal exercises, each progressively more difficult. You will notice that the low back does not move at any point in the exercises. Rather, the abs work to stabilize as the limb movement becomes progressively more challenging. To work through the exercises, you must first successfully perform up to 20 repetitions correctly before progressing to the next exercise. Therefore, you may be on one level for up to 2 weeks before you feel you are ready for the next. If you can not perform an exercise without compensations (arching it away from the floor, pushing into the floor, or allowing your abdominal muscles to “pooch” up toward the ceiling), you must go back down to the previous level.
Level 1
Step 1: Lay on back with knees bent and feet flat on floor.
Step 2: Contract abdominals buy pulling navel toward your spine as you exhale. Contract pelvic floor muscles (the muscles you use to stop the flow of urine).
Step 3: Hold 5-10 seconds.
Step 4: Repeat 10-20 times.
Watch out! Do not push your back into the floor or arch it away from the floor. Your stomach should be sinking DOWN, not pushing UP toward the ceiling.
Perform exercise daily until you feel you are able to do 20 repetitions correctly.
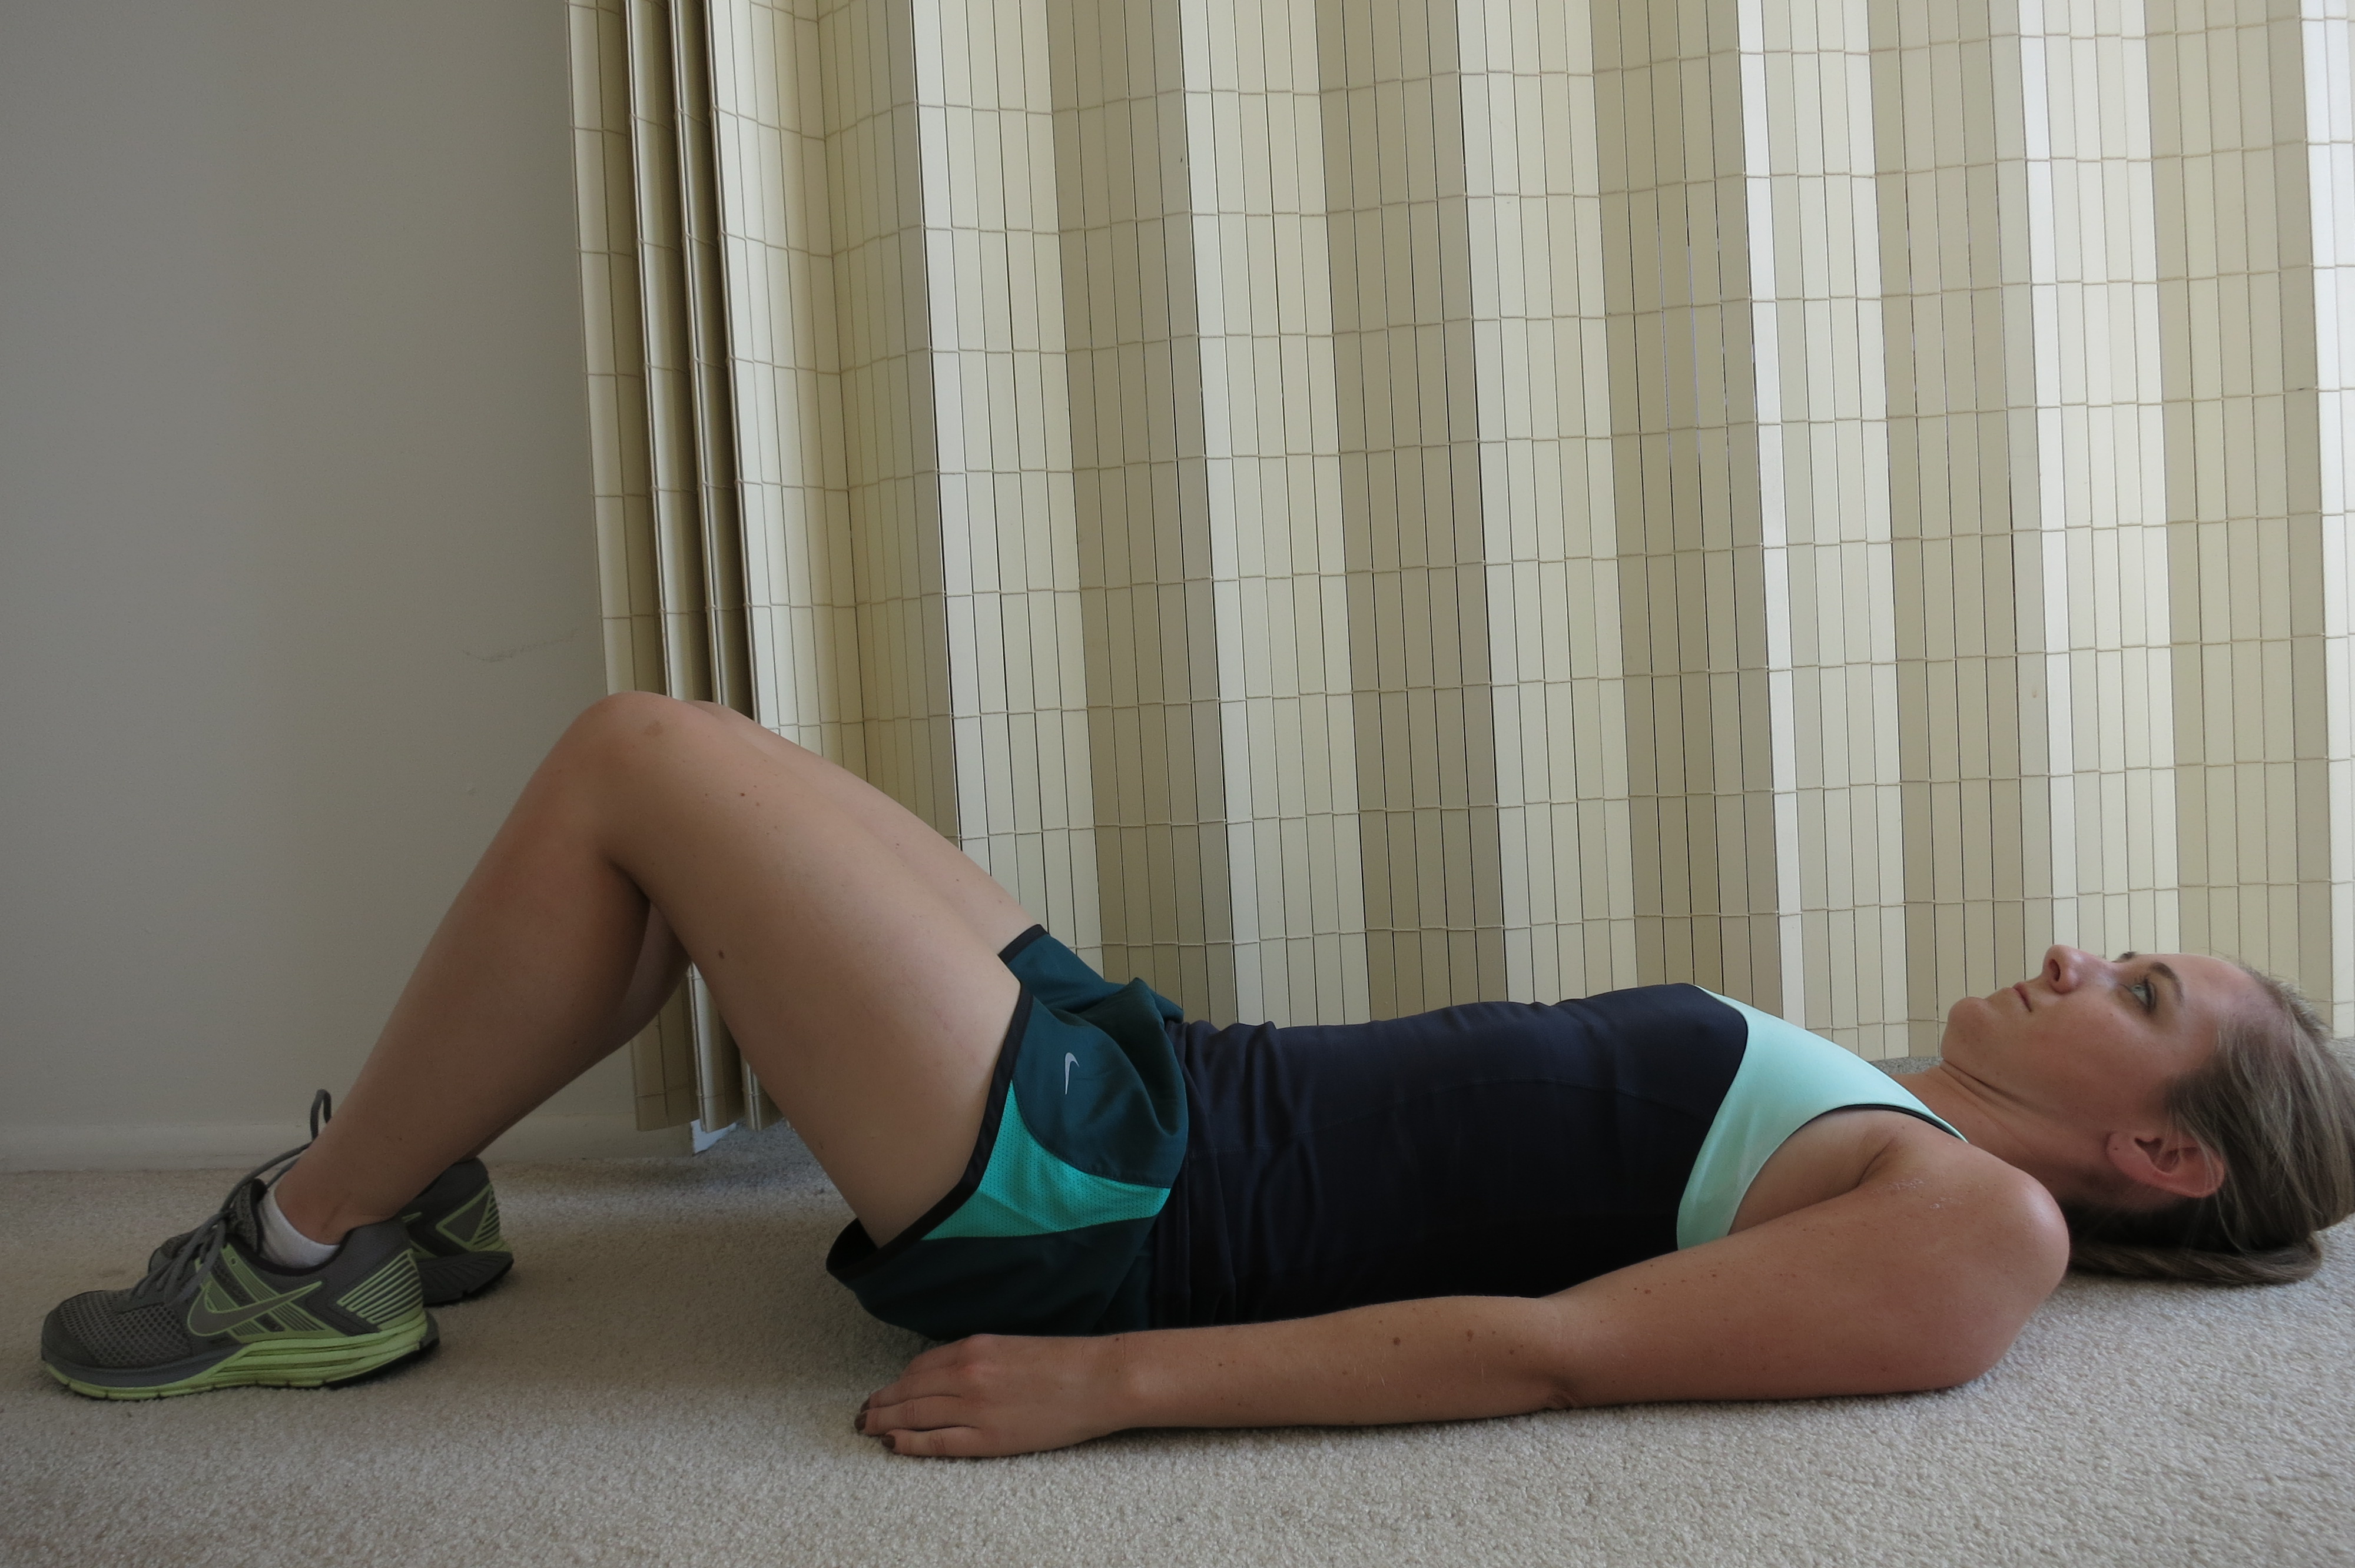
Level 2
Step 1: Perform abdominal and pelvic floor contraction as in Level 1.
Step 2: Raise one leg so hip is bent 90 degrees while maintaining abdominal contraction.
Step 3: Place leg back to starting position as in Step 1.
Step 4: Raise contralateral leg so hip is bent 90 degrees while maintaining abdominal contraction.
Step 5: Place leg back to starting position as in Step 1.
Step 6: Repeat 10-20 times.
Watch out! Do not push your back into the floor or arch it away from the floor. Your stomach should be sinking DOWN, not pushing UP toward the ceiling.
Perform exercise daily until you feel you are able to do 20 repetitions correctly.
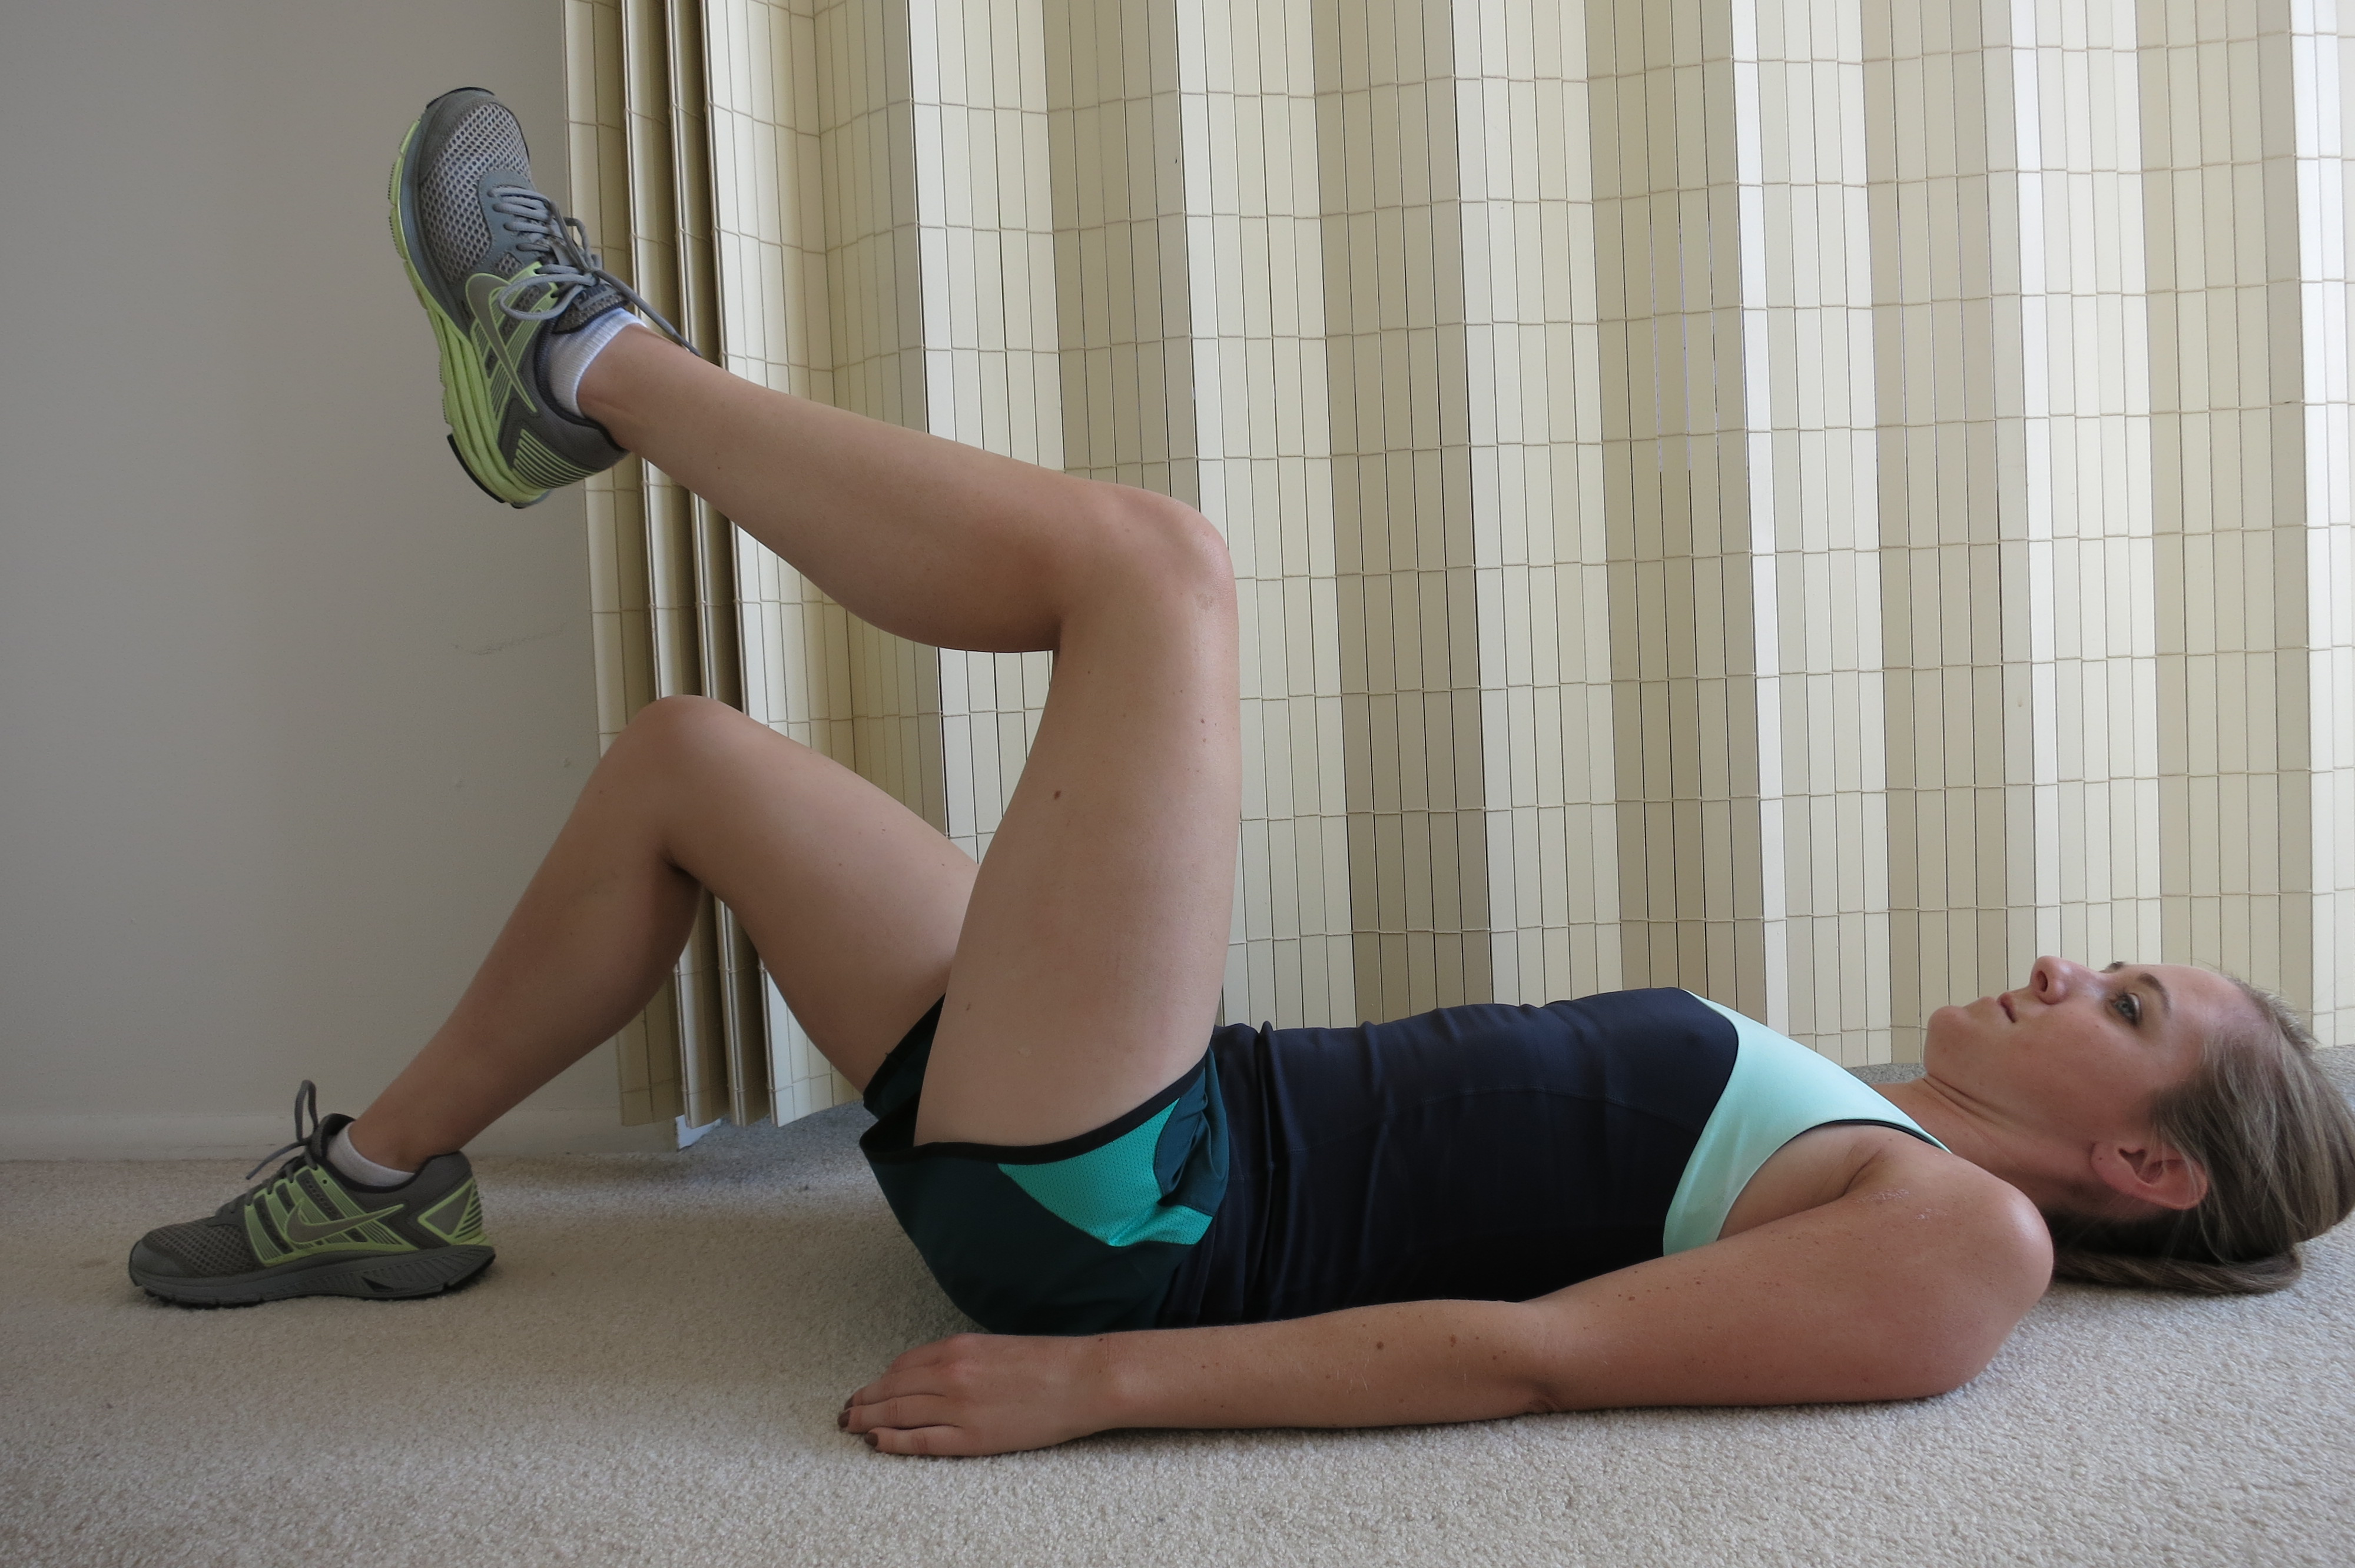
Level 3

Step 1: Perform abdominal and pelvic floor contraction as in Level 1.
Step 2: Raise one leg so hip is bent 90 degrees while maintaining an abdominal contraction.
Step 3: Maintain position of Step 2 and raise opposite leg so hip is bent 90 degrees.
Step 4: Place one foot back to starting position (keep those abs contracted!)
Step 5: Place the other foot back to the starting position (keep those abs contracted!)
Step 6: Repeat 10-20 times.
Watch out! Do not push your back into the floor or arch it away from the floor. Your stomach should be sinking DOWN, not pushing UP toward the ceiling.
Perform exercise daily until you feel you are able to do 20 repetitions correctly.
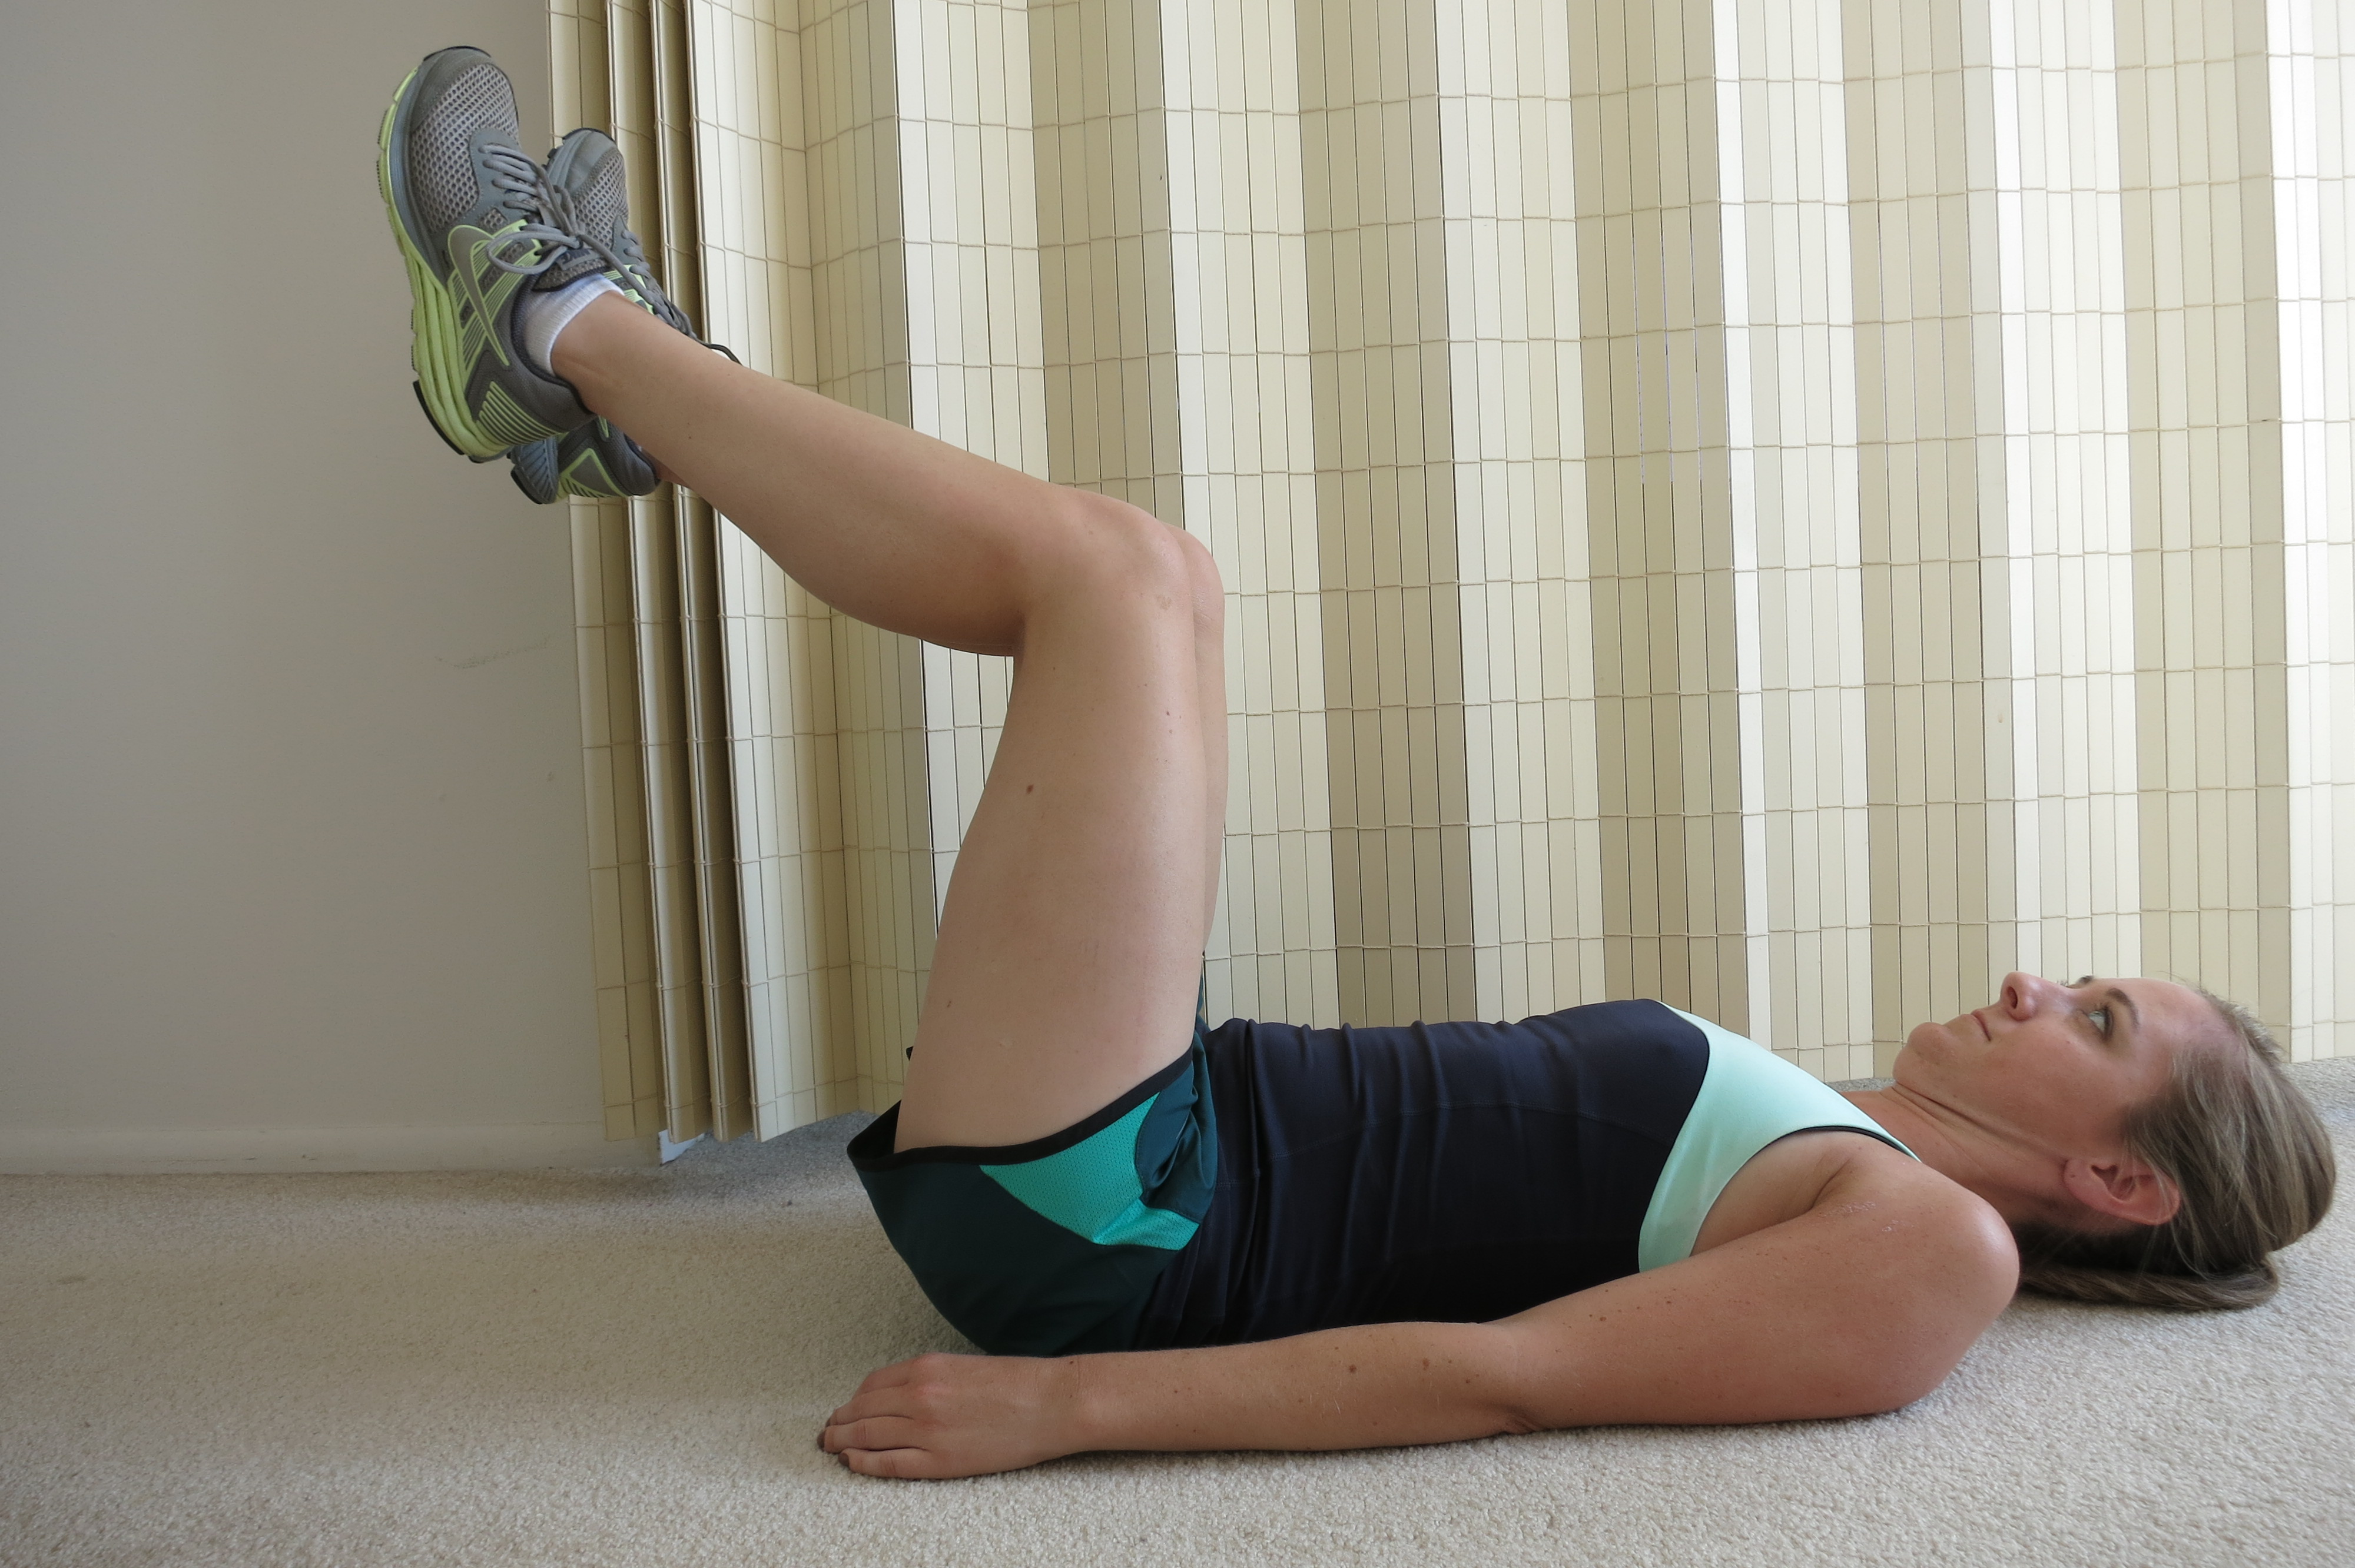
Level 4
Step 1: Perform abdominal and pelvic floor contraction as in Level 1.
Step 2: Raise one leg so hip is bent 90 degrees.
Step 3: Raise opposite leg so hip is bent 90 degrees.
Step 4: Straighten out one leg, keeping heel close to the floor.
Step 5: Bring leg back to position in Step 3 (bent 90 degrees).
Step 6: Straighten opposite leg, keeping heel close to the floor.
Step 7: Bring leg back to position in Step 3 (bent 90 degrees).
Step 8: Continue alternating extending each leg (as if running!) while keeping abdominals contracted for 10 -20 repetitions.
Watch out! Do not push your back into the floor or arch it away from the floor. Your stomach should be sinking DOWN, not pushing UP toward the ceiling. If you cannot straighten your leg without moving your back, try sliding your heel on the floor. Progress to being able to straighten your leg with your heel just above the floor.
Perform exercise daily until you feel you are able to do 20 repetitions correctly.
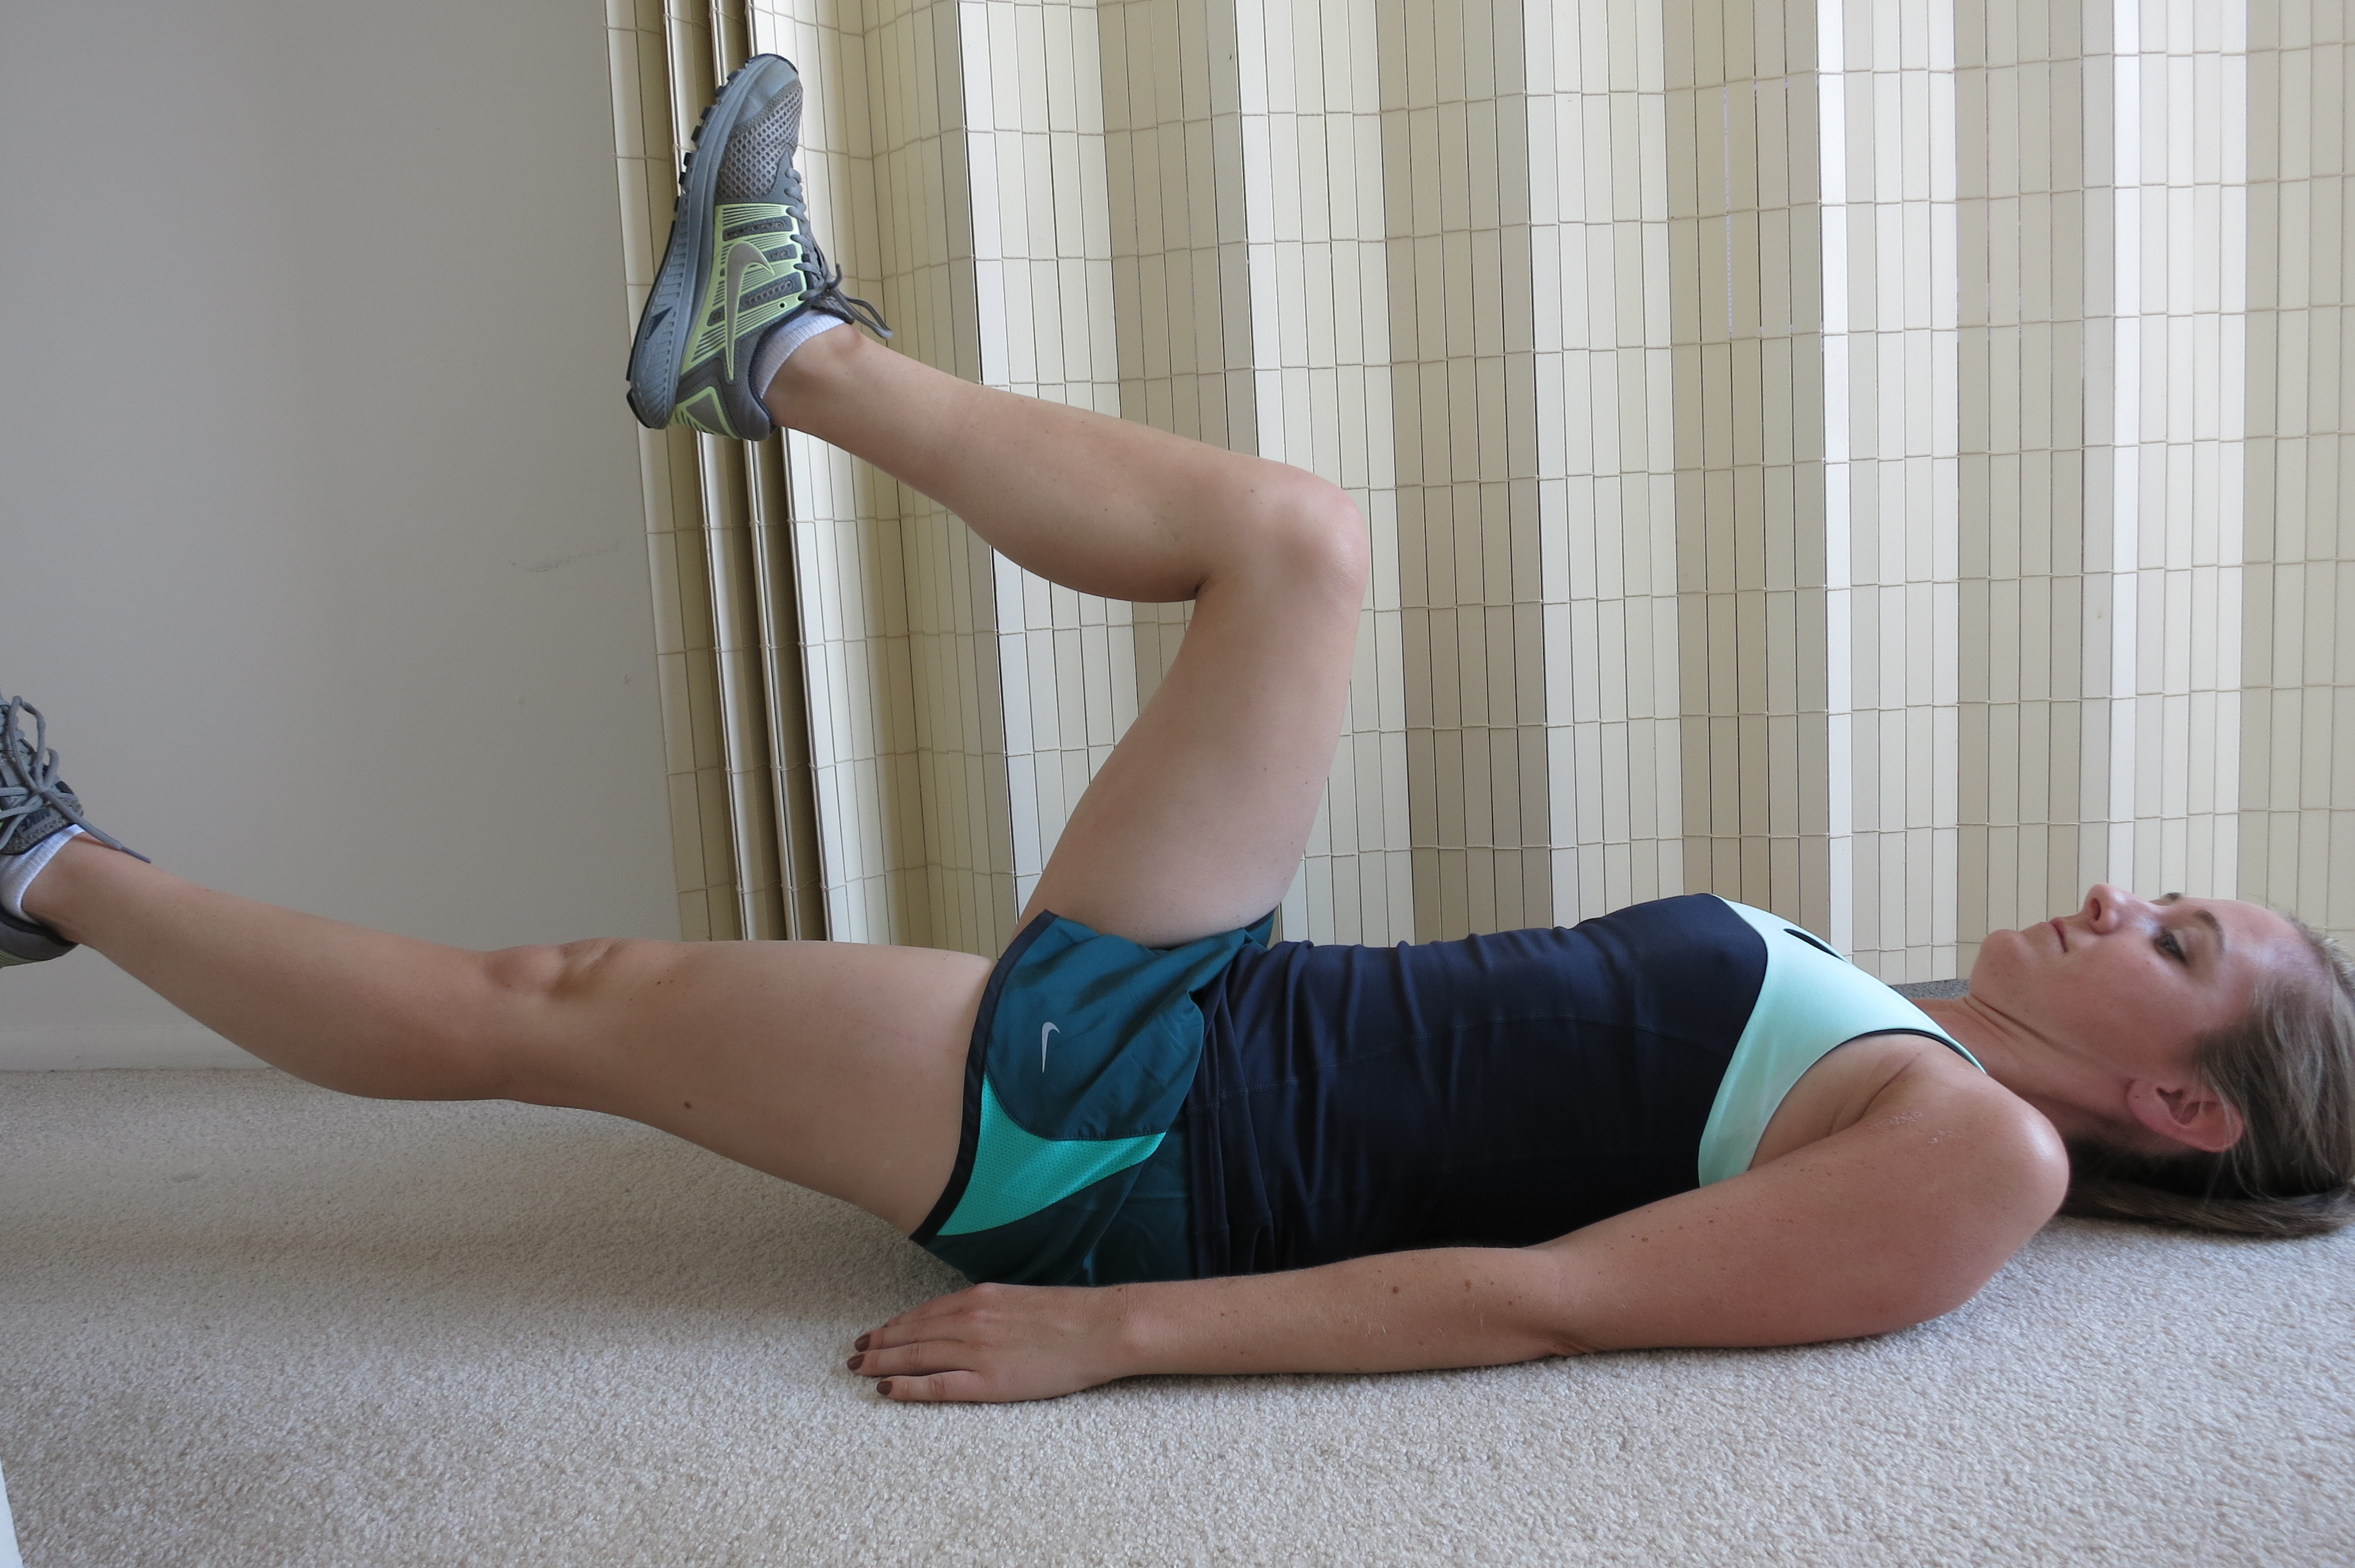
Level 5
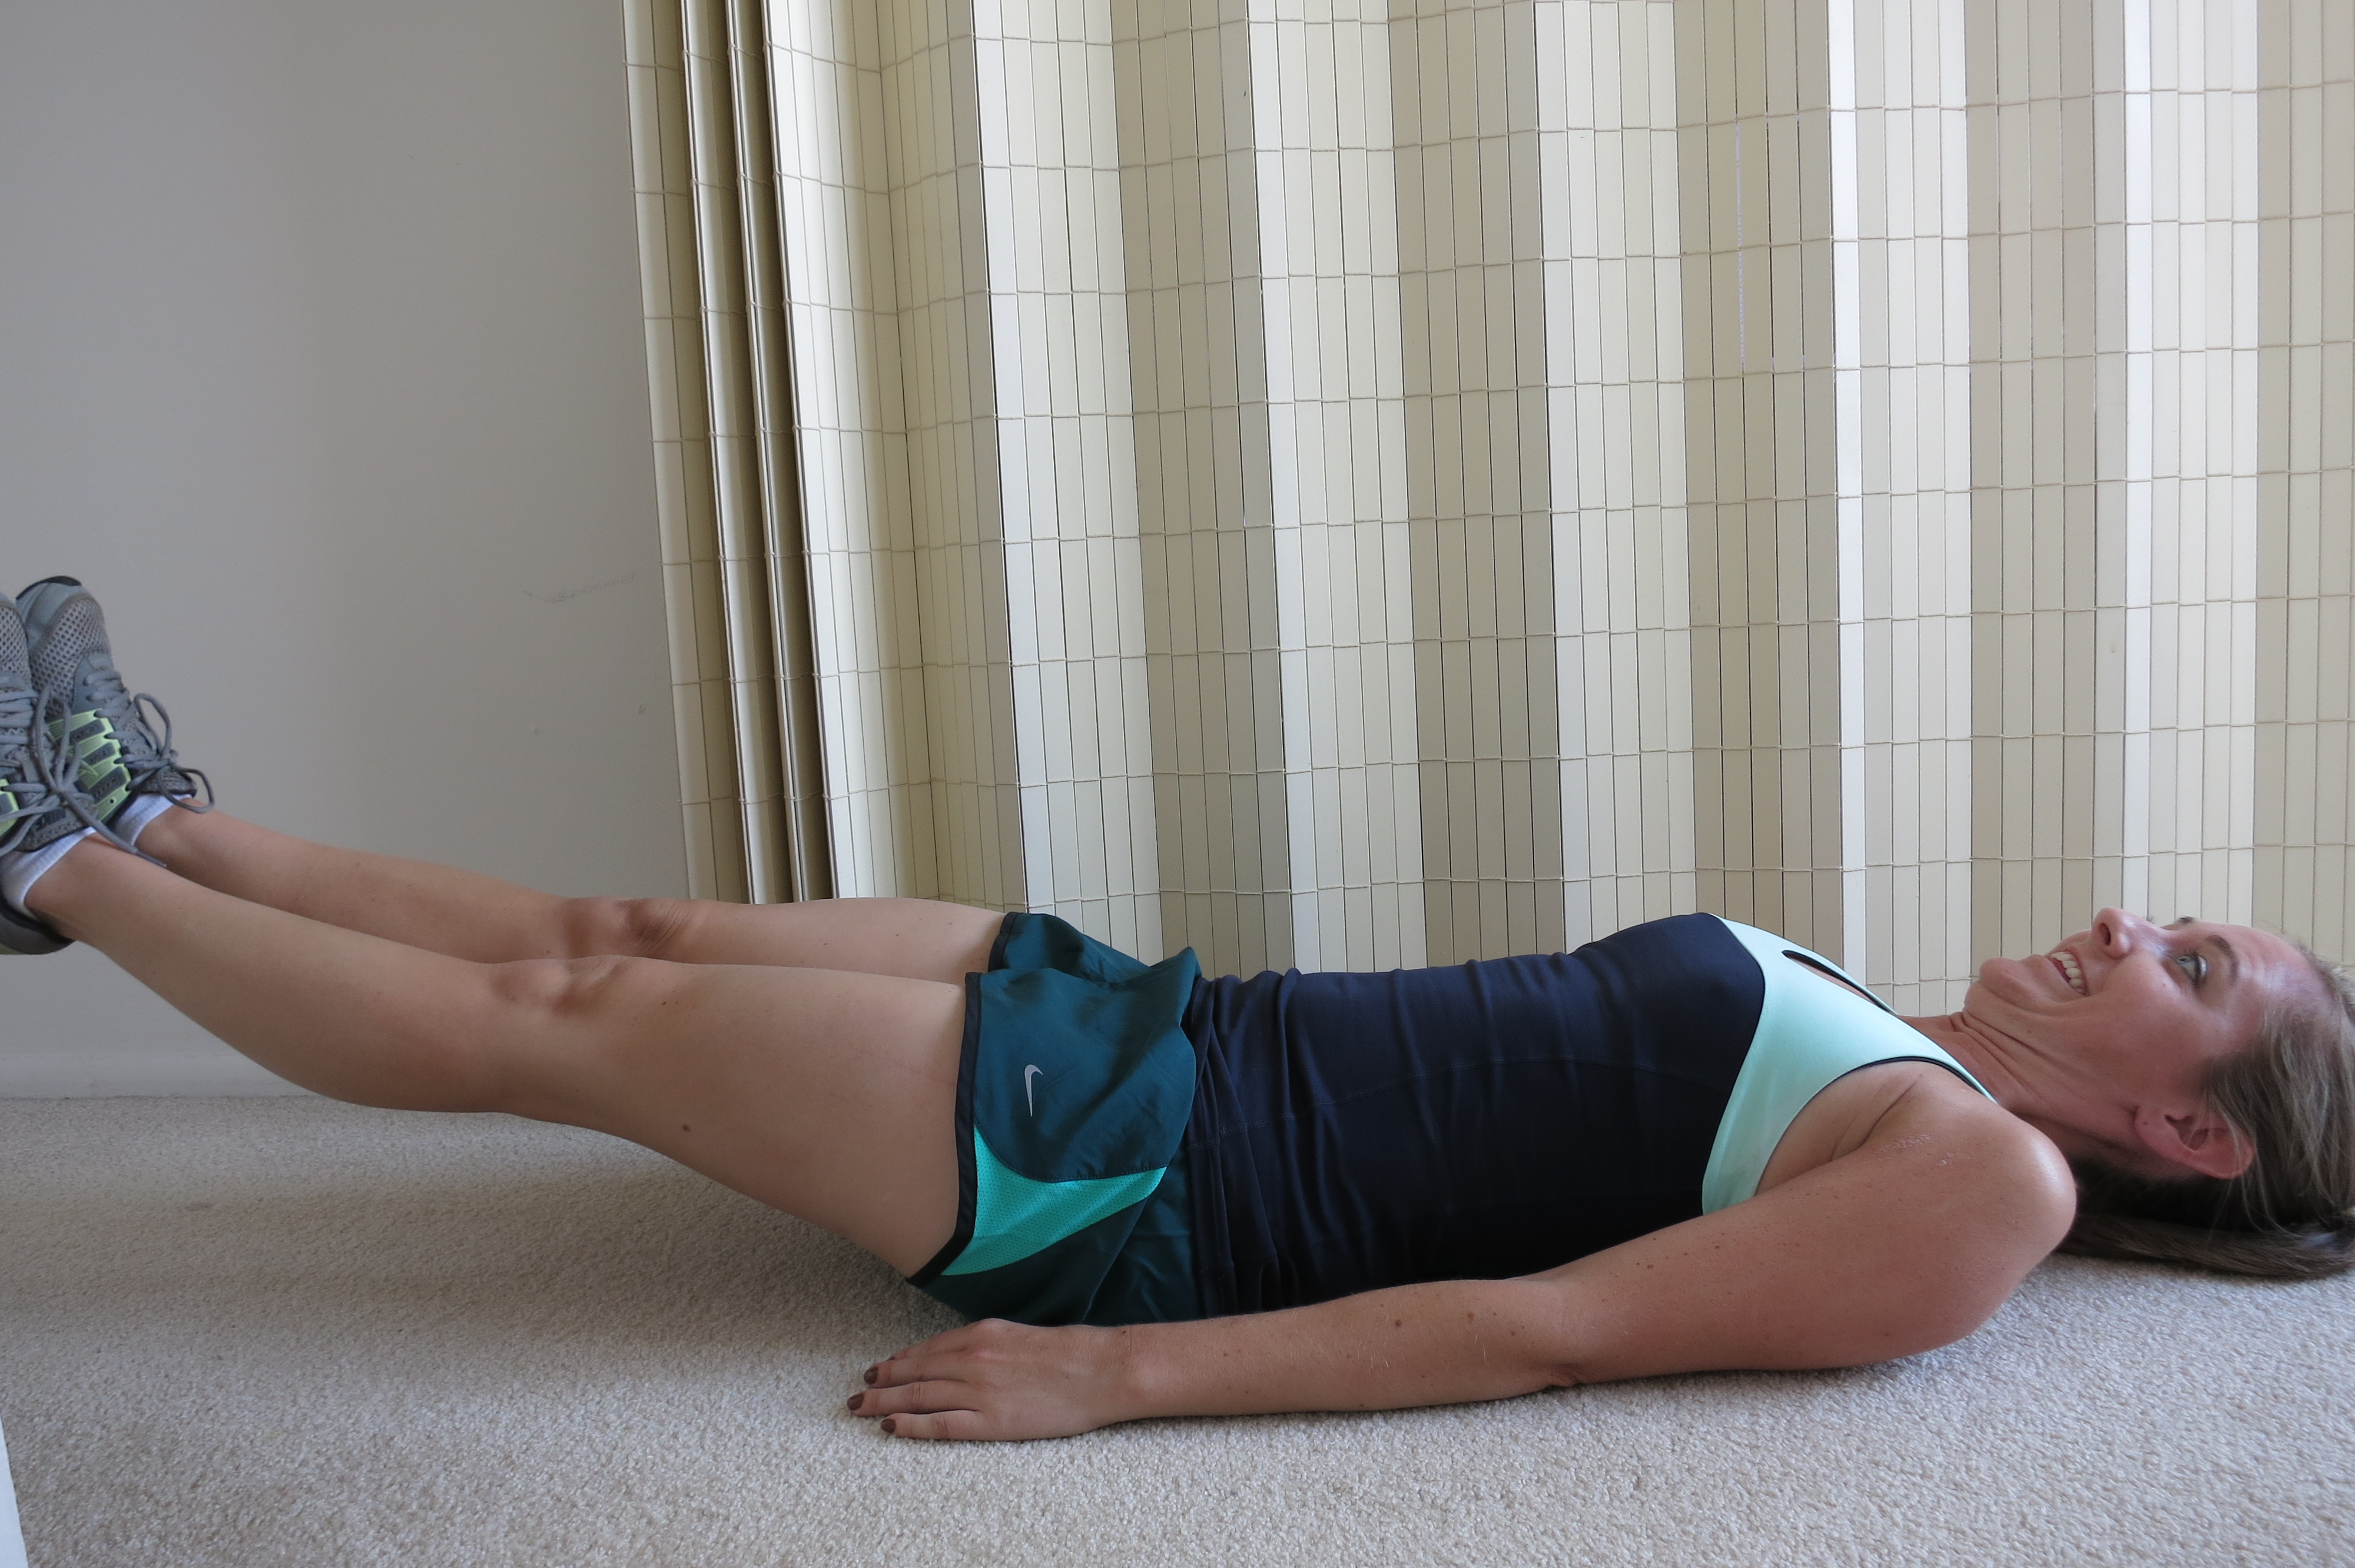
Step 1: Perform abdominal contraction as in Level 1.
Step 2: Lift one leg so hip is bent 90 degrees.
Step 3: Lift other leg so hip is bent 90 degrees.
Step 4: While maintaining your abdominal contraction, straighten BOTH legs so heels are just above floor.
Step 5: Bring both legs back up to being bent 90 degrees.
Step 6: Repeat straightening both legs at the same time for 10-20 repetitions.
Watch out! Do not push your back into the floor or arch it away from the floor. Your stomach should be sinking DOWN, not pushing UP toward the ceiling. If you cannot straighten your leg without moving your back, try sliding your heel on the floor. Progress to being able to straighten your leg with your heel just above the floor.
Perform exercise daily.
You also want to integrate the program into your daily life. Be sure to contract your abs when walking, getting up from a chair, carrying your baby (and that carseat…grrr), etc.
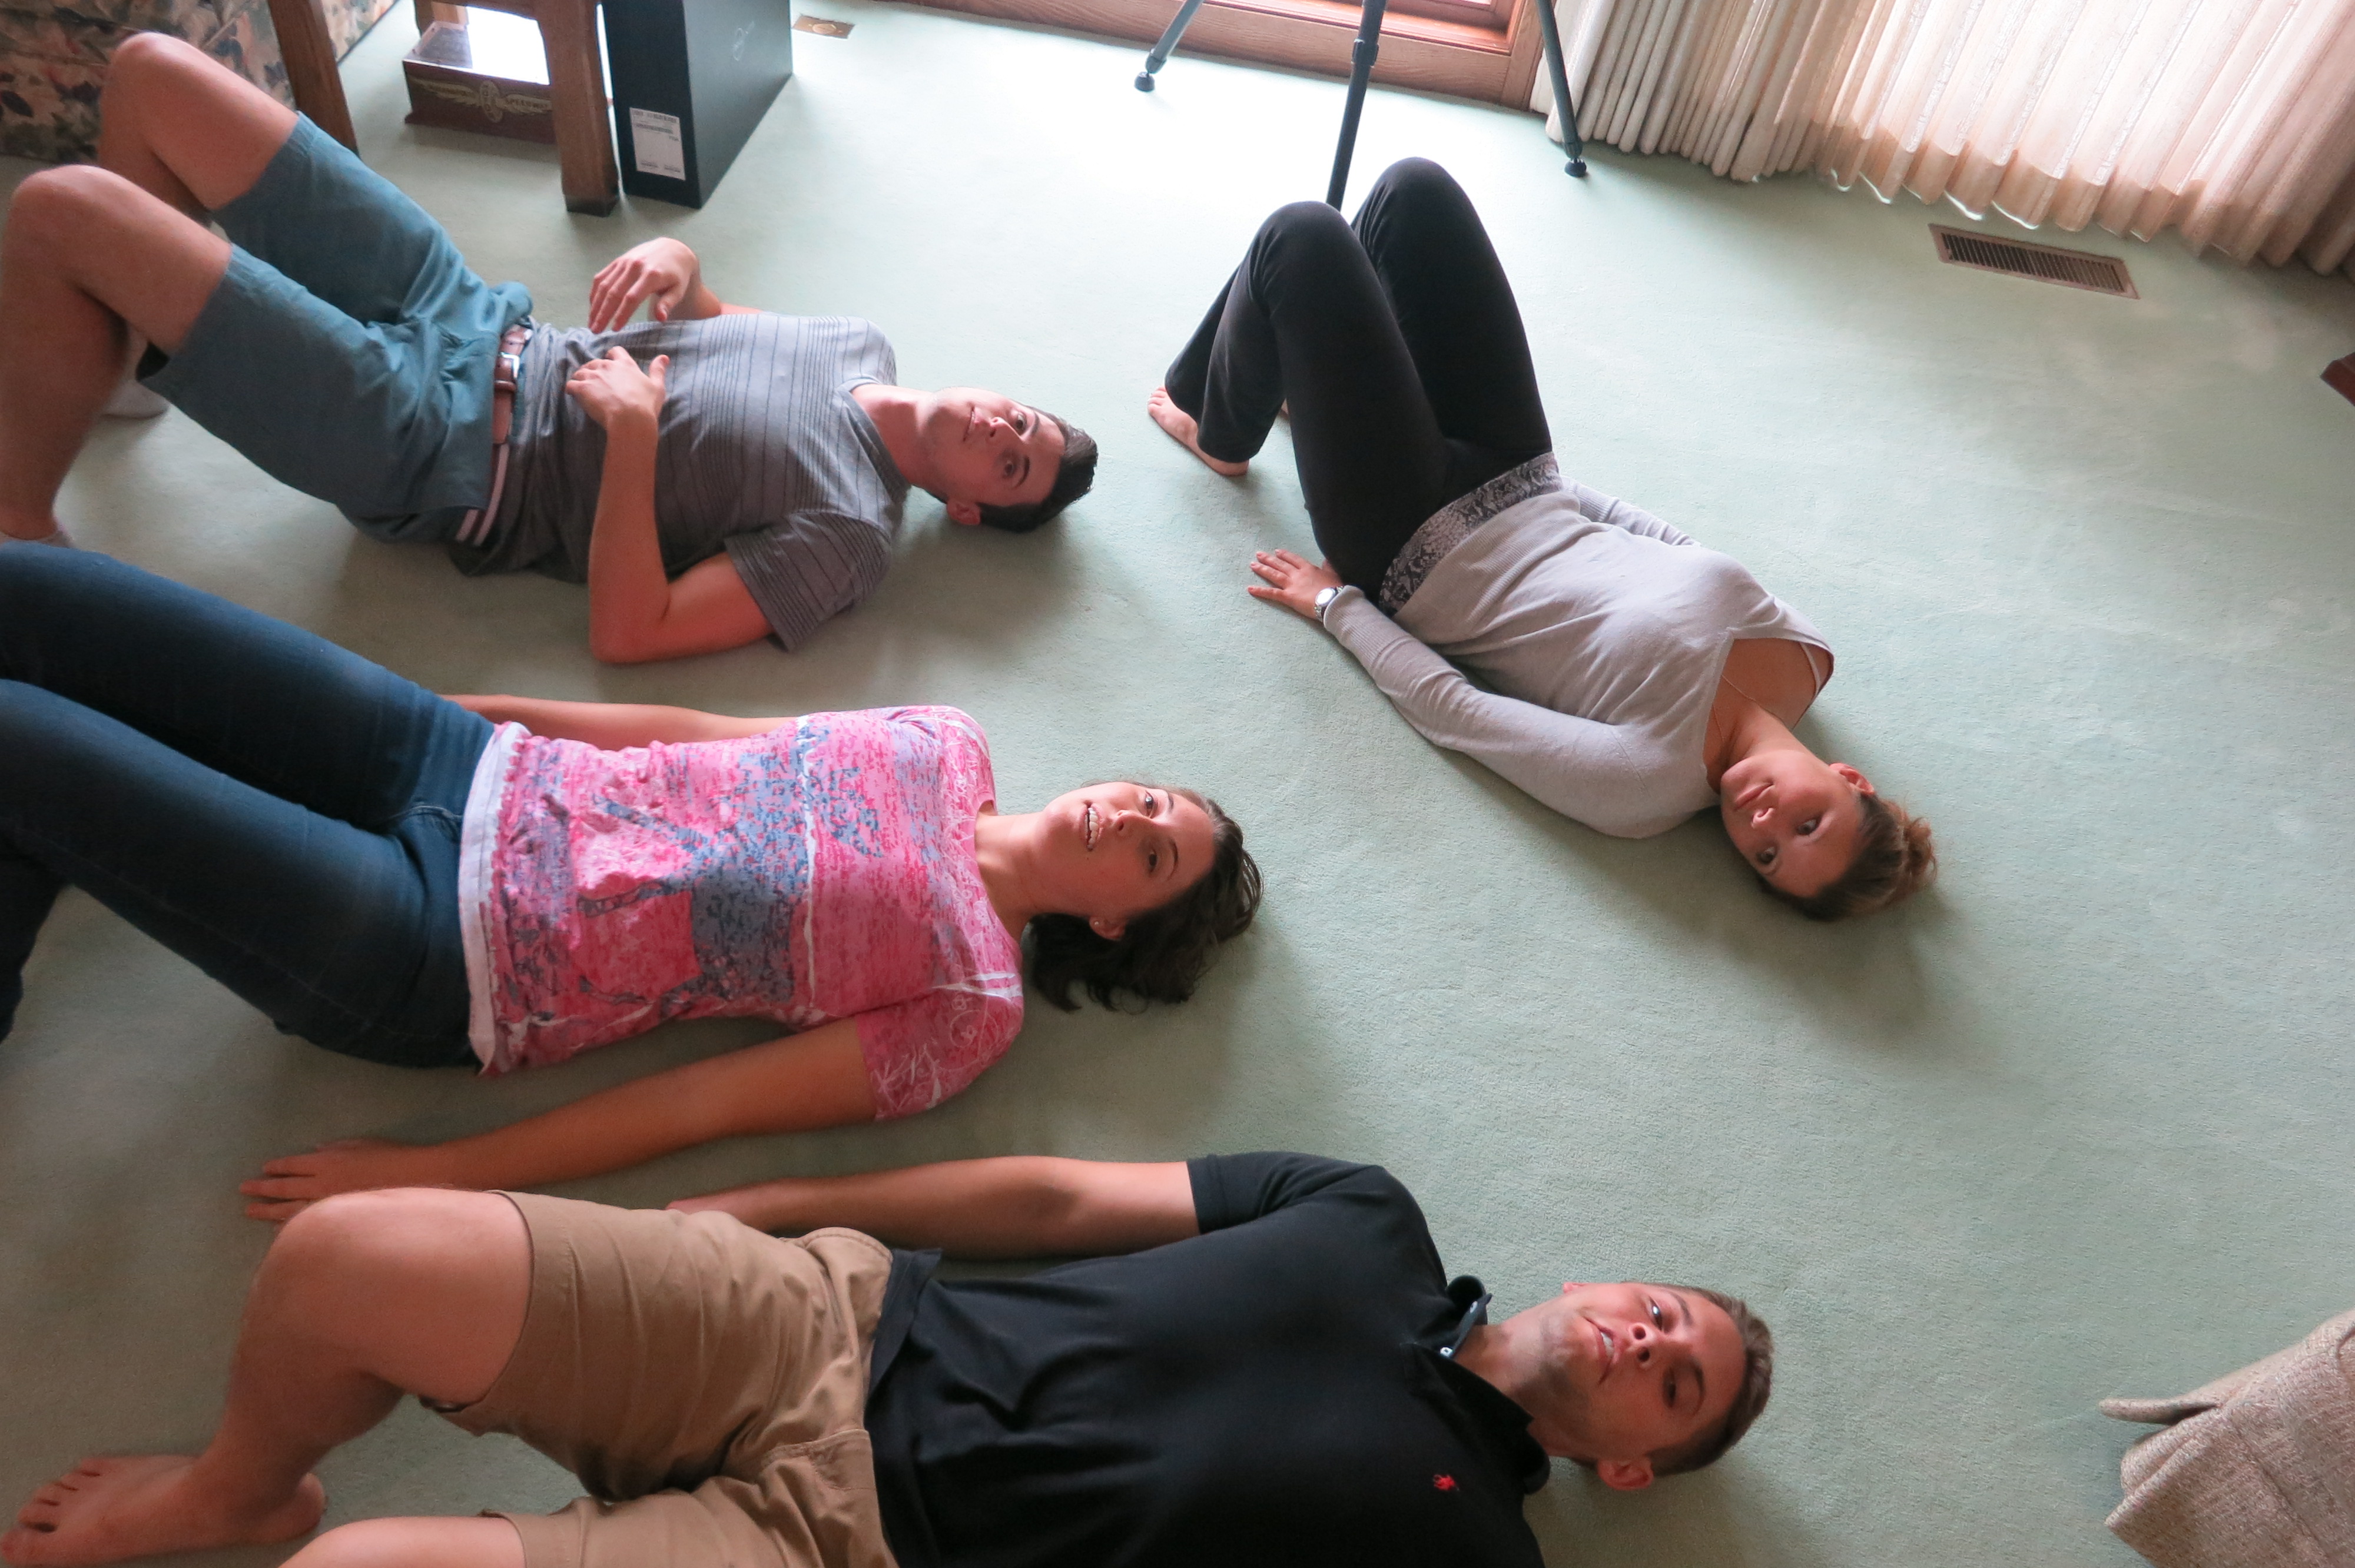
For humor, here is what family gatherings look like when you are related to a physical therapist and someone asks how to strengthen their abs:
***The content of www.kayleemay.com is for informational purposes only. The information presented is not to be taken as professional medical advice, diagnosis, or treatment. If you are having pain, or seeking medical advice, talk to your health care provider. Do not delay in seeking treatment because of information you have read on www.kayleemay.com. Taking recommendations presented on www.kayleemay.com is solely at your own risk***