Tag: hip pain

Diastasis Recti | Dealing with a common postpartum condition

diastasis recti, pregnancy, pregnancy abs,

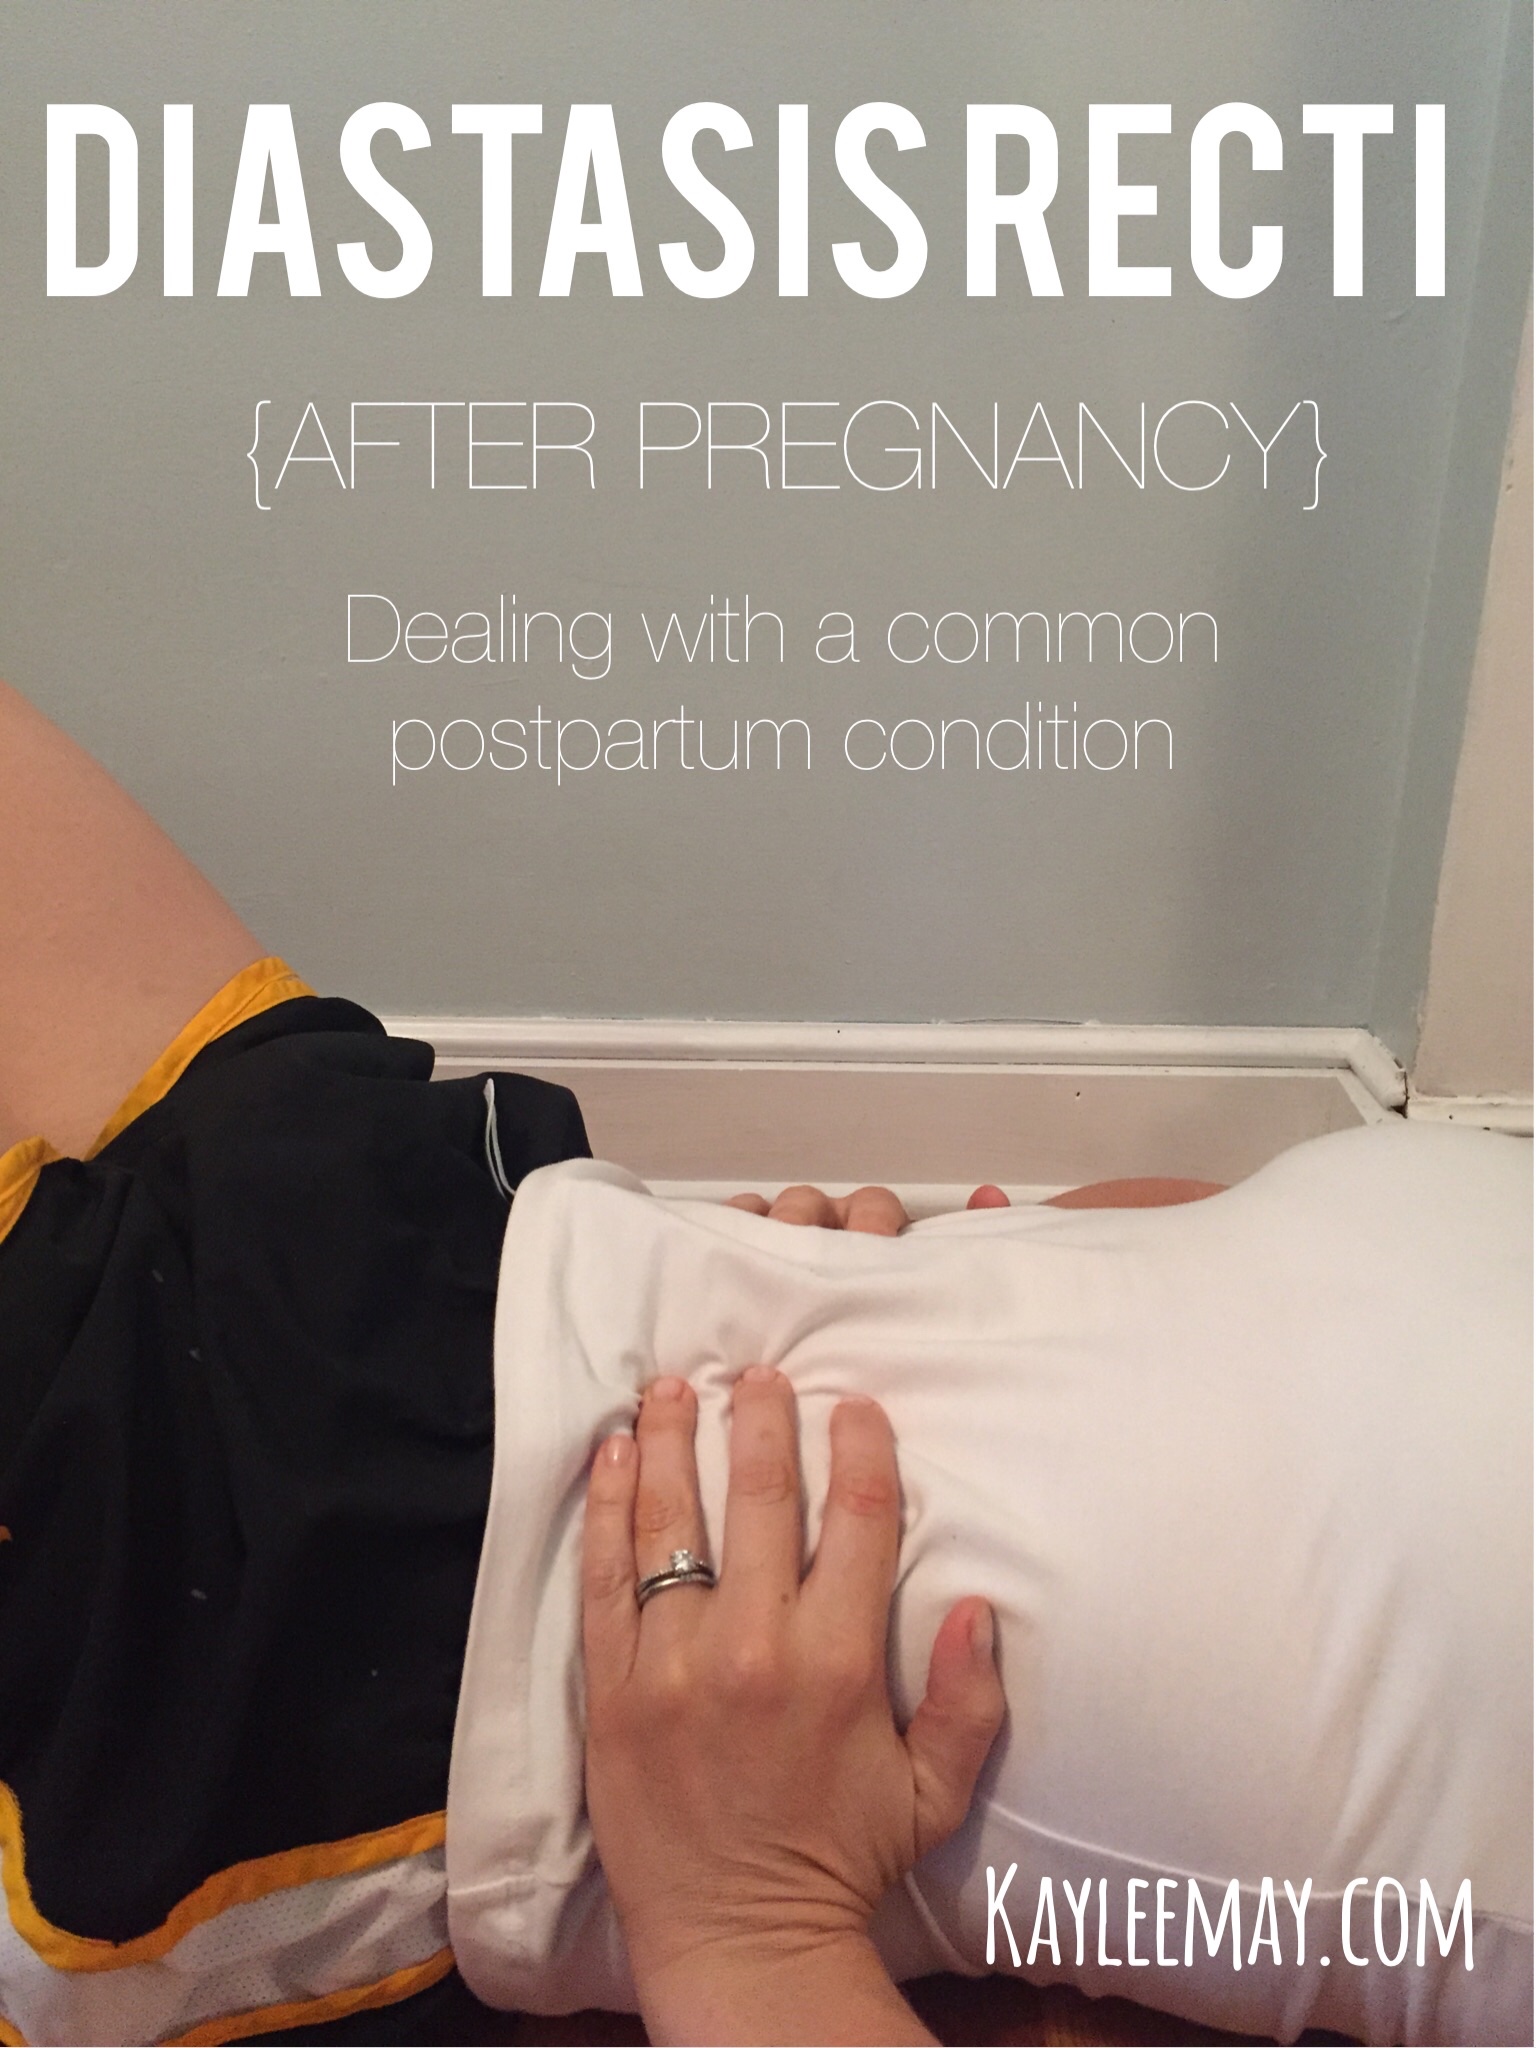
Diastasis recti, a separation of your abdominal muscles, is a common condition during and after pregnancy.

The linea alba is a line of fibrous tissue between two sides of the rectus abdominis that runs vertically. When this muscle is stretched throughout pregnancy, there can be a physical separation or widening between the two sides of the abdominal muscle.

rectus abdomis, diastasis recti, linea alba, postpartum, pregnancy,

As outlined in previous posts, the abdominals act as a natural back brace for us. If there is weakness or separation in our natural back brace, a number of pain conditions arise. Unfortunately, diastasis recti is not always recognized early, and I see mothers of all ages in the clinic for hip pain, back pain, knee pain (etc, etc, etc) that arose from weak abdominals. (side note: Obgyns should just start referring women to physical therapists after any type of birth, right?)

I searched the web to find a quick video of how to tell if a diastasis recti is present. I found this video you can use to assess for the presence of this condition:

Let’s all freak out for a minute because we all just realized we have diastasis recti…

ok, I’m still freaking out…

still freaking out…

ok, now I am desperate to fix this!

How convenient there is a post right here about postpartum abdominal strengthening!

There is one thing to add to this strengthening program if you find that you have diastasis recti. Use your hands (or a brace, etc) to physically pull your abdominals together as you perform the exercises. In other words, push your abs together.

diastasis recti, pregnancy, pregnancy abs,

diastasis recti, pregnancy, pregnancy abs,

I want to note a few things you should most definitely NOT do if diastasis recti is present:

1. SIT UPS. Like, never. Never, ever do sit ups.

2. PILATES before you do this program.

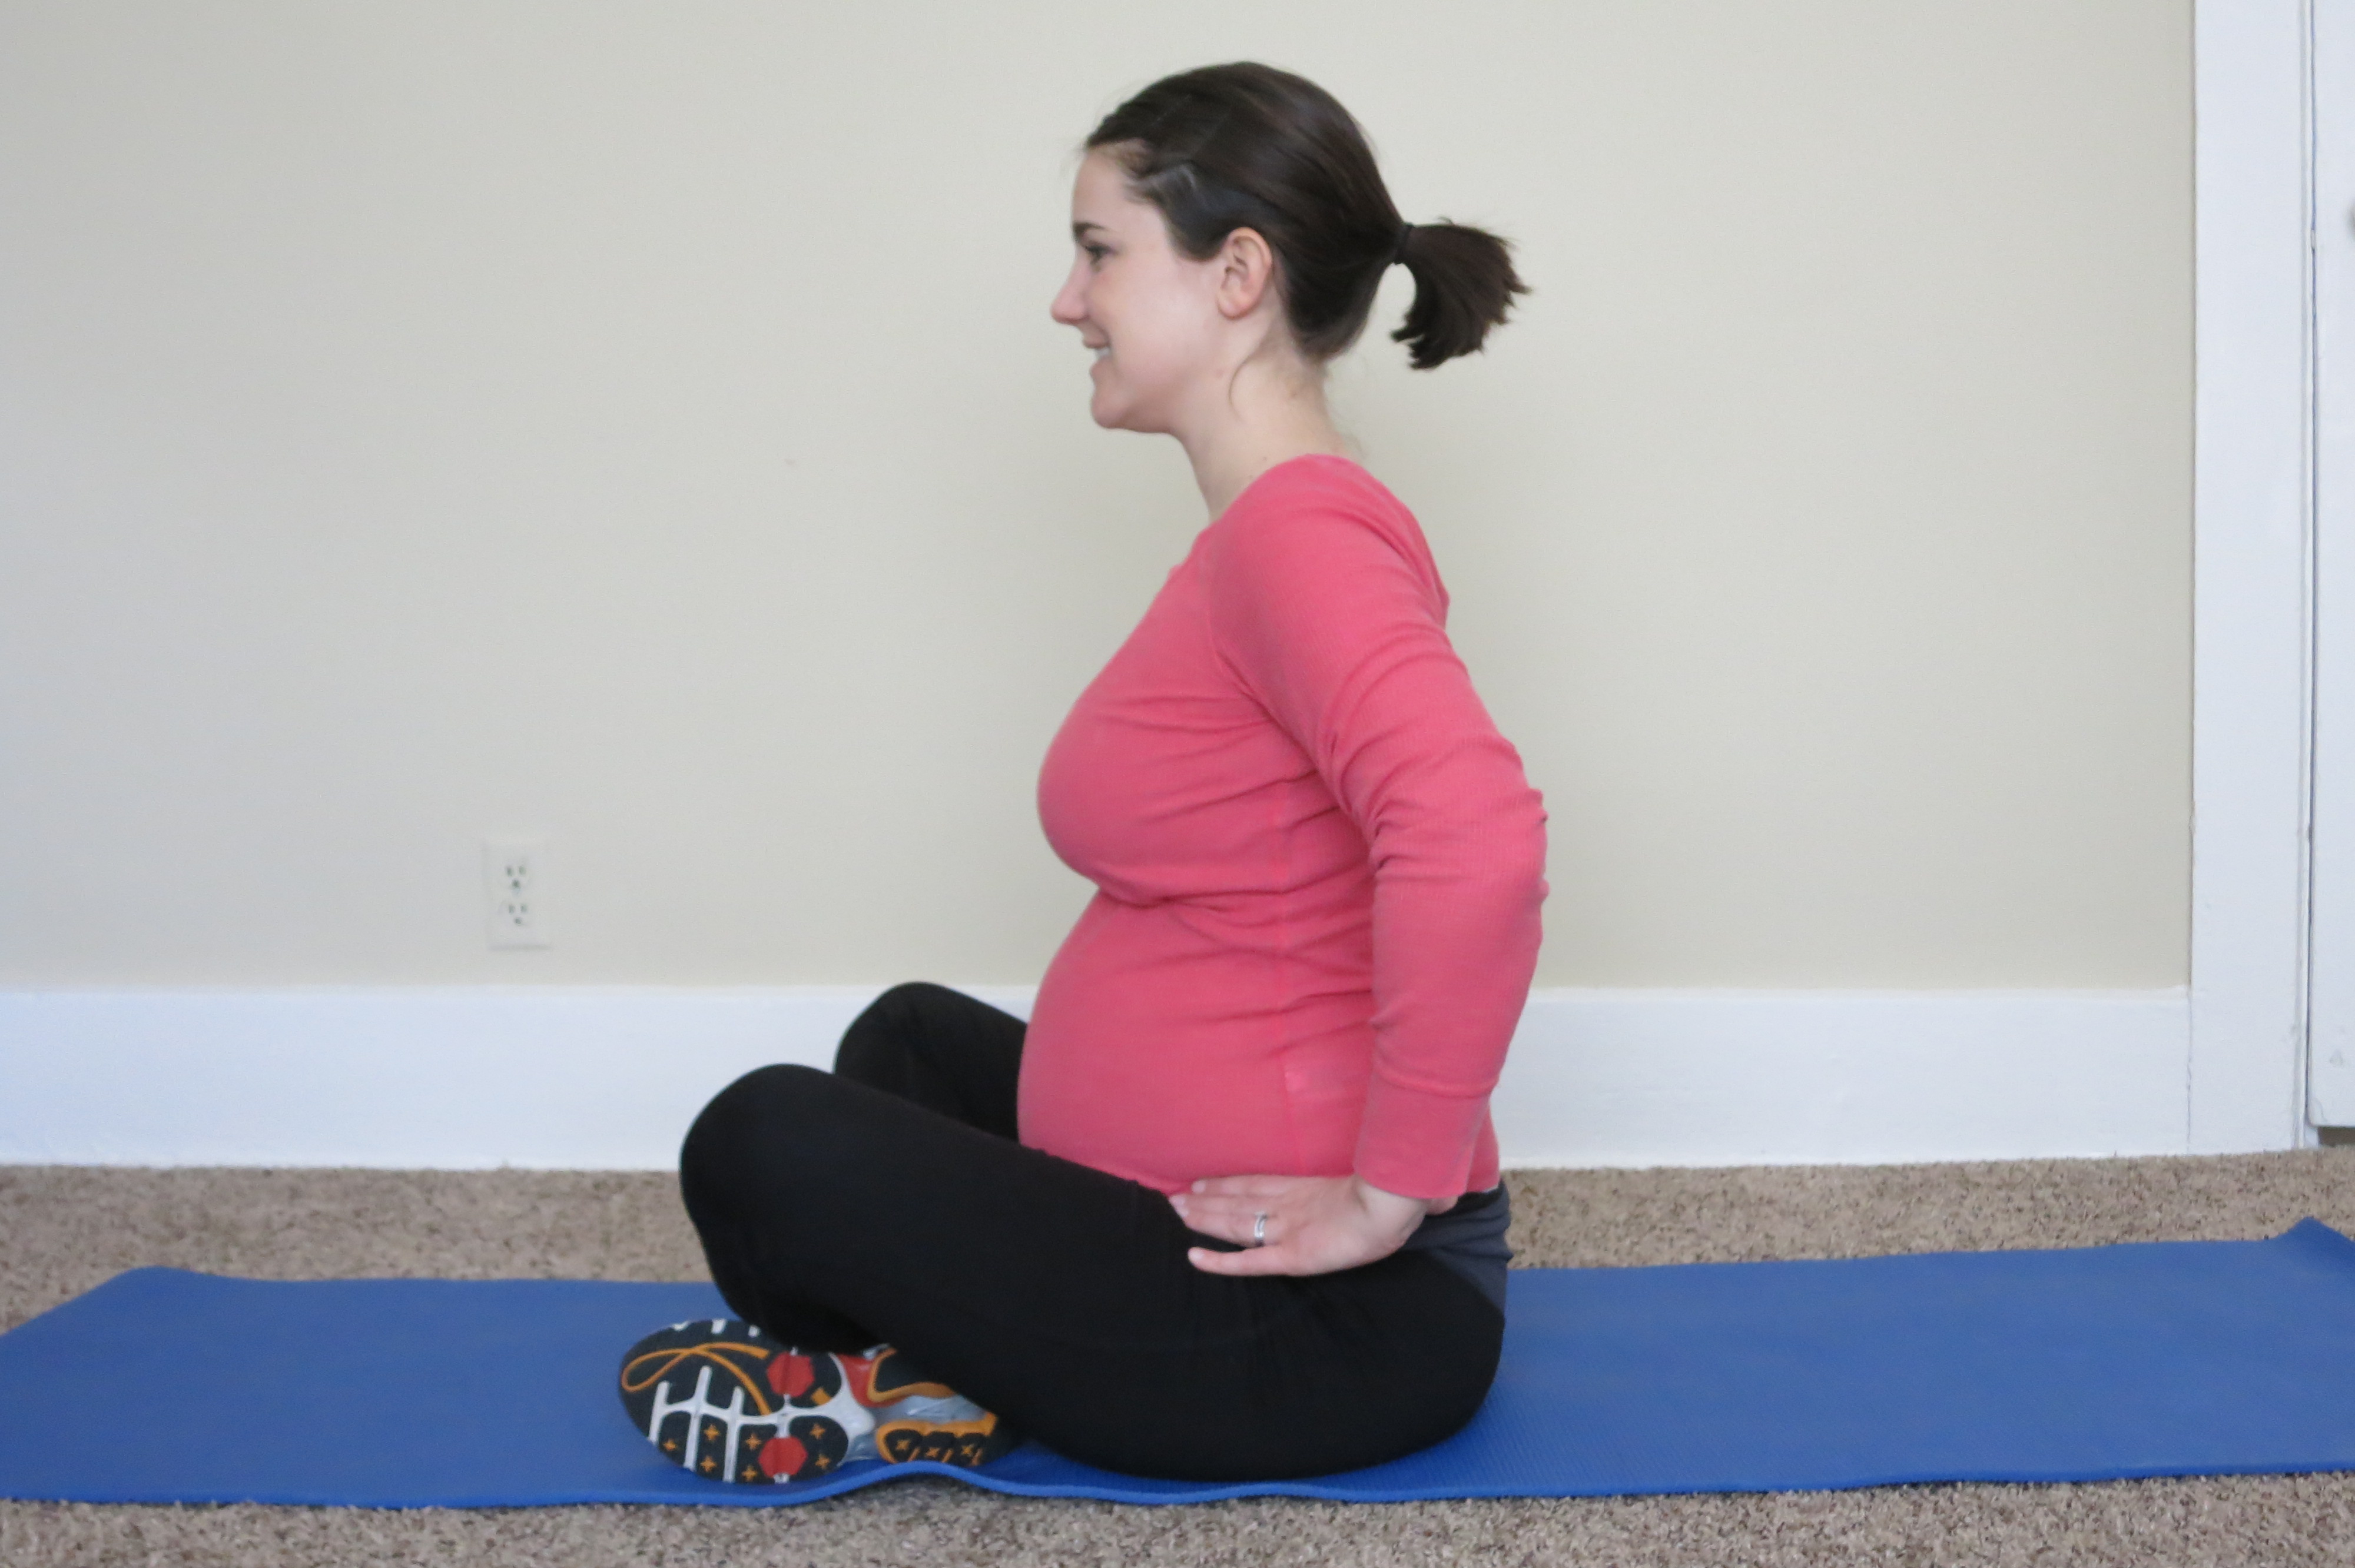
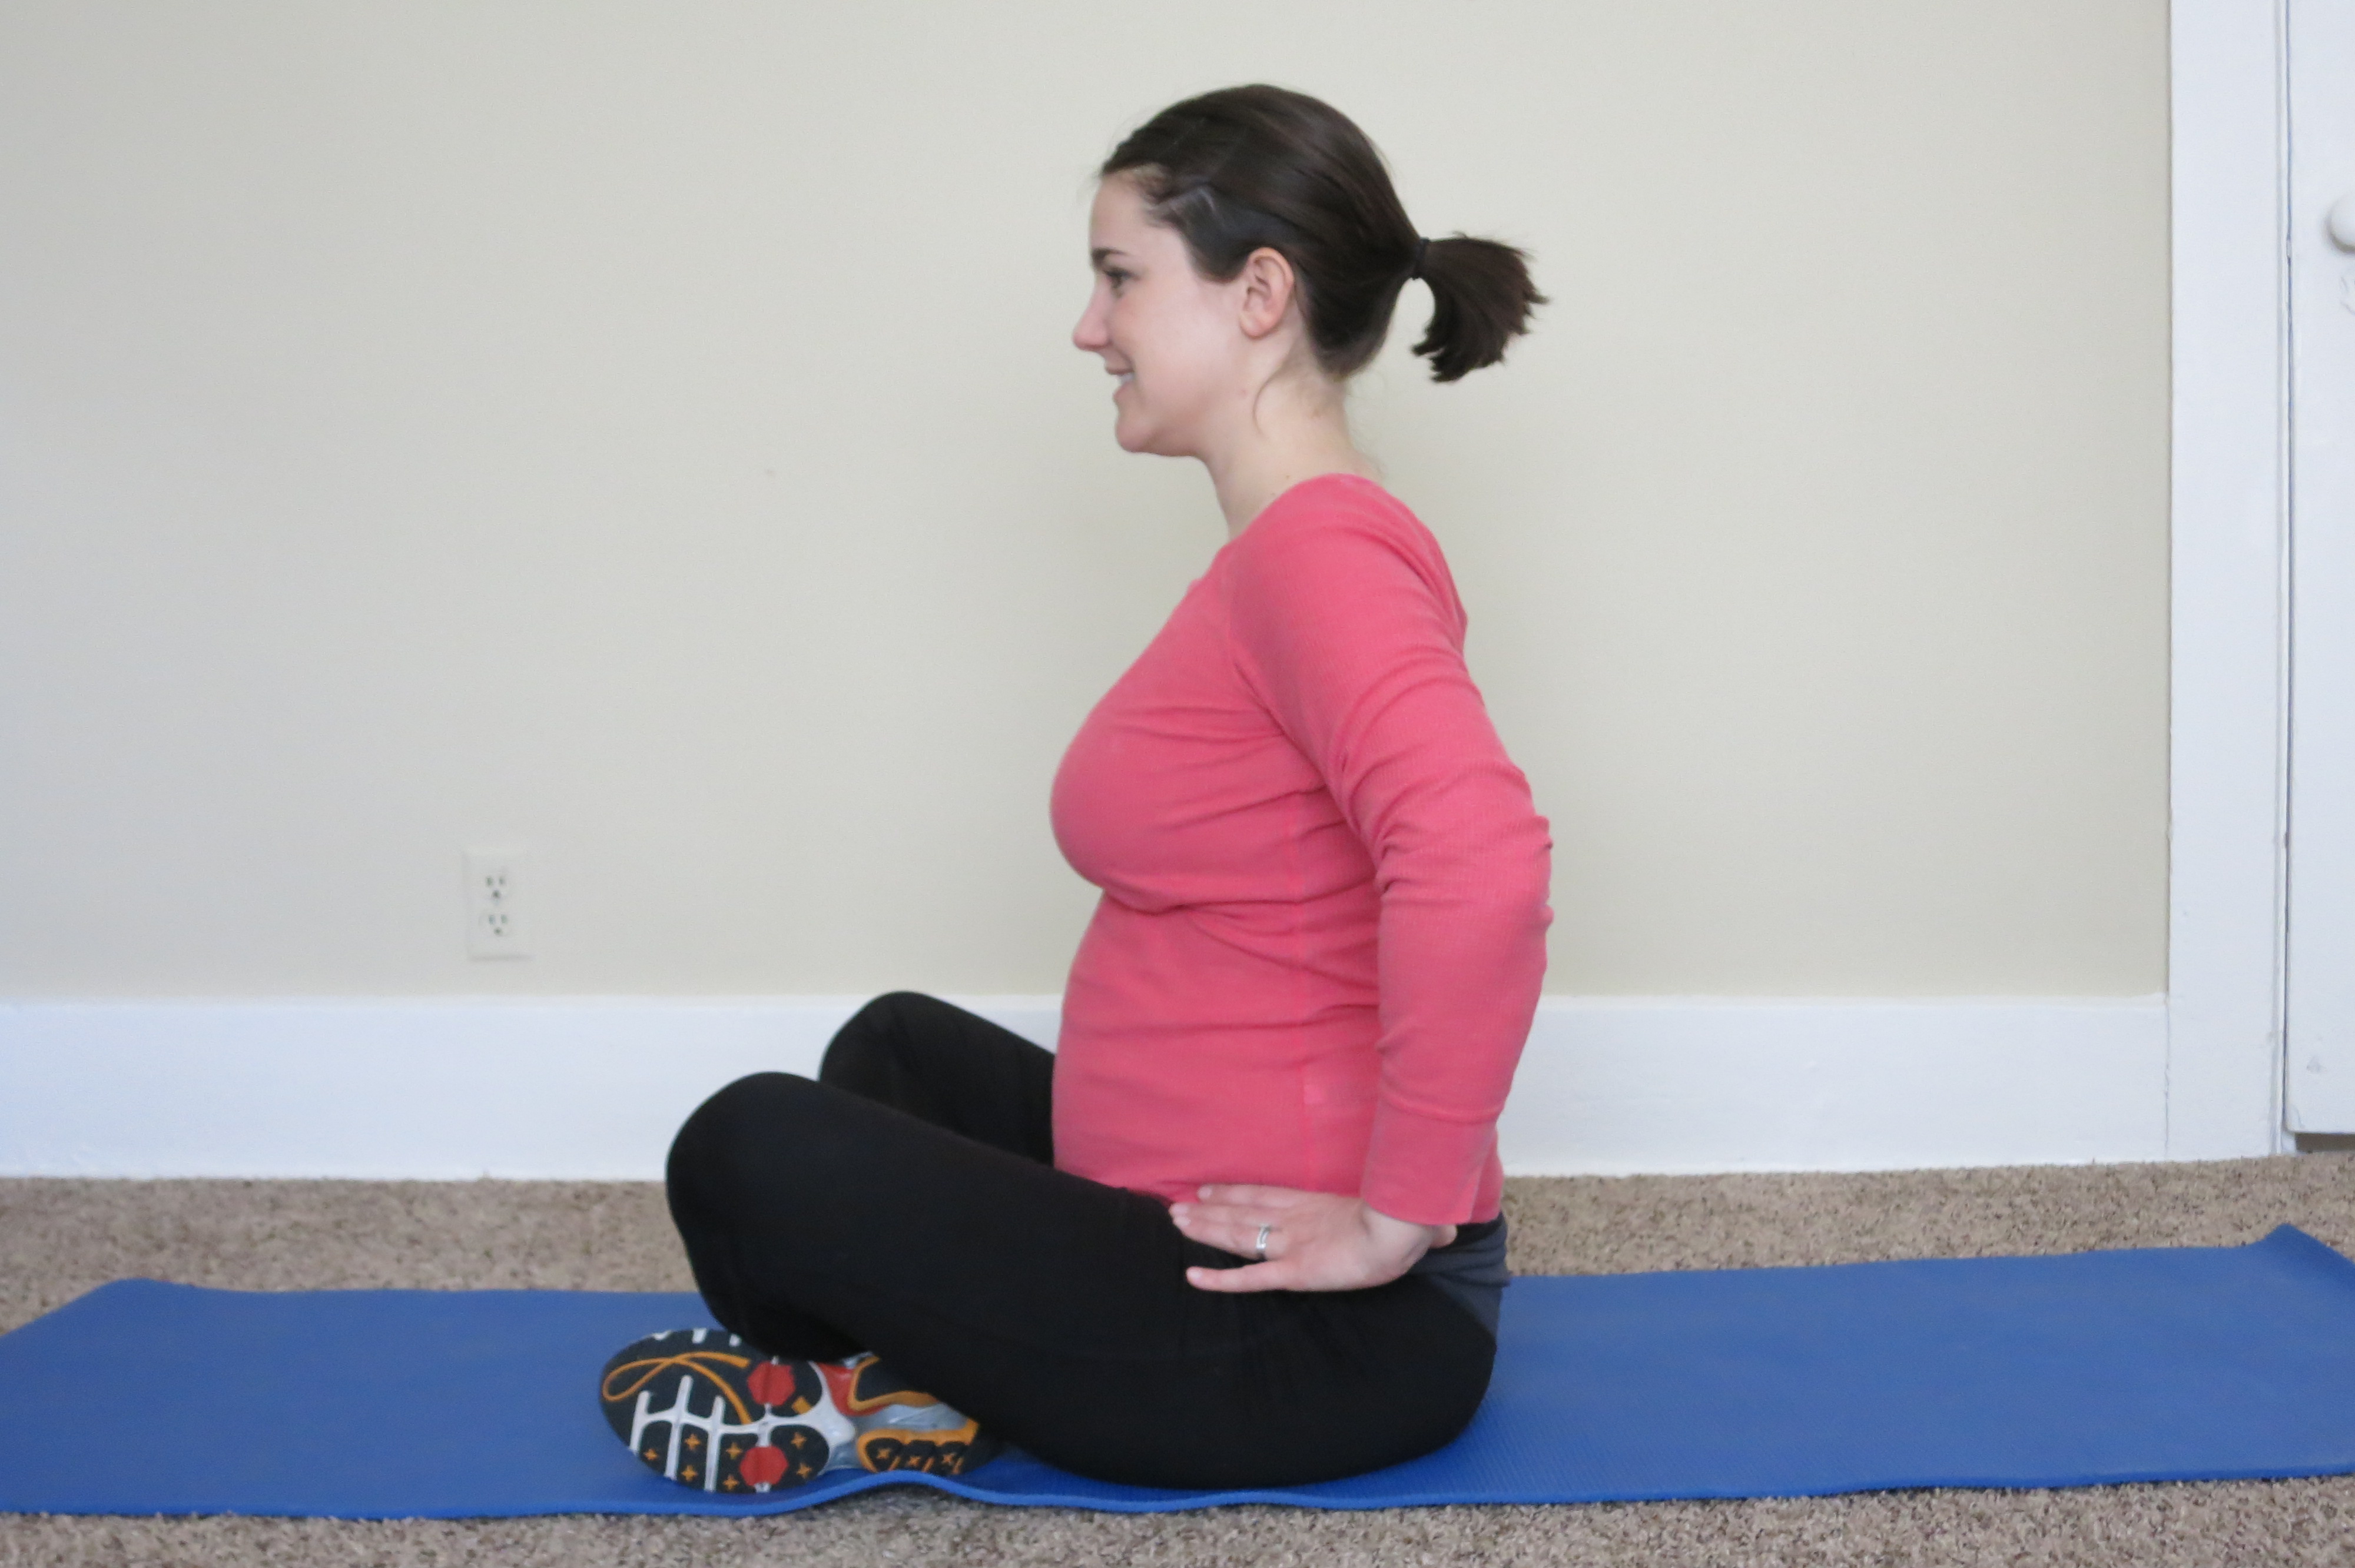
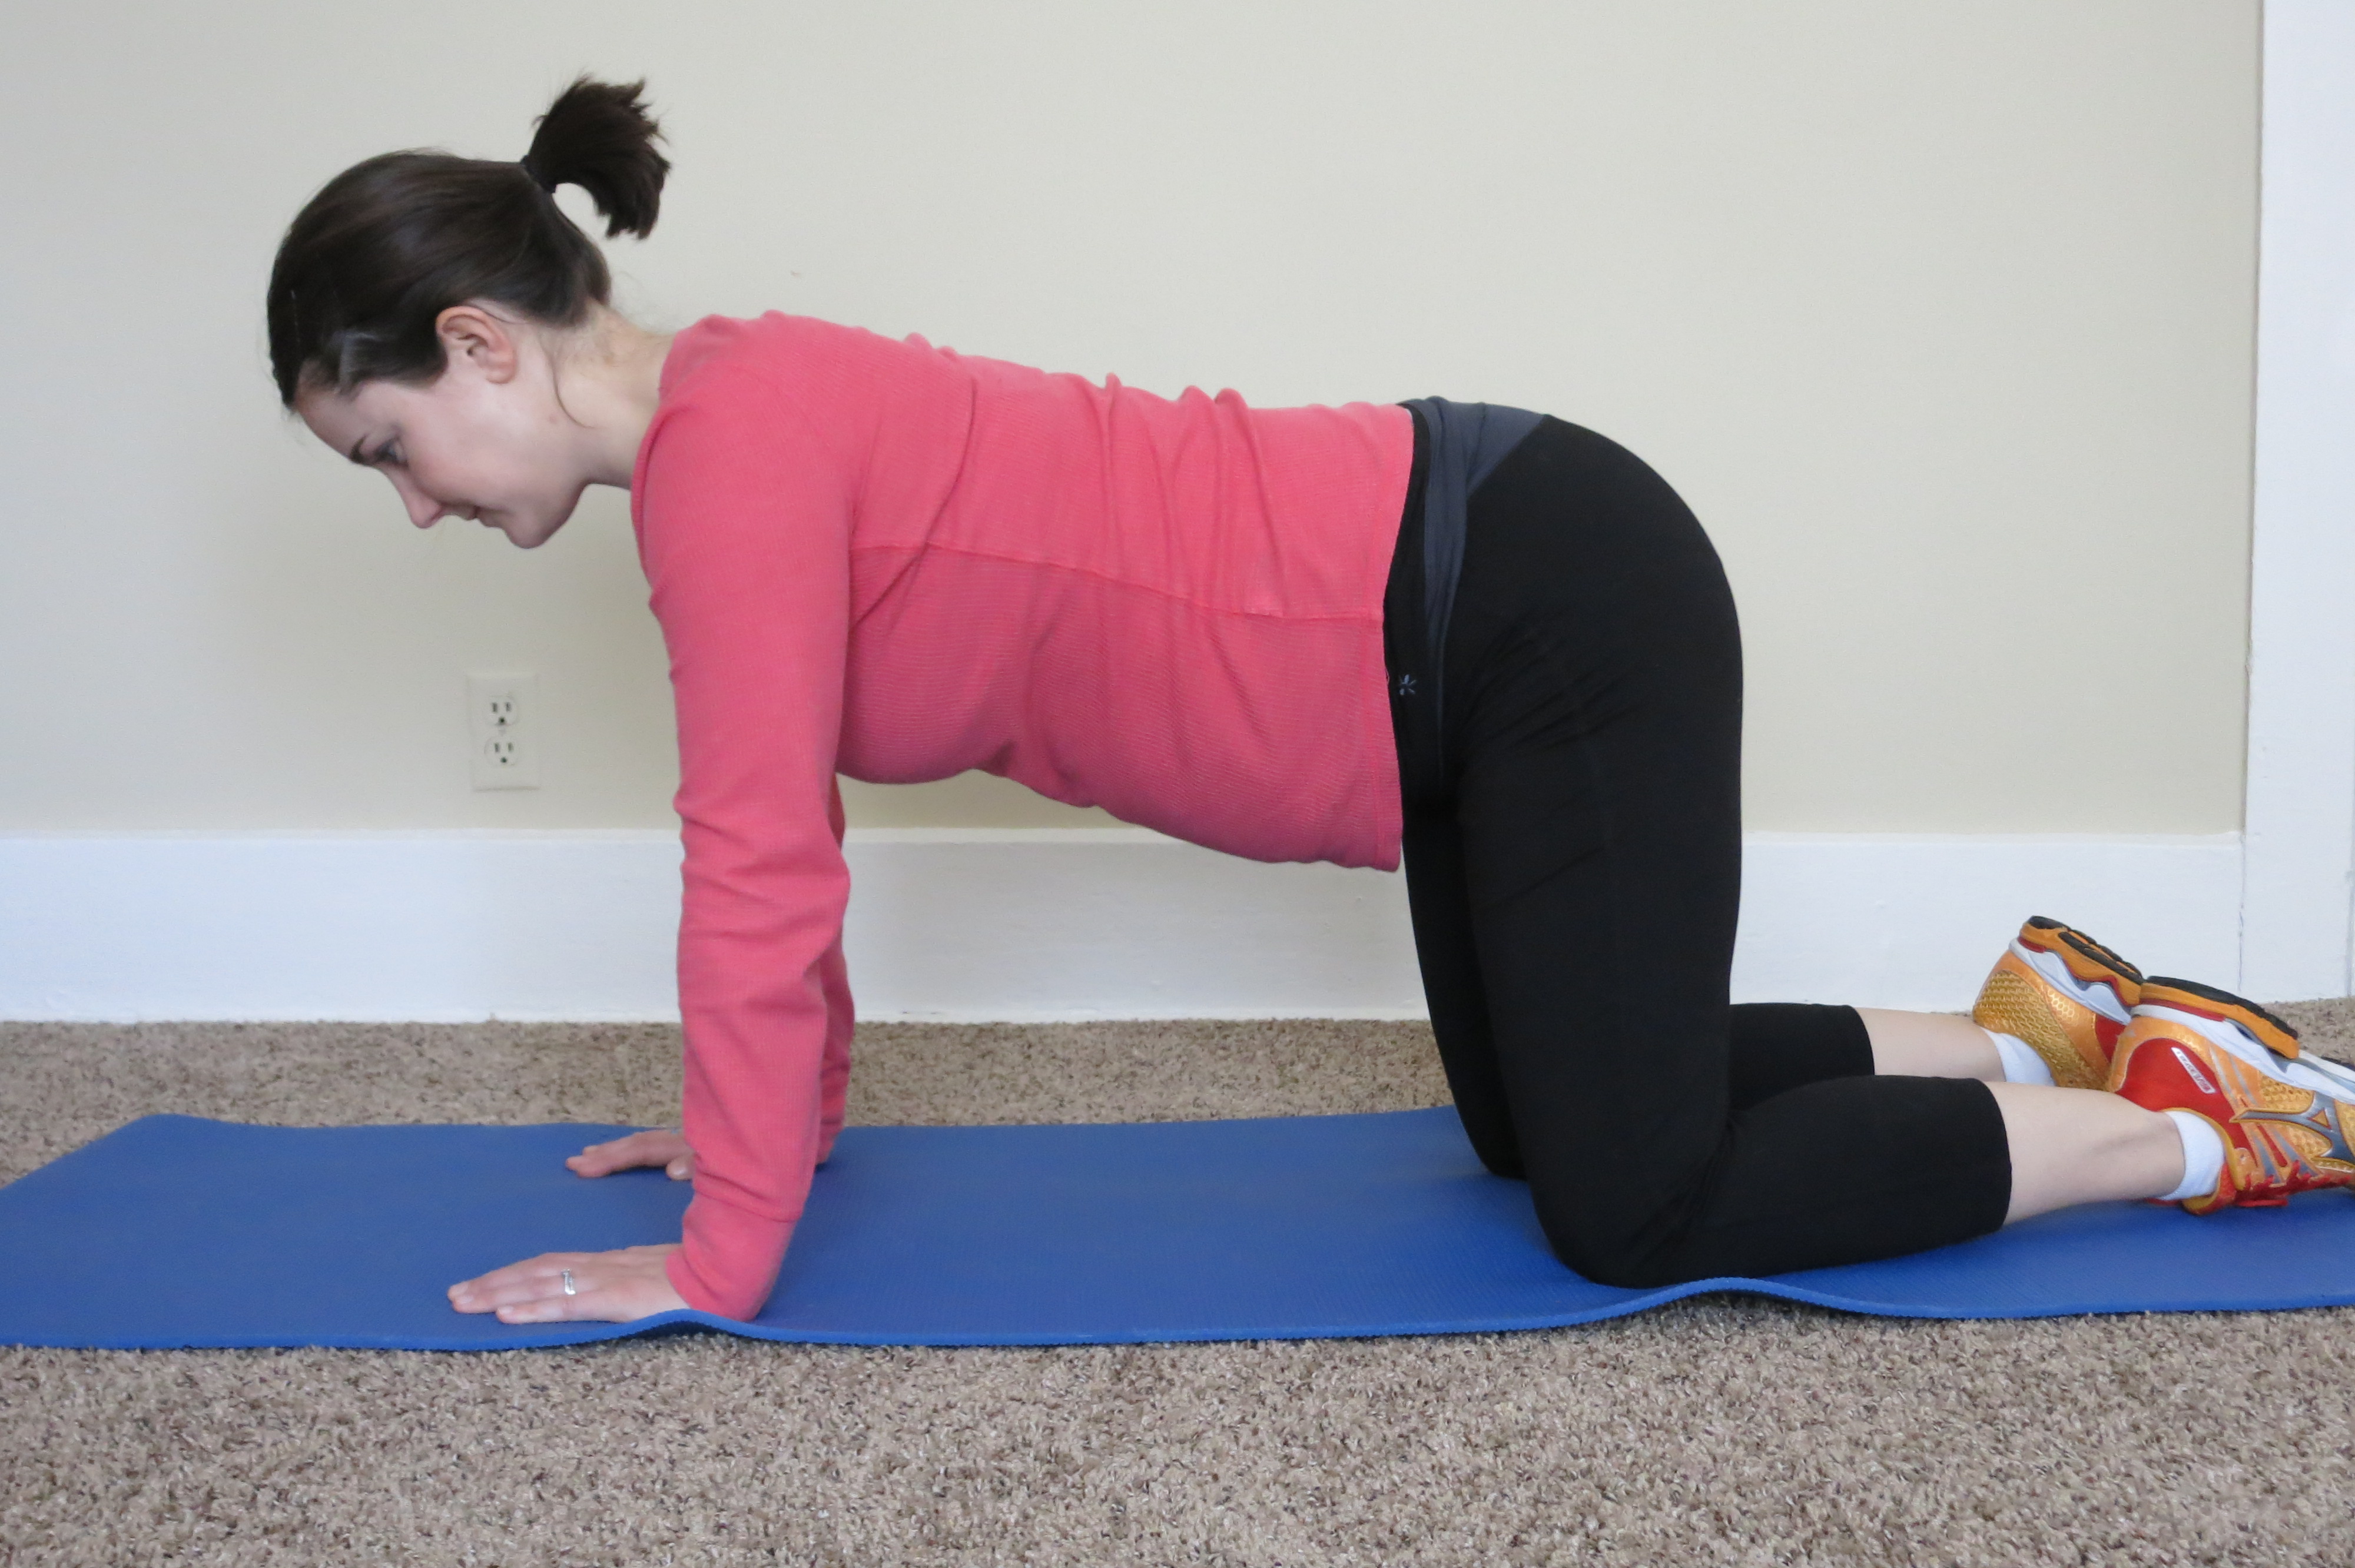
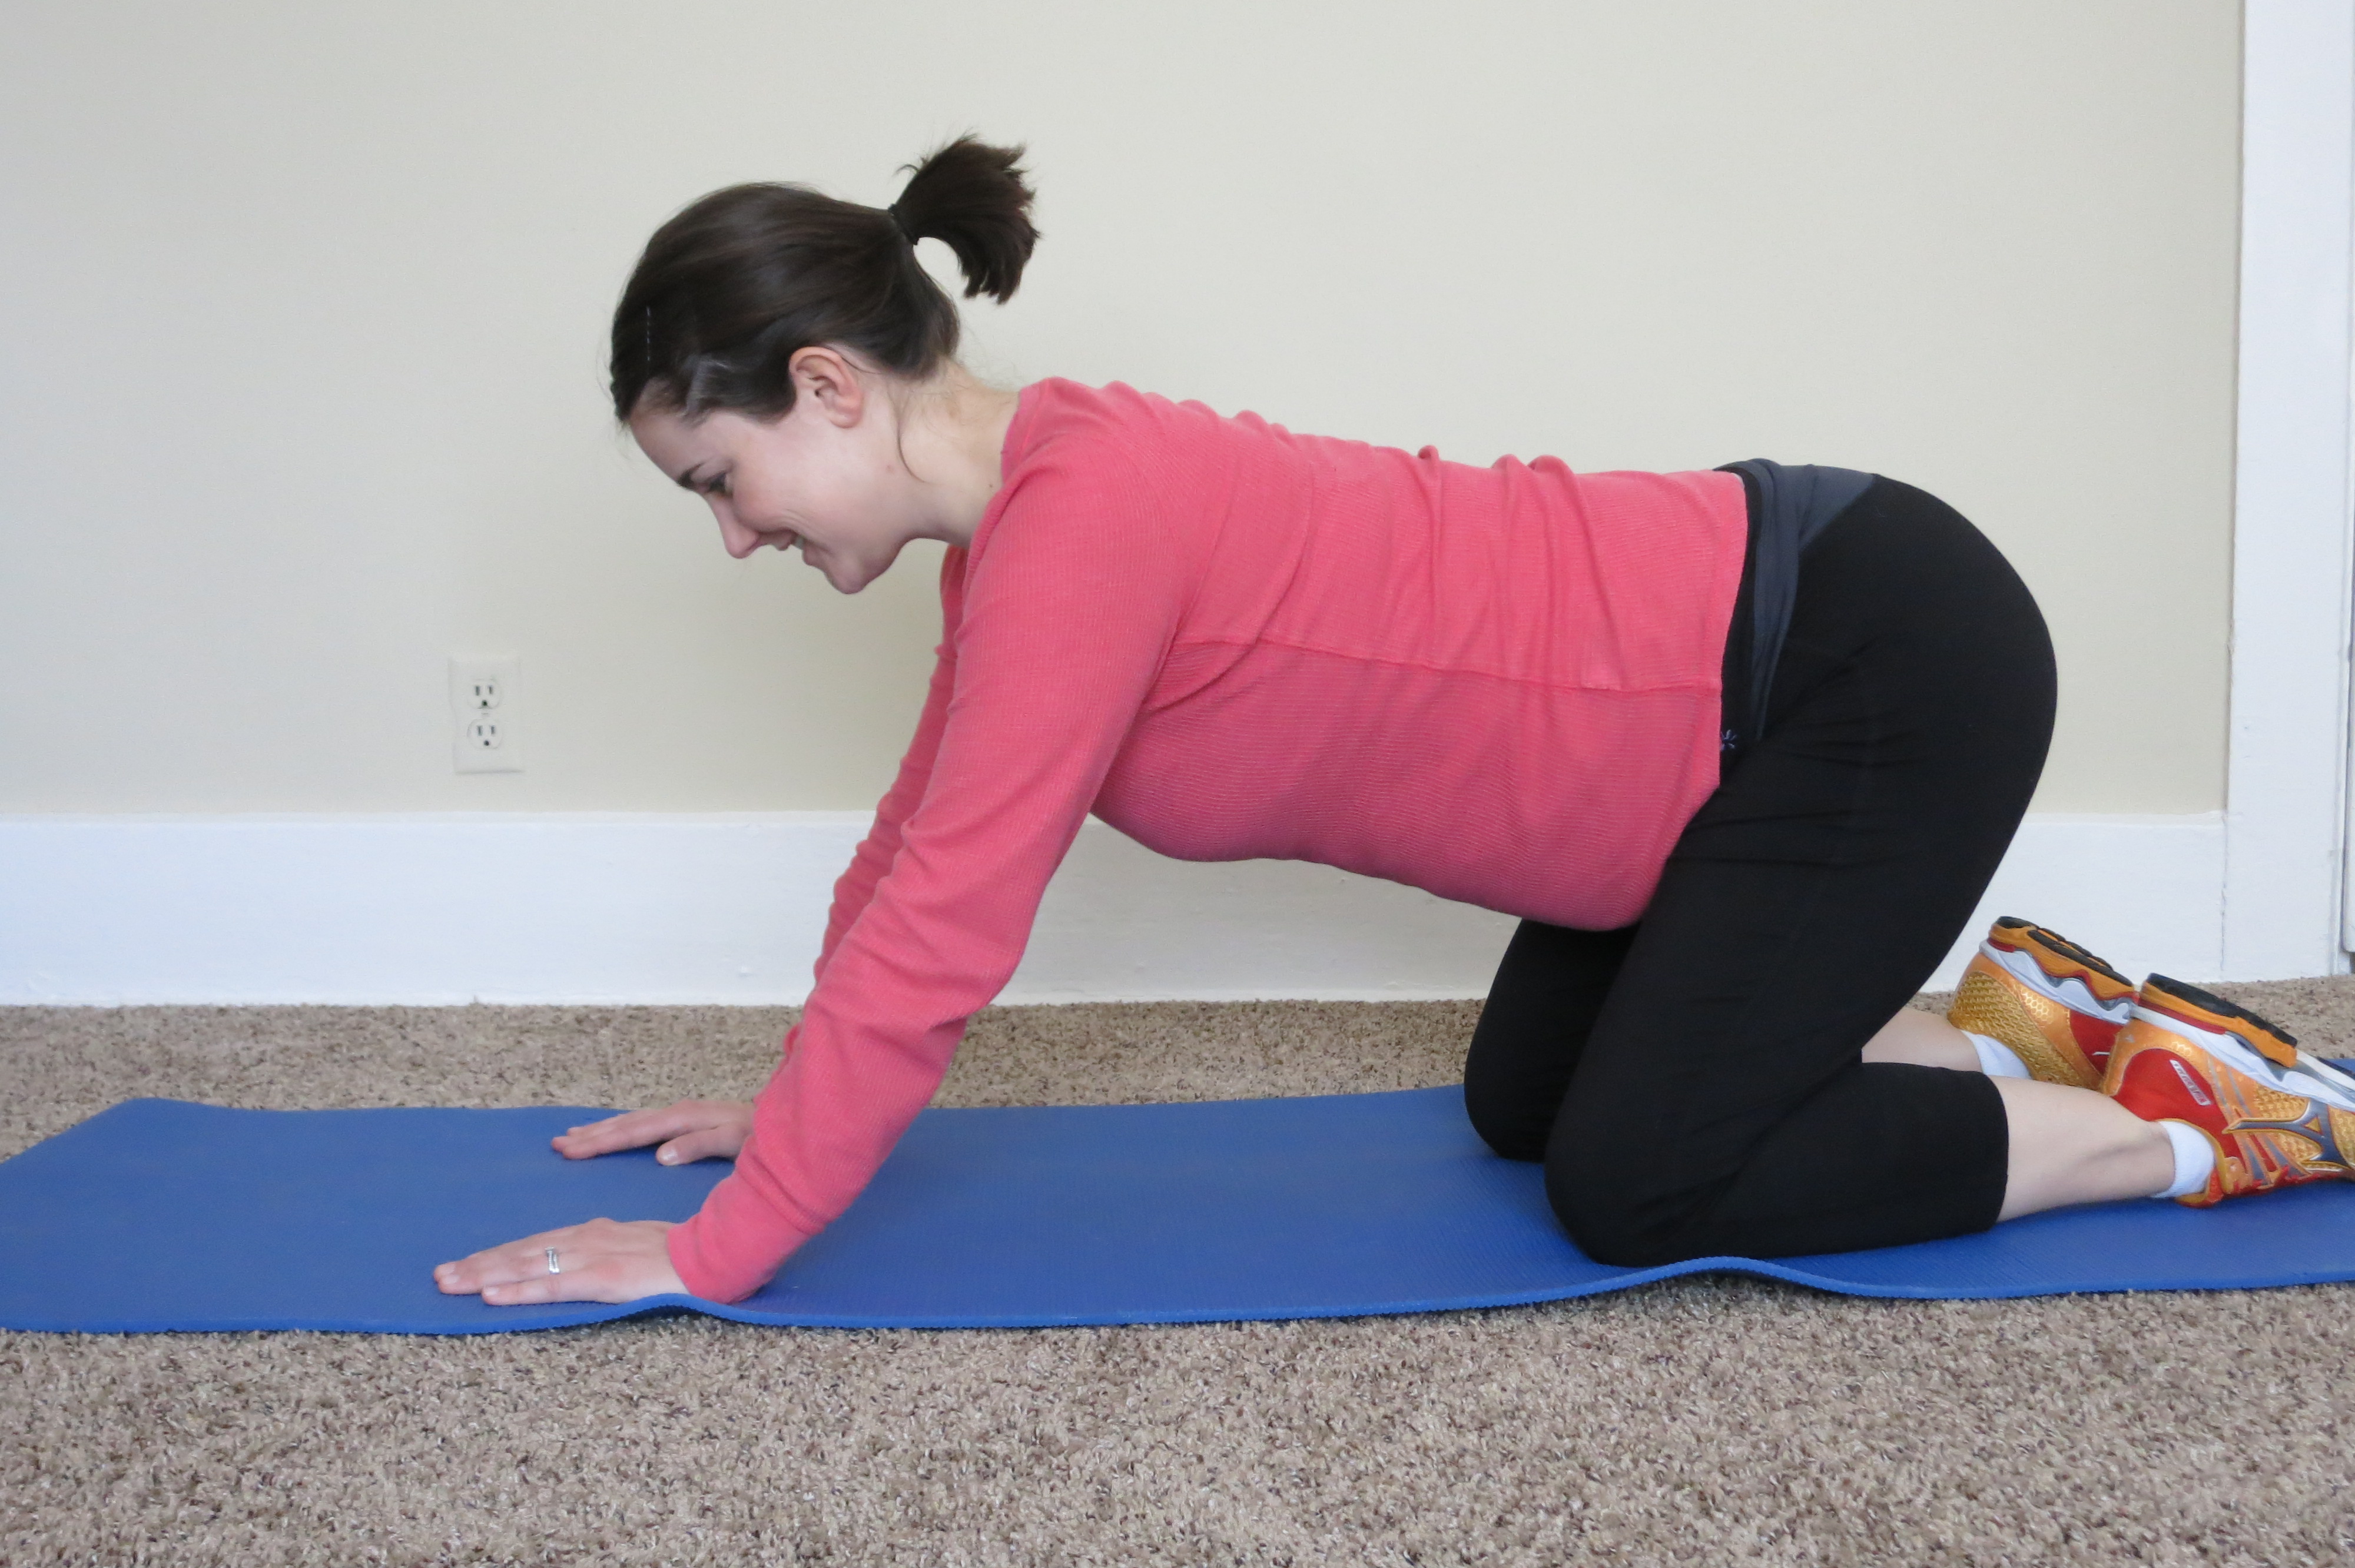
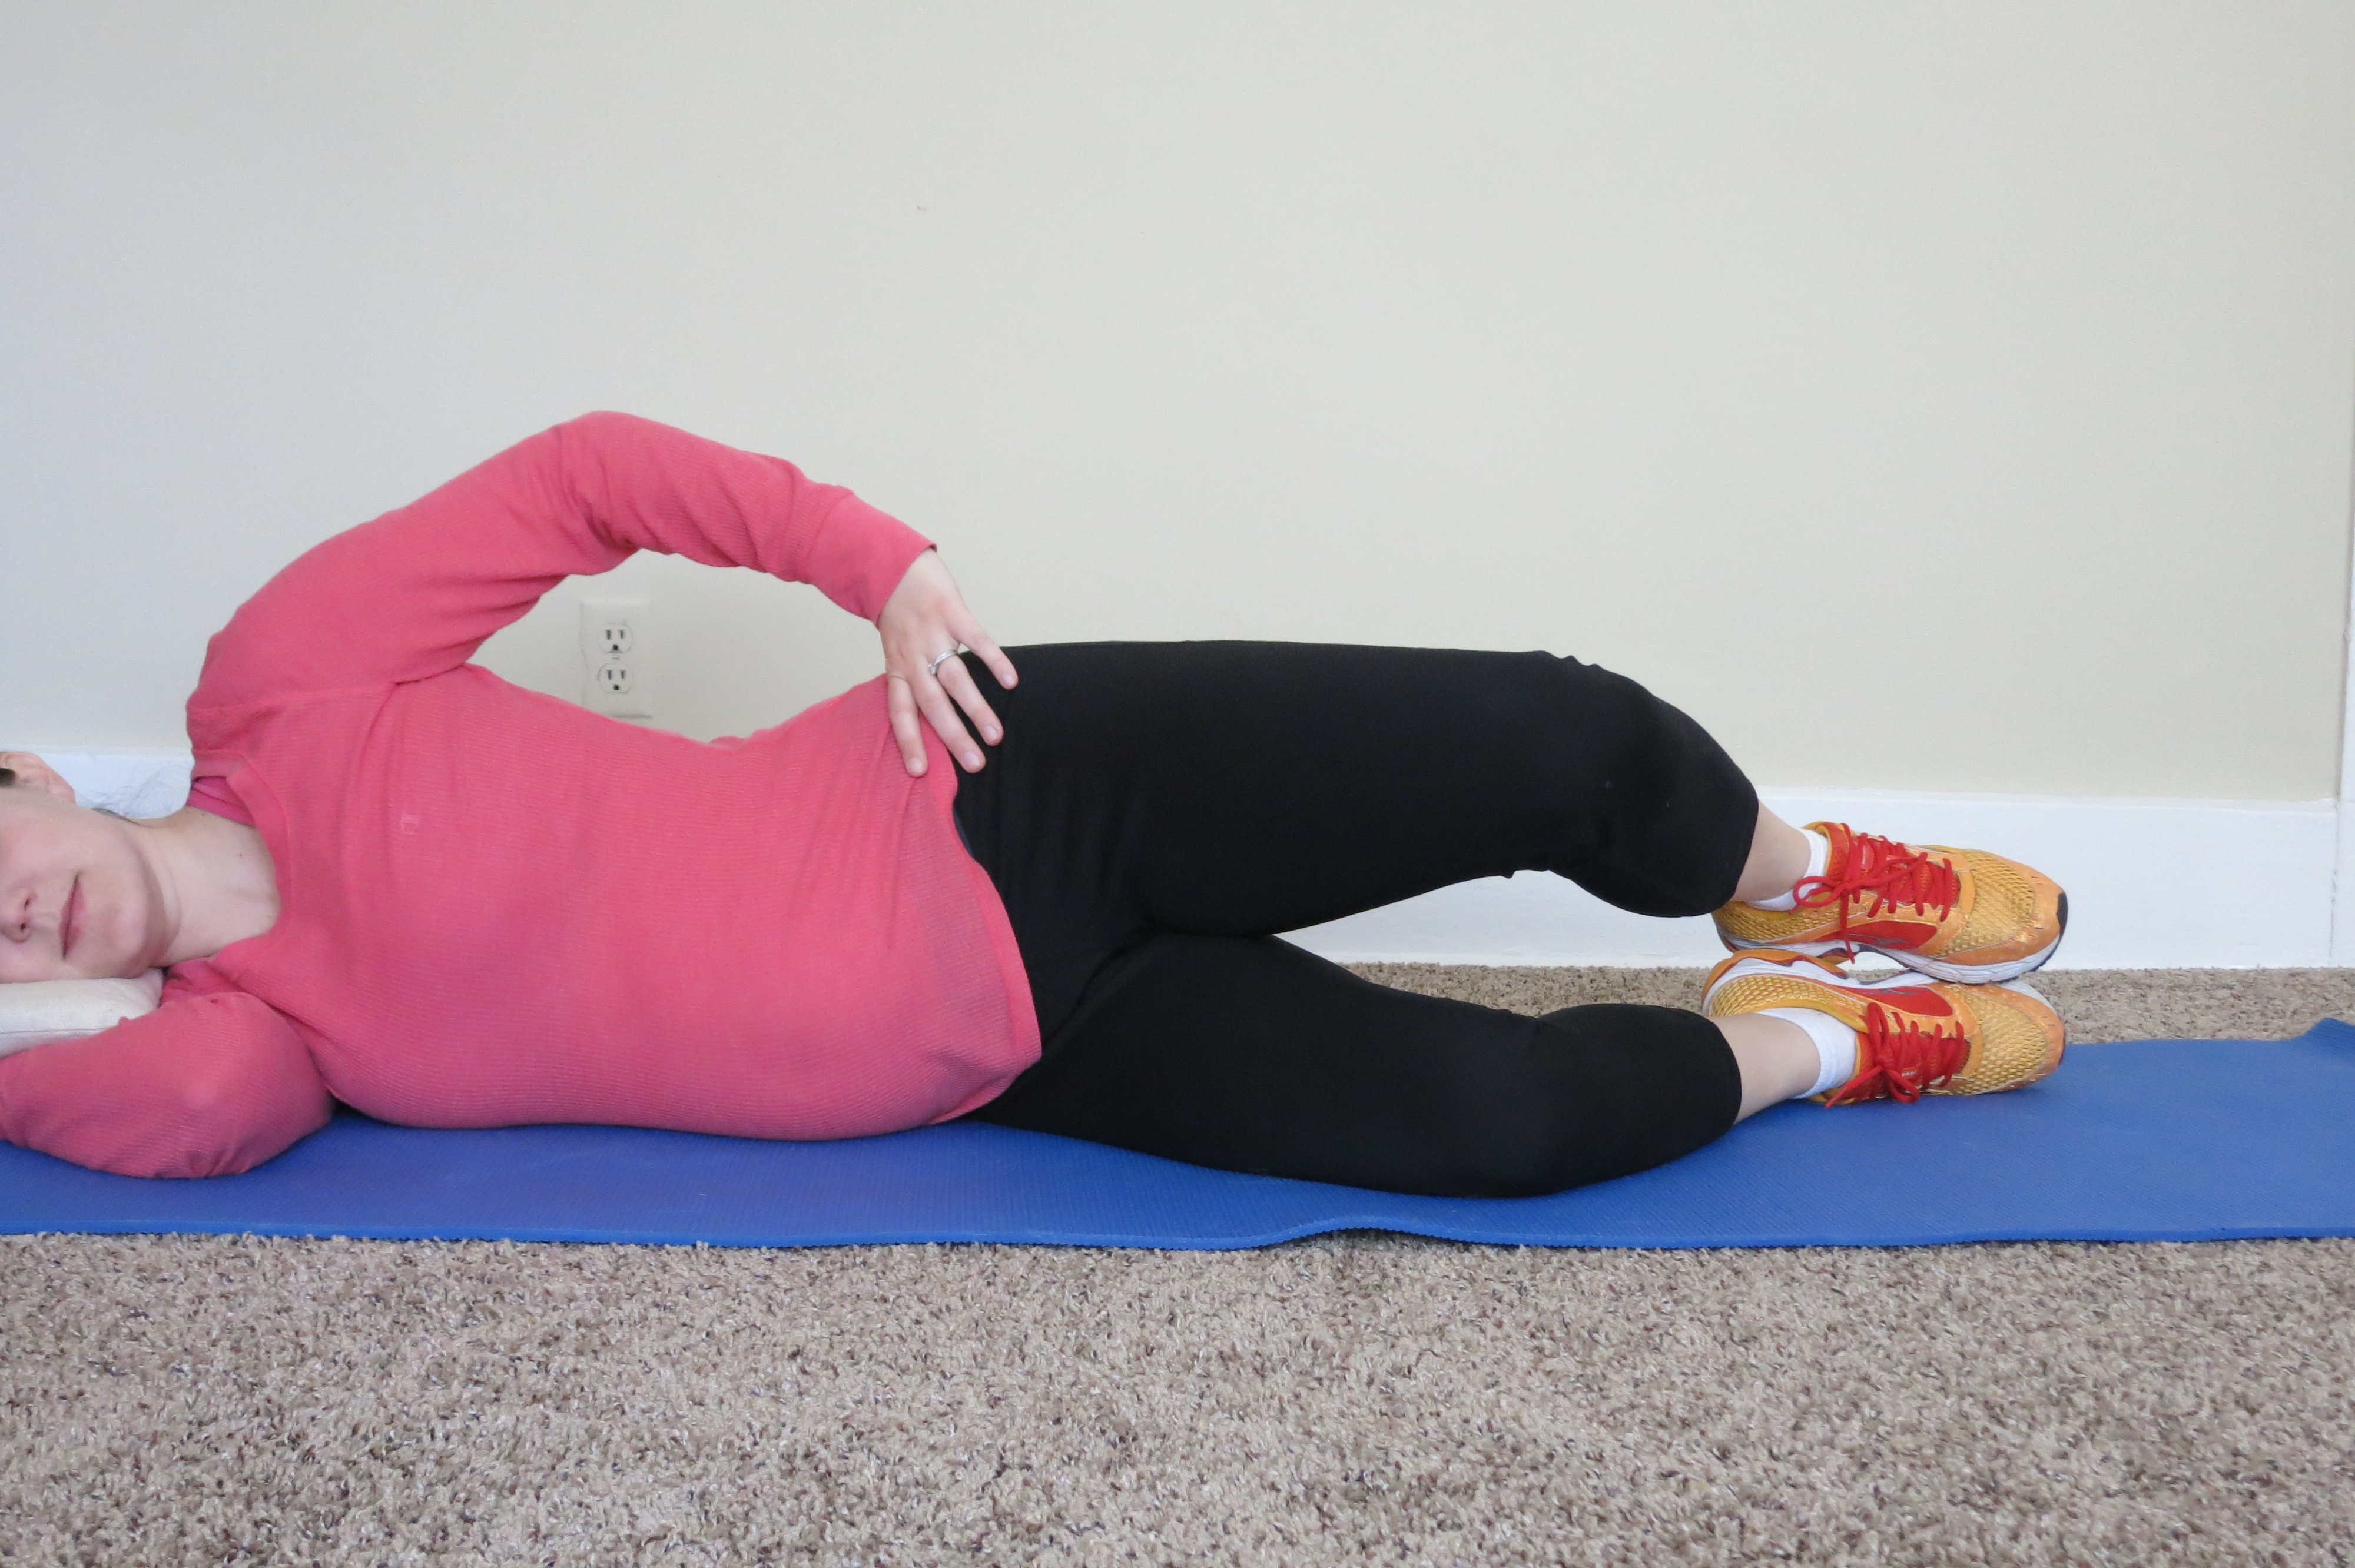
3. YOGA positions where you are pushing your stomach out (aka abdominal breathing, dead bug, to name a few), yoga positions that STRETCH the abs (cobra), or anything on your hands and knees with poor abdominal control (cat, cow, sunbird).

4. LIFTING without engaging your abdominal muscles. This includes lifting your dear little (or big) baby.

5. Did I already say don’t do sit ups? Just don’t. If you want strong abs, do this.

diastasis recti, postpartum, pregnancy, abdominals, rectus abdominis

I strongly encourage you to seek help from a physical therapist if you have a significant diastasis recti. There is nothing like having an expert treat you one on one to prevent and treat pain. I am not speaking of a personal trainer or fitness guru, although they are helpful for many things. A physical therapist is a movement system expert with a physical therapy degree (7 years of post high school education for a doctorate degree) and has been up close and personal with the rectus abdominis and line alba a la cadaver labs. TMI?! I just want to be clear that seeing a personal trainer is NOT the equivalent.

Your health insurance may help you out with the cost of physical therapy. If you don’t want to see a doctor first to get an order for physical therapy, call your local PT clinic and see if they have direct access. If you don’t know what direct access is, please read my explanation here.

Happy abdominal strengthening, ladies!

If you are interested in more pregnancy and postpartum health tips, read my previous posts!

The Do’s and Don’ts of Breastfeeding: How to prevent musculoskeletal pain

Postpartum Abdominal Strengthening

Pregnancy and Back Pain

Top 3 Exercises Every Pregnant Woman Should Do

Return to Running After Pregnancy

***The content of http://www.kayleemay.com is for informational purposes only. The information presented is not to be taken as professional medical advice, diagnosis, or treatment. If you are having pain, or seeking medical advice, talk to your health care provider. Do not delay in seeking treatment because of information you have read on http://www.kayleemay.com. Taking recommendations presented on http://www.kayleemay.com is solely at your own risk***

{Health and Body} Pregnancy and Back Pain

back pain, pregnancy

Lately I have been eating, sleeping, and dreaming pregnancy. So when I thought about what I want my readers to know about {health and body} this week, backaches during pregnancy seemed to be an appropriate topic.

Does anyone else’s husband break out into this song when you say to him, “My back aches…”?

No? Just my husband? Figures.

What is it about pregnancy that makes our backs hurt, sometimes to the point of sending shooting pain down our legs?

There are a million-ca-trillion things going on in our bodies during pregnancy that contribute to backaches.

One of the main reasons for back pain is our changing hormones. Yes, you read it right, those little buggers not only bring us into an emotional roller coaster and make us think cruel thoughts. The hormone relaxin also makes our ligaments looser, causing instability in our spine and pelvic area. Instability can lead to pain.

Weight gain, especially rapid weight gain, puts strain on our body by increasing pressure through all our joints. We are supposed to be gaining 25-35 pounds in pregnancy–sheesh! Think about how that weight can pull down on our backs, reducing the space between our vertebrae and causing compression of various nerves and blood vessels.

As pregnancy progresses, our cute bumps start to pull our backs forward leading to an extension force (as described here) The force that pulls our low backs forward also leads to pain.

Additionally we have lost our “natural back brace“, that is, our abdominals. Our abdominals are being stretched to the max, so no matter how hard we try, it’s nearly impossible to use our abdominals to support our backs during daily activities like walking, washing dishes, bending over to pick things up from the floor, and going up and down stairs.

So what’s a pregnant woman to do (besides listening to her husband’s version of Ciara ‘Got Me Good’ daily)? Refer to my previous post on the Top 3 Exercises Every Pregnant Woman Should Do. Each exercise can help relieve back pain and promote stability in our pelvic girdle and spine

back pain, pregnancy, pregnant .

***The content of www.kayleemay.com is for informational purposes only. The information presented is not to be taken as professional medical advice, diagnosis, or treatment. If you are having pain, or seeking medical advice, talk to your health care provider. Do not delay in seeking treatment because of information you have read on www.kayleemay.com. Taking recommendations presented on www.kayleemay.com is solely at your own risk***

Top 3 Exercises Every Pregnant Woman Should Do

I guess I am feeling very brave today (or something), but I am posting pictures of myself (sorry) at 23 weeks pregnant. I say sorry because I am not one of those gorgeous pregnant woman on Pinterest that look so adorable that I pin their maternity fashion mainly because I want their body. But I just couldn’t resist the opportunity to share the top 3 exercises every pregnant woman should do!

I have treated countless pregnant women in physical therapy for various aches and pains, but it took being pregnant for me to realize that even our own doctors, although eager to help us, don’t consider how exercises may ease our aches and pains. I told my doctor I had calf cramping in the middle of the night, and her quick response was “magnesium!” I told her my back was aching, and she said, “Tylenol and a heating pad!” While these are good options, stretching and gentle exercises can provide pain relief without adding another pill to our evening prenatal rituals.

Without further adieu, the top three exercises every pregnant woman should do are: 1) The Pelvic Tilt; 2) Quadruped Stabilization While Rocking Back; and 3) Hip Abduction with Lateral Rotation (“Clamshell”).

The Pelvic Tilt

Step 1: Sit or stand with good posture.
Step 2: Contract abdominals by pulling your belly button toward your spine.
Step 3: Hold 5-10 seconds. Repeat 10-20 times at least twice per day.

Purpose: Maintain and/or strengthen abdominals. Our abdominals, when strong and firm, act as a natural back brace that stabilize and support our low back. Additionally, labor will be easier if our abdominals are strong enough to help with the pushing! We all want labor to be easier, right?!

pelvic tilt, pregnancy exercise
The pelvic tilt; Step 1
pelvic tilt, pregnancy exercise
The pelvic tilt; Step 2

Quadruped Stabilization While Rocking Back

Step 1: Position yourself on your hands and knees. Make sure your hands are directly under your shoulders and your knees are directly under your hips.
Step 2: Contract your pelvic floor muscles (the ones you use to stop the flow of urine). Hold.
Step 3: Contract your abdominals by pulling your belly button toward your spine.
Step 4: Holding the contractions, rock back toward your heels while keeping your back flat.
Step 5: Hold 1-2 seconds. Repeat 10-20 times twice per day.

Purpose: This is a great position because it is non weight-bearing for the spine! This equates to relief of lower back pain by just putting ourselves in this position. Can I get an amen, sista? It is also an easier position to recruit contractions from our abdominals and pelvic floor muscles, allowing us to fully engage our stabilization system to help our low backs!

pregnancy exercise
Quadruped Stabilization While Rocking Back; Step 1-3
pregnancy exercise
Quadruped Stabilization While Rocking Back; Step 4

Hip Abduction with Lateral Rotation (“Clamshell”)

Step 1: Lay on your side with your pelvis exactly perpendicular to the floor. Knees and hips should be bent 45-90 degrees.
Step 2: Contract pelvic floor muscles and hold.
Step 3: Contract abdominals by pulling your belly button toward your spine.
Step 4: Keeping feet together, roll top knee off bottom knee. Make sure you keep the muscles in your thigh relaxed; you should be contracting your gluteal muscle to lift your thigh. Do not allow your pelvis to move.
Step 5: Hold 5-10 seconds. Repeat 10-20 times twice per day.

Purpose: This exercise engages our posterior gluteus medius (and minimus), one of the greatest muscles in our bodies that we all tend to ignore. By strengthening our “gluts”, we provide more stability around our sacroiliac joint which tends to be looser during pregnancy due to the affects of those fun things called hormones. The “Clamshell” provides us with muscular stability around our pelvis which further leads to a more stable spine.

pregnancy exercise
Hip Abduction with Lateral Rotation; Steps 1-3
pregnancy exercise
Hip Abdcution with Lateral Rotation; Steps 4-5

Good luck, ladies!

***The content of www.kayleemay.com is for informational purposes only. The information presented is not to be taken as professional medical advice, diagnosis, or treatment. If you are having pain, or seeking medical advice, talk to your health care provider. Do not delay in seeking treatment because of information you have read on www.kayleemay.com. Taking recommendations presented on www.kayleemay.com is solely at your own risk***

Improve Your Running Stride Part III: The Running Shoe

I have spent a long time looking for a running shoe that has firey blazes shooting from the back that miraculously make me run faster. My search continues to this day. I will not give up.

"Mama says they was magic shoes."
“Mama says they was magic shoes.”

In the meantime, it’s important to find a shoe that fits the shape of your own particular foot, promoting the best and most optimal relationship between your foot and the ground. A fitted shoe has the ability to lower your risk of injury.

Forresyt

Finding the right running shoe requires an understanding of foot mechanics. To simplify foot mechanics, think of two different foot movements: supination and pronation. Both of these movements are very complex and involve multiple joints, but for the purpose of this post, pronation is when the arch of the foot moves toward the floor and supination is when the arch of the foot is raised.

In a static standing position, you may have a supinated foot defined by a raised arch. This type of foot is classically more rigid.

A pronated foot has a collapsed arch and is classically more flexible.

To decide what type of shoe is best for you, the first step is to figure out if your foot is pronated, supinated, or neutral. To figure this out, I recommend having someone trace your foot while you are standing. Look at the tracing and determine if it is more pronated, supinated, or neutral. It is important that you are standing so the you are fully weight bearing.

This is an example of a pronated foot with a notable rectangular shape:

Dfoot-2

This is an example of a neutral to supinated foot with a larger curve on the inside:

K1

Ideally, the bottom of the ideal shoe should match the shape of your tracing. If your foot is pronated (or flat), the bottom of the running shoe will look more like a rectangle. If your foot it supinated, the inside of the running shoe should curve inward.

It is also very important to consider what happens to the arch of your foot when you move. Some people may stand with a very high arch, but once they walk or run, their arch collapses. If you feel as though you fit in that category, I would recommend finding a local running store that has a good reputation. They should be able to watch you run and recommend a shoe for you.

So as we wait for rocket shoes to be invented, make sure your current running shoe is the right shape for your foot–and if it’s not, be sure to invest in a new pair to prevent injuries.

***The content of www.kayleemay.com is for informational purposes only. The information presented is not to be taken as professional medical advice, diagnosis, or treatment. If you are having pain, or seeking medical advice, talk to your health care provider. Do not delay in seeking treatment because of information you have read on www.kayleemay.com. Taking recommendations presented on www.kayleemay.com is solely at your own risk***

Improve Your Running Stride Part II: The Gluteals

My favotite beach run ever!

25211_770495583588_7711246_43596226_5433885_n

In my previous post Improve Your Running Stride Part I: The IT Band, we discussed how runners typically have stiff IT bands. A stiff IT band has the potential to lead to hip pain, knee pain, foot pain, and back pain. Simply stretching the IT band will not solve the problem; rather, a runner has to change how he uses his muscles when he runs to prevent the IT band from tightening up.

As mentioned in Part I, the key to reducing the use of the IT band lies in increasing the recruitment of the gluteals during runs (a stronger booty!)

Changing your running form can be a daunting task and may require increased energy expenditure at first. But with these three basic tips, you will be using your gluteals—which are some powerful muscles—in no time.

On your next run, practice these three things:

1. Think of yourself as one of two types of runners: a runner who pulls himself forward with each step, or a runner that pushes himself forward with each step. To use your gluteals, you need to be a runner that pushes yourself forward. Give the ground a good push to get to your next step.

2. With respect to number one, make sure your foot hits the ground directly below your body as opposed to reaching ahead of your body. If your foot reaches too far forward, you will likely have to pull yourself to the next step. When you think of placing your foot directly below your body during your next run, you may feel as though you are leaning forward. Strangely enough, that’s okay. Leaning forward a little puts your gluteals in a position in which their contraction will much stronger.

3. As your leg is swinging through, but before it contacts the ground, raise your knee a little higher. Colleagues of mine commonly use the cue, “pretend you’re riding a bike down a hill and your legs are trying to keep up with the pedals.” Raising your knees up will bend the hip more, allowing the gluteals to work through a greater range of motion. Another benefit of bringing your knees higher is that it allows more time in the air and less time on the ground. Research shows that faster runners spend more time airborne than slower runners. Therefore, this little clue may get you to the finish line quicker.

Changing the way you run in even the smallest way will initially make your runs more fatiguing. I encourage you to practice these three things in two minute intervals until you feel like you are getting the hang of it. You’ll feel funny running this way at first, and you will be sore the next day. But no worries; keep practicing, and it will become second nature.

Now you can spend more time running and less time stretching your IT band.

Are you curious about which running shoes are the best for your foot? Part III will discuss how you should go about choosing a running shoe based off the shape of your foot.

100_0852

***The content of www.kayleemay.com is for informational purposes only. The information presented is not to be taken as professional medical advice, diagnosis, or treatment. If you are having pain, or seeking medical advice, talk to your health care provider. Do not delay in seeking treatment because of information you have read on www.kayleemay.com. Taking recommendations presented on www.kayleemay.com is solely at your own risk***

Improve Your Running Stride Part I: The IT band

Are you a runner? Or, in my case, are you an inconsistent light-jogger that moves at a slightly faster pace than speed walkers?

Whatever your speed is, you probably have a stiff IT band and have tried a gazillion stretches to loosen it up. Maybe you have even tried one of those foam rollers that just hurts so good. But after all that, is your IT band still “tight?”

Probably.

Maybe you aren’t sure if your IT band is stiff. In that case, I want you to ask yourself if you have any bothersome pain while running or after running, like knee pain, hip pain, back pain, or foot pain. Your IT band may be contributing to these frustrating symptoms that affect your runs.

So how can you get that annoying band to loosen up?

First, let’s discuss what the IT band is. God is clever, and He didn’t put tissue in our bodies to hang out there. It all serves a purpose.

 Image: Netter FH. Iliotibial band friction syndrome. Image Source: http://www.netterimages.com/image/iliotibial-band-friction-syndrome.htm

Image: Netter FH. Iliotibial band friction syndrome.
Image Source: http://www.netterimages.com/image/iliotibial-band-friction-syndrome.htm

IT band stands for iliotibial band. By its name, it is a band of thick fascia that connects the ilium to the tibia. The connection to the ilium, a part of your pelvis, is by way of the tensor fascia latae muscle, aka the muscle that tenses your fascia a-lotta!

When the tensor fascia latae contracts, the IT band tenses. If this happens repeatedly (a lotta!), the IT band gets tight, or as I like to describe it, short or stiff.

So the answer to the age-old question of stiff IT bands across running circles all over the world…

Image source: http://blogs.bmj.com/bjsm/category/children/

If you’re a runner whose IT band is stiff, it’s because you contract your tensor fascia latae too much.

Contract a muscle too much? Is it so? Can it be possible? Yes. It is possible to contract a muscle too much if it means you are neglecting the muscle’s counterpart, therefore altering the joint’s balance. In the case of runners and IT bands, a stiff IT band usually signals that the runner does not use his/her gluteals enough. This muscle imbalance commonly leads to pain because it alters hip and knee joint mechanics.

You may think I am going to tell you to do gluteal strengthening exercises and bippity-boppity-boo, you’re healed.

videosong

I wish it were that easy. While strengthening exercises can be useful, I am going to suggest that you change the way you run.

It is incredibly difficult to change your running form, but in my next post, I will give you 3 simple clues to think about when you’re running so you use your gluteals relatively more than you use your tensor fascia latae and IT band. With these 3 tips, you will rely less on your tensor fascia latae and IT band, therefore it won’t get so stiff! And word on the street is, these tips will help you run faster…

***The content of www.kayleemay.com is for informational purposes only. The information presented is not to be taken as professional medical advice, diagnosis, or treatment. If you are having pain, or seeking medical advice, talk to your health care provider. Do not delay in seeking treatment because of information you have read on www.kayleemay.com. Taking recommendations presented on www.kayleemay.com is solely at your own risk***